Customize receipts
On the legacy Developer Dashboard
The smart receipts feature lets you add information at the bottom of Clover paper and web receipts for the customer. This feature offers an easy way to encourage customer interaction and add value to the receipt.
NOTE
It may take up to 10 hours for smart receipt changes to sync to merchant devices.
Add smart receipts information
- Log in to the Developer Dashboard.
- From the left navigation menu, click App Settings. The App name - App Settings page appears.
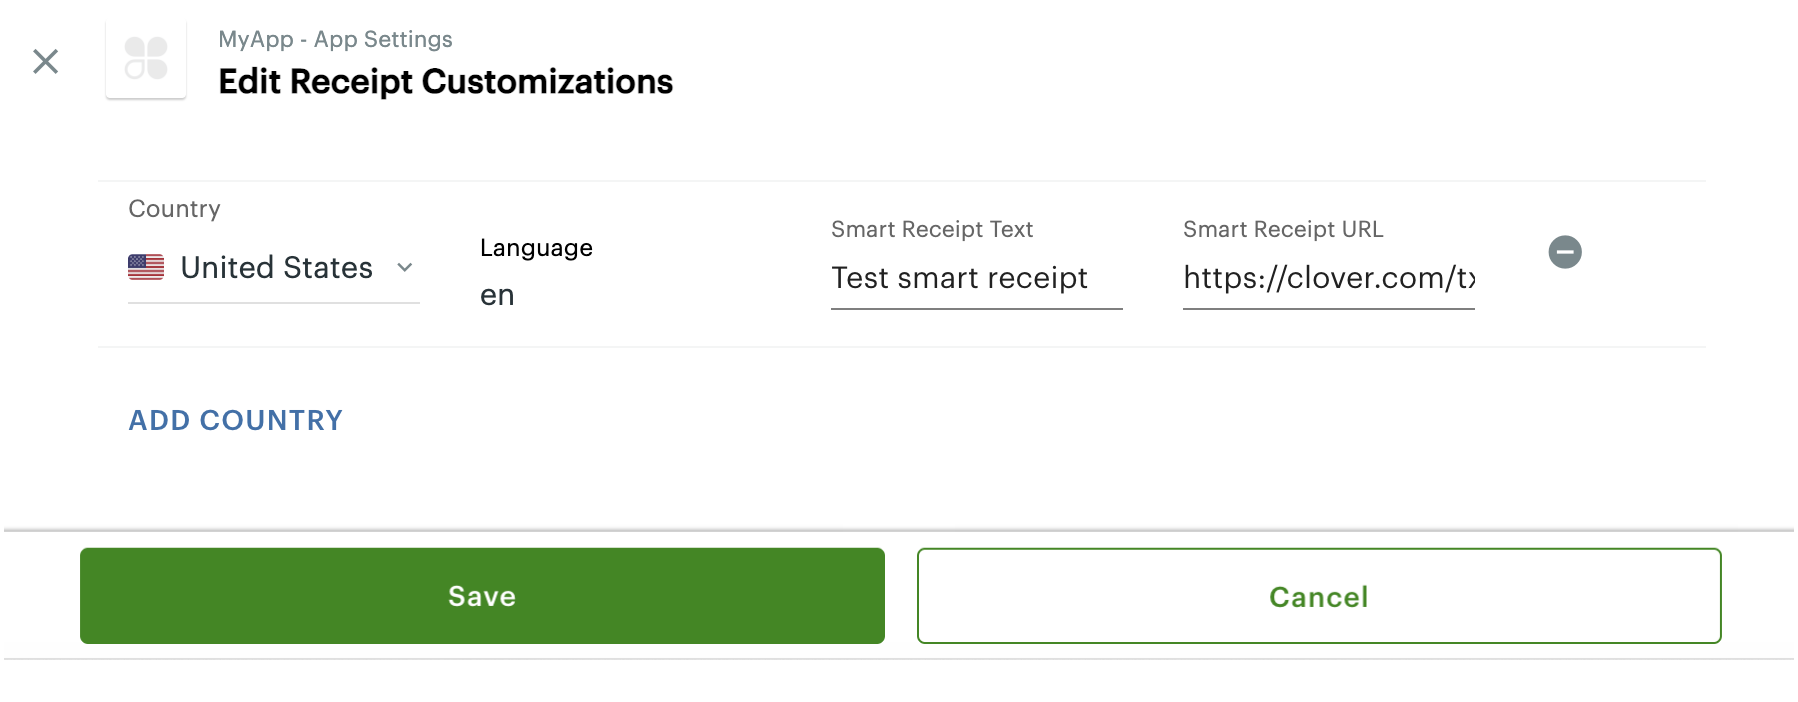
- On the App Settings page, click Receipt Customizations. The Edit Receipt Customizations page appears.
- Click Add Country. The country and language details display based on your app region.
Note: Smart Receipt Text and Smart Receipt URL fields are also displayed on the page. See Create an app. - In the Smart Receipt Text field, enter text to display at the bottom of receipts.
- In the Smart Receipt URL field, enter the URL (link) that displays QR codes on paper and web receipts. The URL can redirect to third-party websites.
- If needed, add smart receipt information for other countries where you can build and publish apps on the Clover App Market.

Edit Receipt Customizations
- Click Save. Your receipt customizations appear on the App name - App Settings page.
NOTE
URL format:
[BASE_URL]?m=[MERCHANT_ID]&o=[ORDER_ID]&p=[PAYMENT_ID]&c=p
On the smart receipt, Clover includes the following parameters in the URL you provide:
m- merchant IDo- order IDp- payment IDc- receipt context (p indicates a paper receipt, indicates an iframe in a web receipt)
Paper receipts
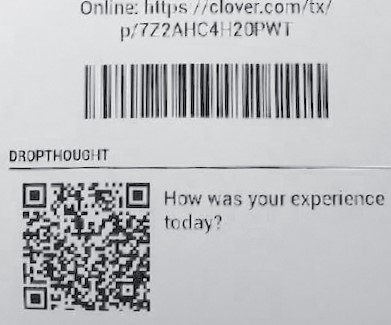
On a paper receipt, smart receipt information displays after the regular receipt content. The name of your application displays at the bottom followed by a horizontal line. If you provide a URL, it is embedded as a QR code to the left of any smart receipt text.

Receipt image
The URL format for the QR code is:
[BASE_URL]?m=[MERCHANT_ID]&o=[ORDER_ID]&p=[PAYMENT_ID]&c=p
Web receipts
On a web receipt, the name of your application displays after the receipt details. An iframe element contains the content associated with the Smart Receipt URL you provide. The URL format for the iframe is:
[BASE URL]?m=[MERCHANT_ID]&o=[ORDER_ID]&p=[PAYMENT_ID]&c=i
The iframe's alt attribute value is the smart receipt text.
NOTE
If you do not provide a URL, no smart receipt
iframedisplays on web receipts.
Updated 9 months ago
