Integrate Clover Payments plugin with Shopify Online Shop
Pay Anywhere, Sell Everywhere
Before you begin
To integrate the Clover Payments plugin with a Clover merchant's Shopify Online Shop, note the following:
- Clover merchants—The free Clover Payments plugin is available for Clover merchants. On the Clover Merchant Dashboard, a merchant:
- Can have multiple merchantIds but can associate only one merchantId with one or more Shopify Online Shops.
- Can only create a Shopify Online Shop for a specific country and its currency.
The merchant's Clover account agreement determines the charges for transactions. Shopify does not support surcharging; hence, only Clover merchants who do not support surcharging can connect with a Shopify Online Shop.
- Card networks—Merchants with Shopify Online Shops must select the same card networks on Shopify to ensure a seamless payment transaction process. In case of any changes, Clover communicates the card network settings and updates to Shopify to apply the same settings.
- Best practices—Review the best practices and recommendations and for additional information, see the introductory topic: Clover Payments plugin for Shopify Online Shop.
Prerequisites
- Clover merchant account with the Owner role and a Clover
merchantId.
Note: Surcharge-enabled merchantId cannot be connected to a Shopify Online Shop. - Shopify Online Shop for the Clover merchant.
1. Install the Clover Payments plugin
- Log in to your Shopify Online Store account.
- Click Settings > Payments. The Payments page appears. On this page, you can add different payment providers and methods.
Note: Click test payment provider to use the Bogus Gateway to test a payment provider. - In the Payment providers section, click Choose a provider.

Shopify Online Shop: Payments > Choose a provider
The Third-party payment providers page appears.
- Enter Clover in the Filter third-party payment field and click the search icon. Clover Payments displays in the search results.
- Click Clover Payments and then click Install. The Install app page appears.
- Review or add information as needed.
- Click Install. The Clover Payments plugin page appears.
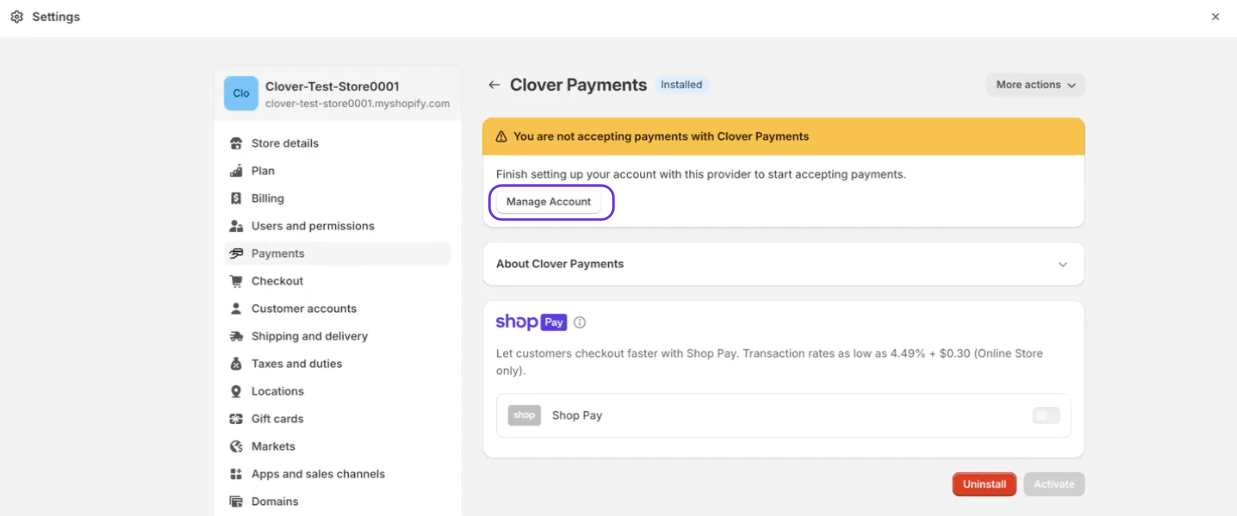
- Click Manage Account.

Clover Payments: Manage Account
The Clover Merchant Log In page appears.
- Log in to your Merchant Dashboard and complete the steps to Connect the Clover Payments plugin with a merchant.
2. Connect the Clover Payments plugin with a merchant
On the Clover Merchant Dashboard, select the merchant to integrate the Clover Payments plugin with the Shopify Online Shop.
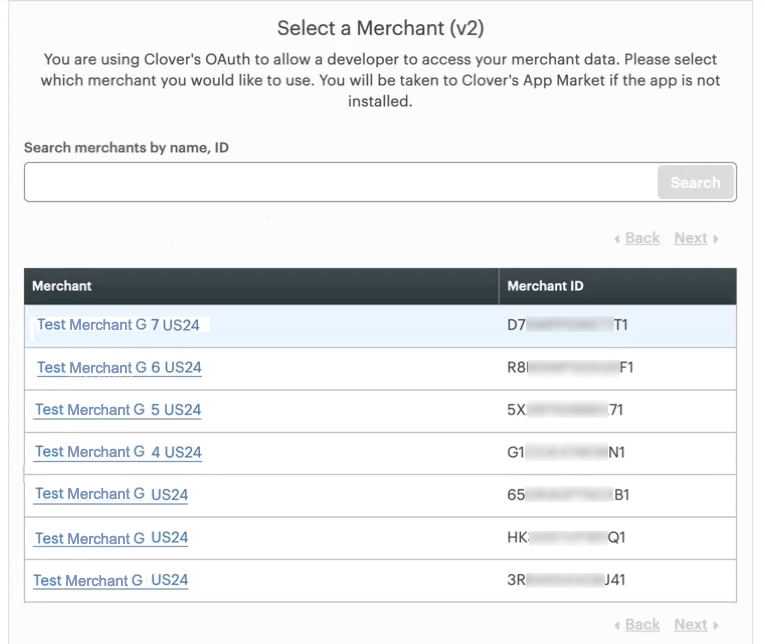
- Log in to the Clover Merchant Dashboard. The Select a Merchant page appears.

Clover Merchant Dashboard: Select a Merchant page
- From the Merchant column, click a merchant.
-
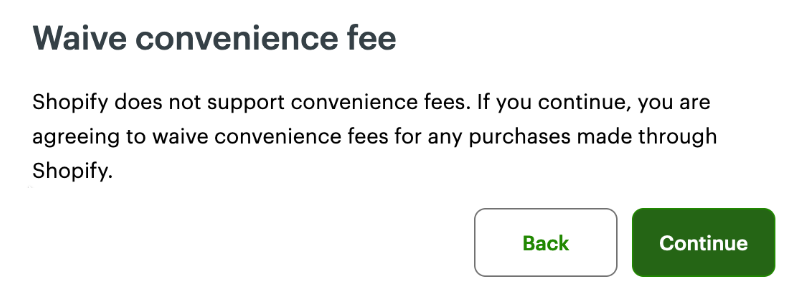
If the merchant does not charge a convenience fee, the Waive convenience fee page appears. Review the information and click Continue. The Review payment tenders are accepted by <store name> page appears.

Clover Merchant Dashboard: Waive convenience fee
-
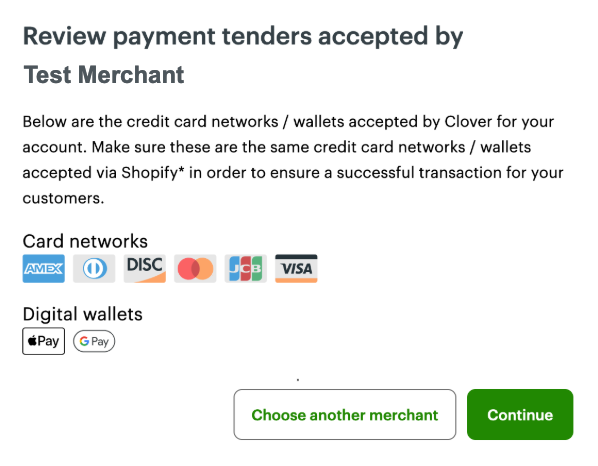
If the merchant charges a convenience fee, the Review payment tenders are accepted by <store name> page appears.

Clover Merchant Dashboard: Review payment tenders
The page displays all the card network brands and digital wallets associated with the merchant ID during their onboarding. Merchants with Shopify Online Shops must select the same payment tenders on Shopify to ensure a seamless payment transaction process.
- Review the card networks and digital wallet information, and click Continue. The Shopify Online Shop Dashboard appears.
Note: To integrate the Clover Payments plugin with the Shopify Online Shop of another business, click Choose your business. Search for and select another merchant on the Select a Merchant page.
Updated 12 months ago
