(MSC Pilot) Set up and test your app for service charges
Get out in front of the change! Set up and test your app to manage multiple service charges (MSC) during the pilot.
In the initial release, the multiple service charges (MSC) feature is available to a limited set of merchants. During the migration period, your app must support both MSC and legacy service charges. Use the steps in this topic to verify that your app can support both MSC and legacy service charges endpoints.
Prerequisites
- Your existing sandbox developer account must have an app that uses legacy service charges and is similar to your production app.
- You must have a test merchant without the MSC feature enabled.
1. Setup for MSC
To test how multiple service charges functionality works in your app, complete the setup steps:
- Create a new test merchant for your existing sandbox developer account.
- Email the following information to [email protected].
- Sandbox Developer ID
- Sandbox App ID you will use to test the MSC new features
- Sandbox Merchant ID (
merchantId) of the new test merchant you created to test the MSC features
Clover uses this information to activate the MSC feature for your test merchant account.
2. Test MSC features for your test merchant
In your sandbox new test merchant account, complete the following:
- Create up to three service charges for testing; use one of the following procedures:
- Create a service charge on the test Merchant Dashboard
- Create a service charge in the Setup app on a Clover device
- Check the multiple service charge (MSC) endpoints for data.
- Open an order and apply the service charges to the order.
2.1 Create a service charge on the test Merchant Dashboard
-
Log in to the Developer Dashboard.
-
On the test Merchant Dashboard, click Account & Setup. The Account & Setup page appears.
-
Under Business Operations, click Additional Charges. The Additional Charges page appears.
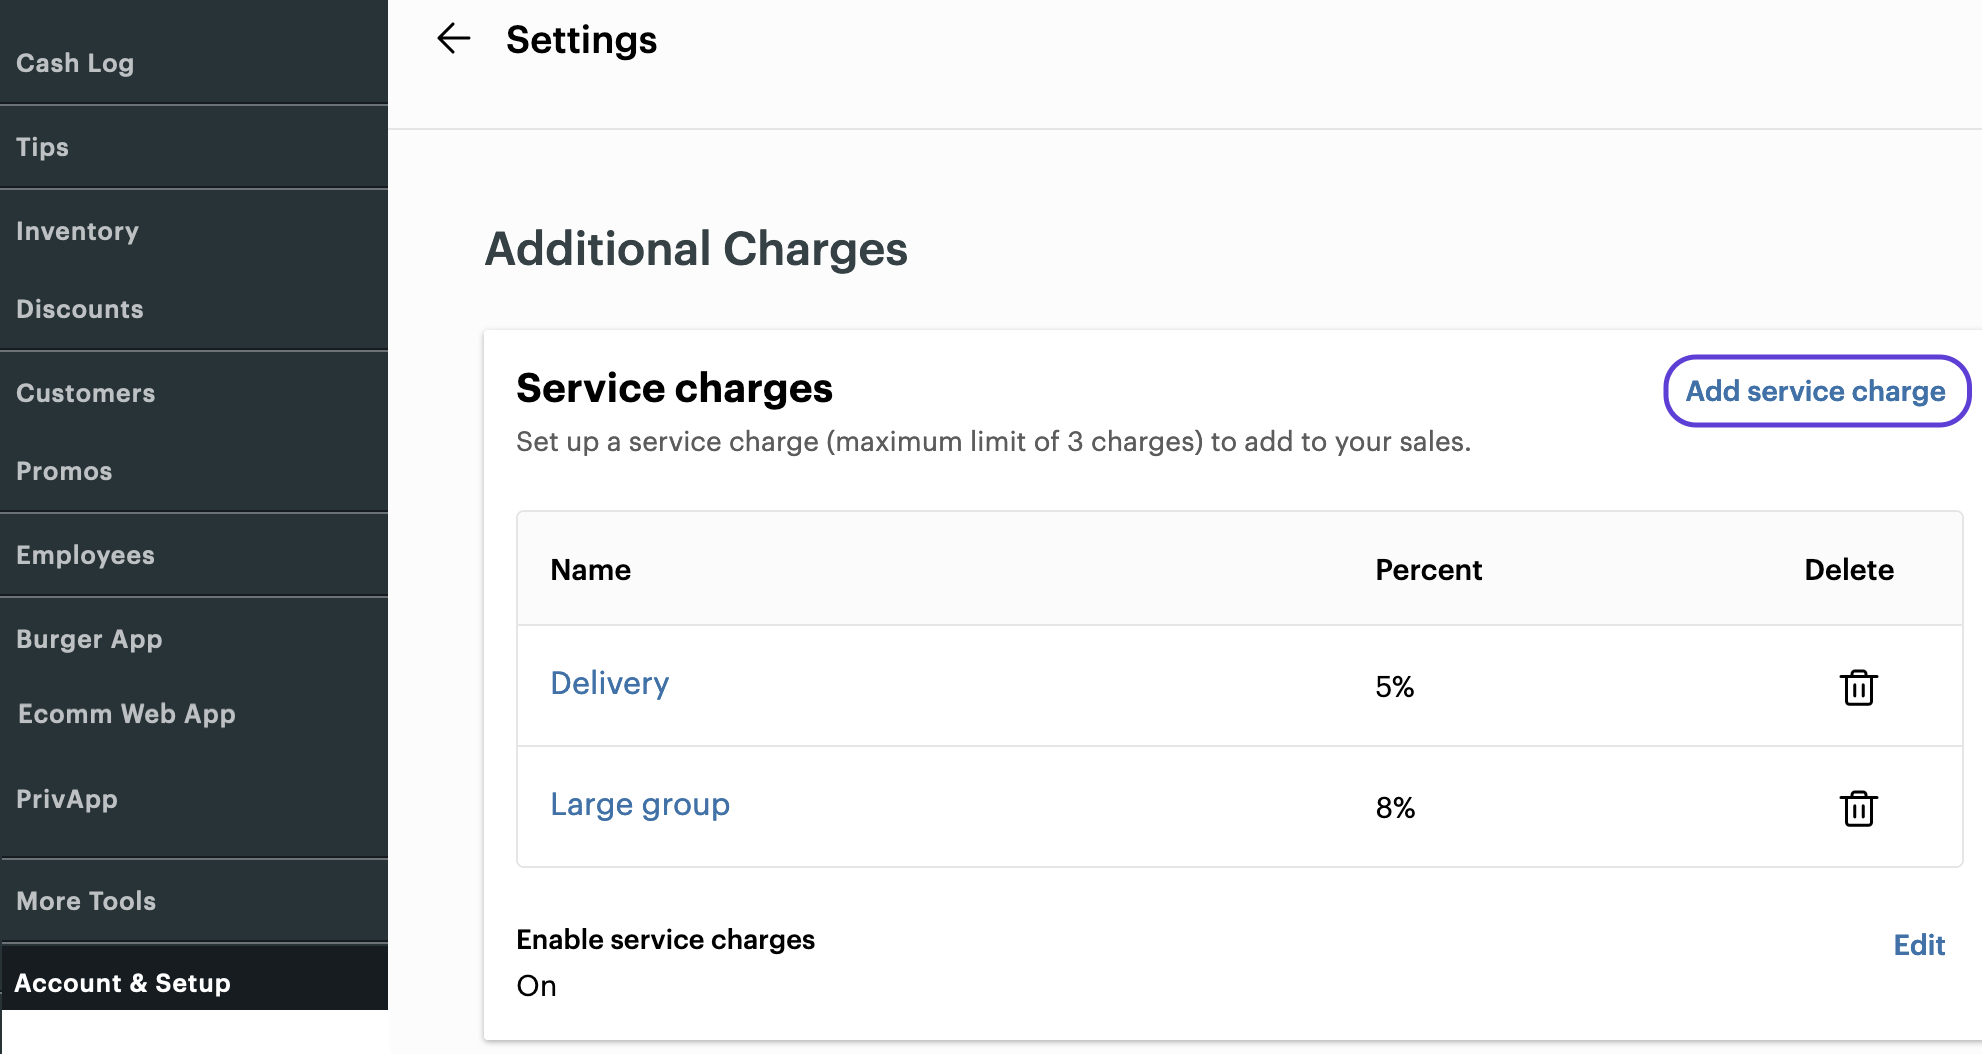
Test Merchant Dashboard—Additional charges page
-
Click Add service charge. The Add service charge pop-up appears.
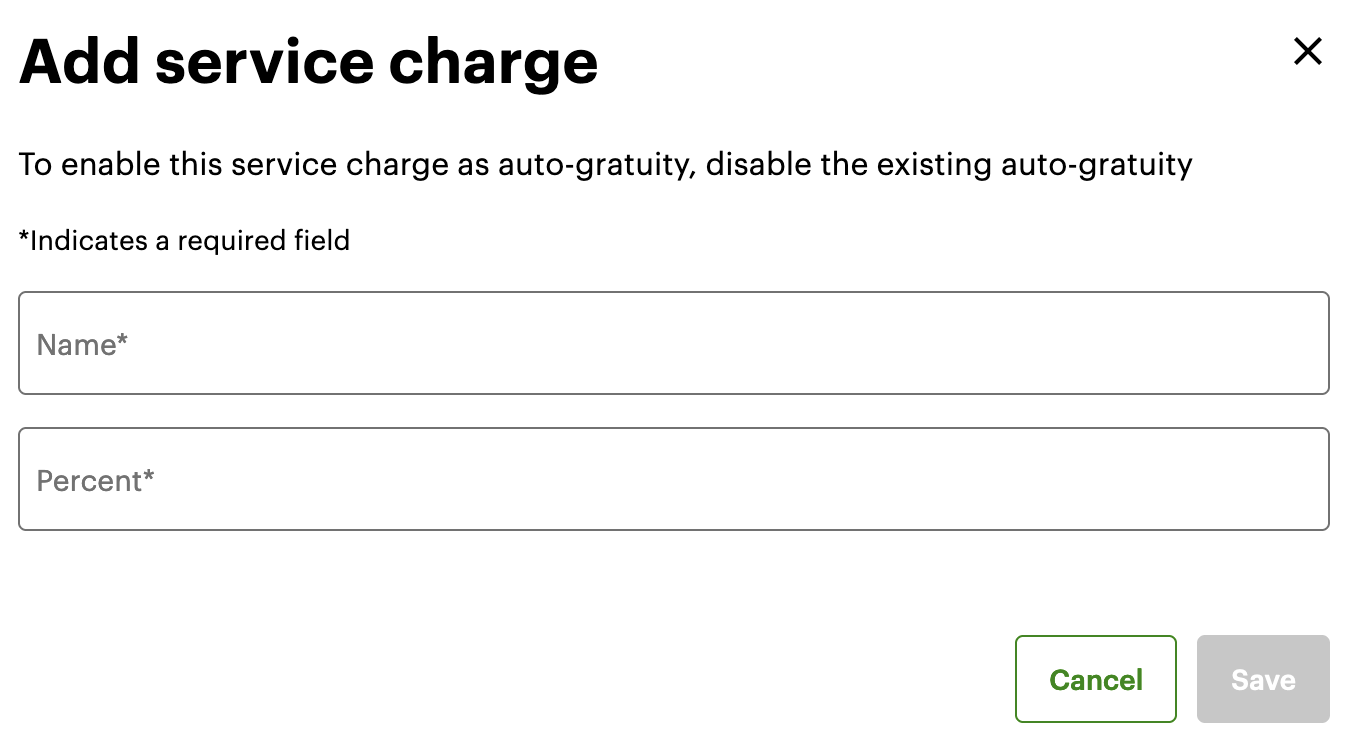
Test Merchant Dashboard—Add service charge pop-up
-
Enter the service charge name and amount.
-
Click Save. The service charge list displays the added service charge.
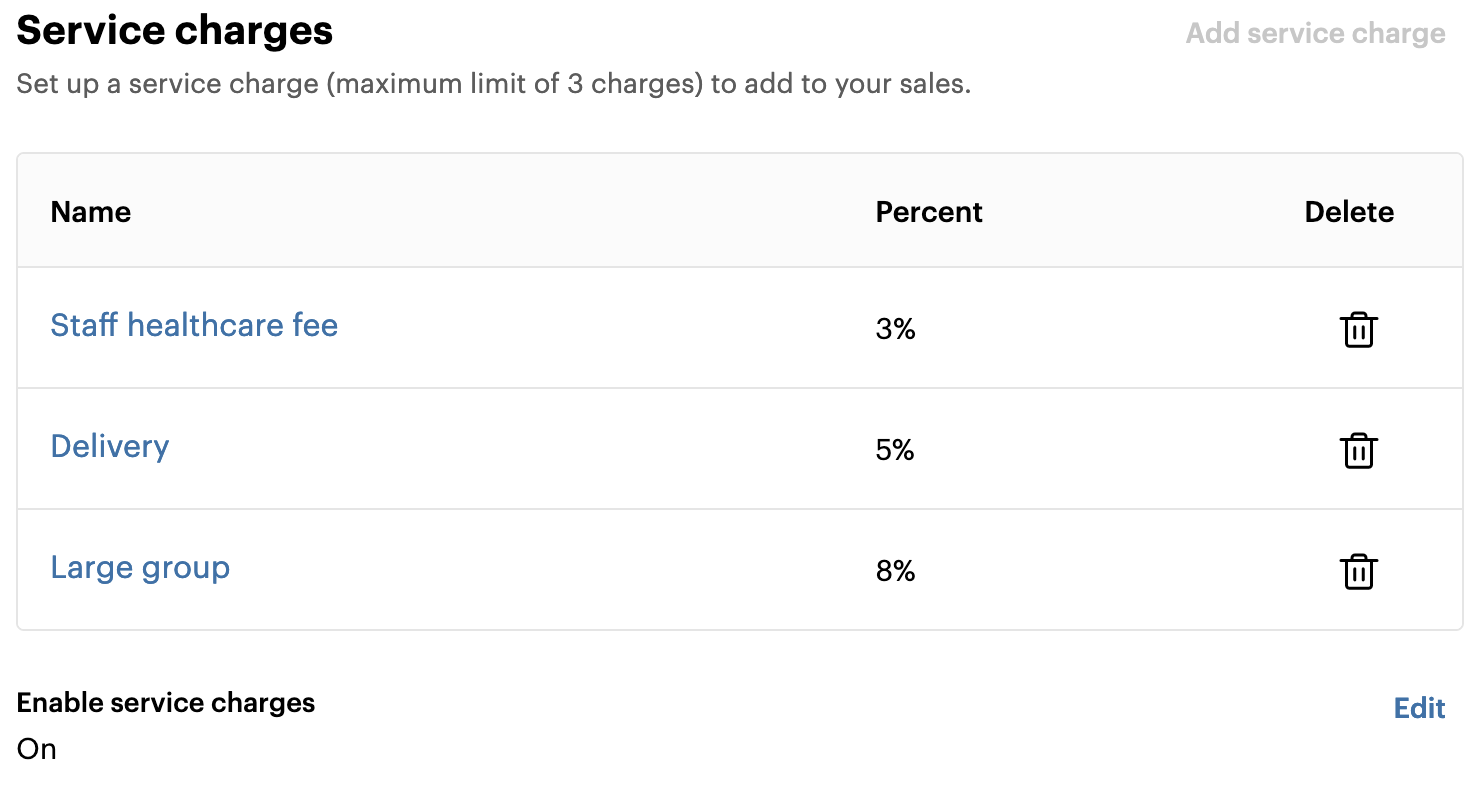
Test Merchant Dashboard—Service charge added
2.2 Create a service charge in the Setup app on a Clover device
-
On the Clover device, tap the Setup app.
-
Tap Additional Charges. The Service charges window appears.
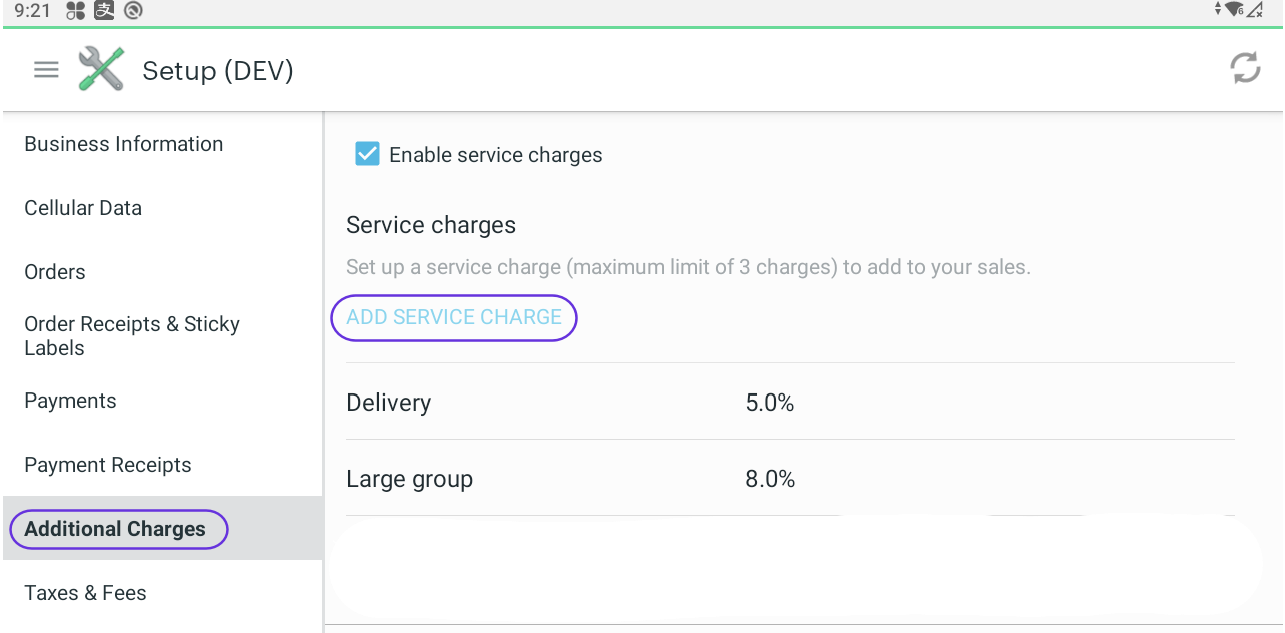
Clover device Setup app—Add a service charge
-
Tap Add Service Charge. The Add service charge window appears.


Clover device Setup app—Add service charge details
-
Enter the service charge name and amount.
-
Tap Save. The service charge list displays the added service charge.
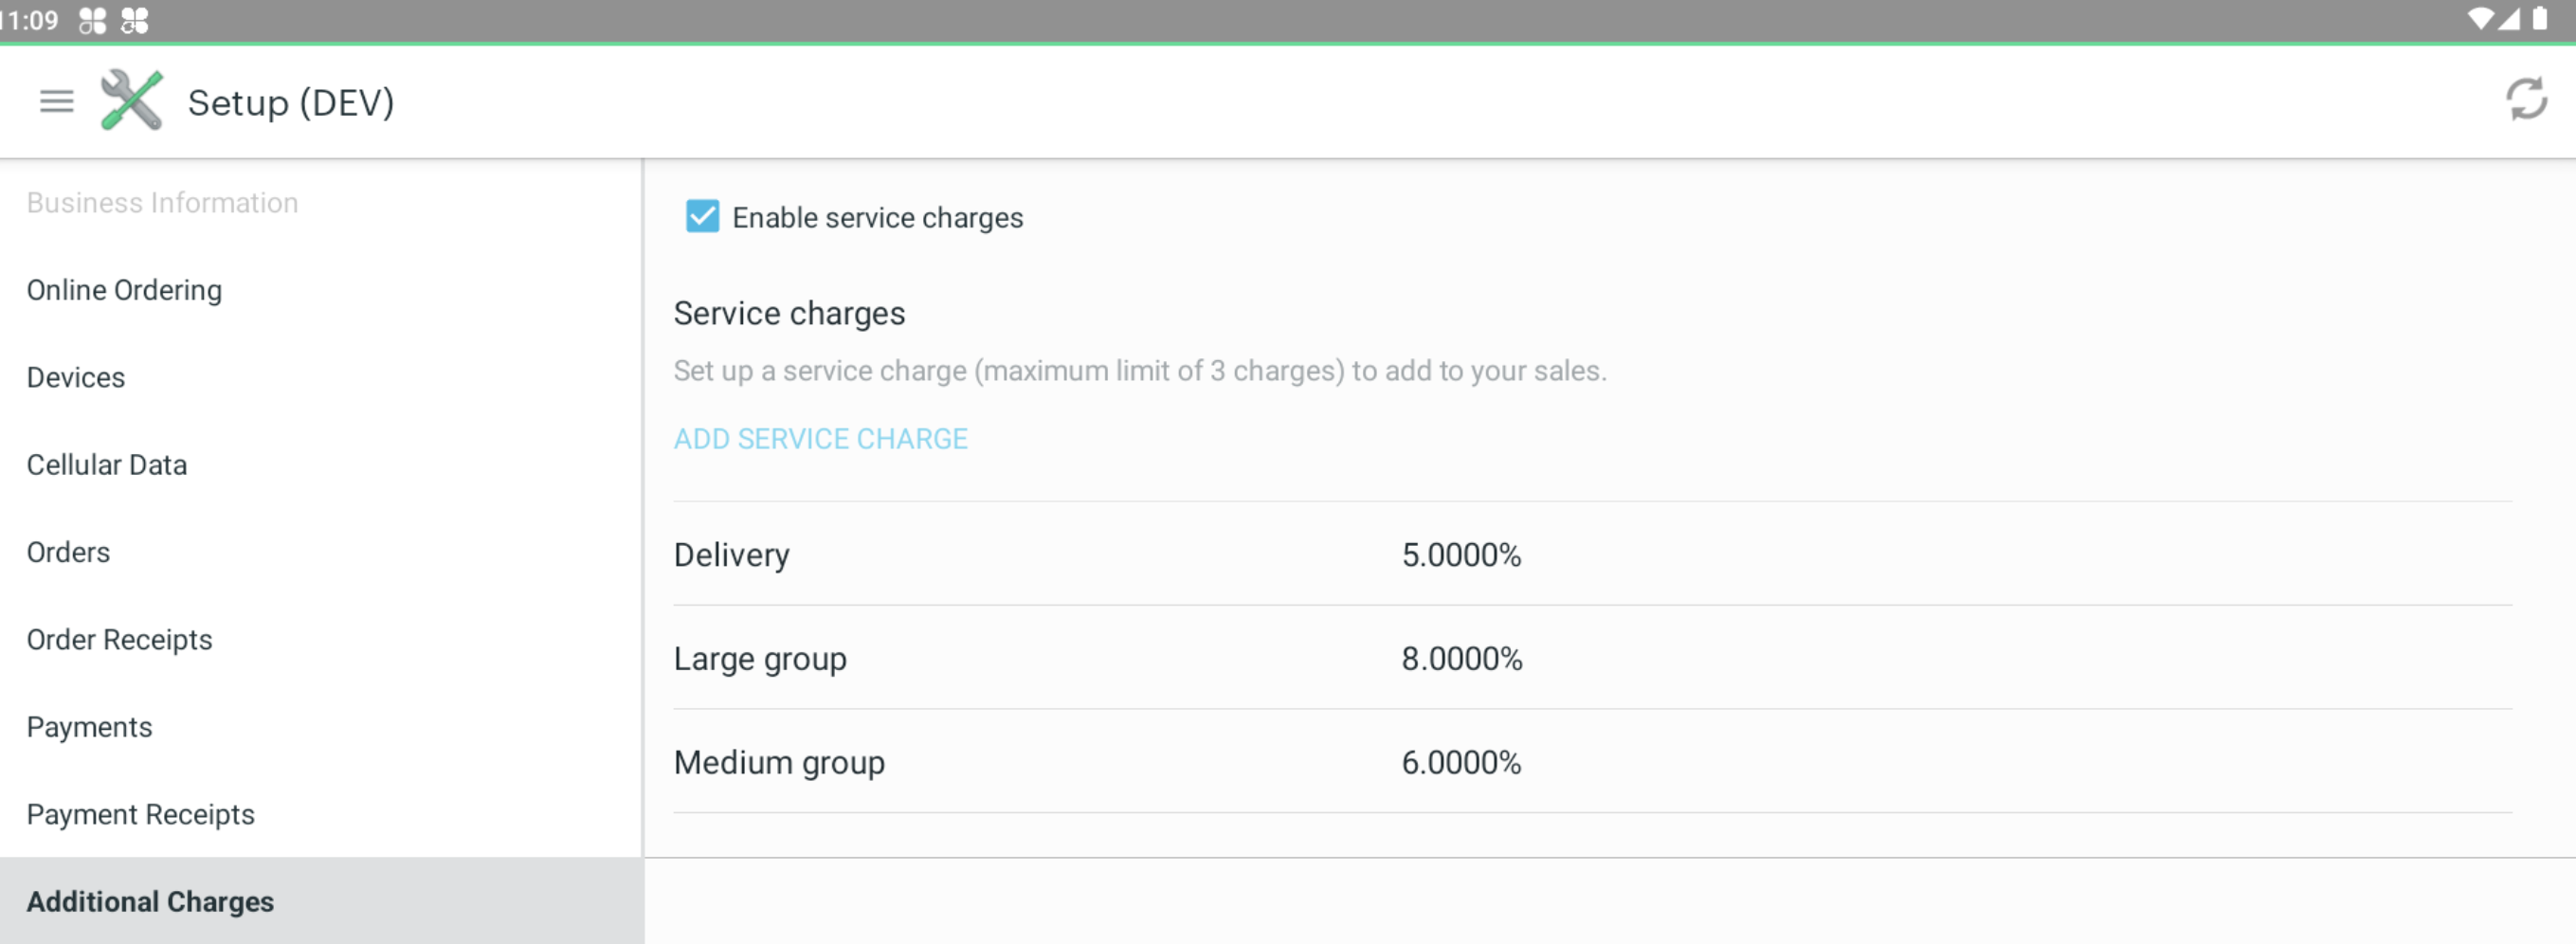
Clover device Setup app—List of service charges
2.3 Check the multiple service charges endpoints for data
Request returns multiple services charges data: If a request to the MSC endpoint returns a response, it indicates that the MSC feature is activated for your test merchant.
- Send a request to the Get service charges associated with a merchant endpoint.
- Use the data returned in the response from the endpoint to apply service charges to an order.
Important! Use data returned from the MSC endpoints. Do not access the legacy service charges endpoint, as it will have redundant data.
Request does not return data: If a request to the MSC endpoint does not return data, it indicates one of the following:
- MSC feature is not activated for the test merchant.
- Your app has not been updated to use the MSC endpoints.
In this case, continue to use the legacy endpoint for service charges. See Get default service charge for a merchant.
2.4 Apply service charges to an order
As a test merchant, apply and save service charges to an order on the Clover device.
-
On the Clover device, tap the menu icon, then tap Add Service Charges.
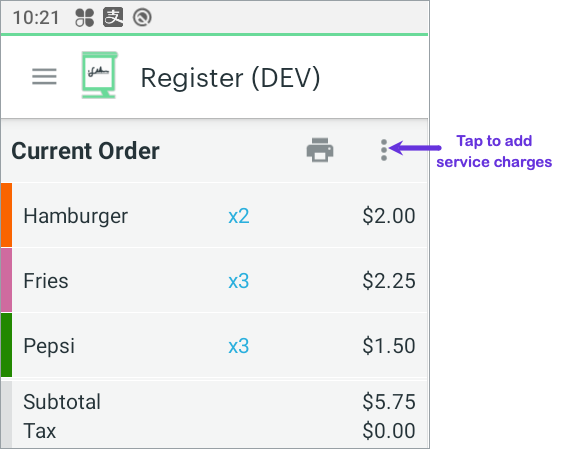
Clover device—Add service charges pop-up
-
Select the checkboxes of the service charges you want to add and then click Save.
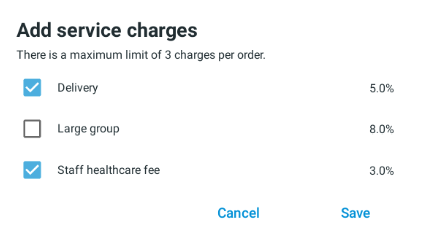
Clover device—Select service charge to add
The service charge is added under the subtotal section on the order.
Updated about 1 year ago
