Add Apple Pay button to the Clover iframe
Your merchants can accept payments through Apple Pay® using the Clover iframe integrations on their ecommerce websites.
Prerequisites
- Validate merchant ecommerce website domain—Only Clover merchants with a validated ecommerce website domain and subdomain can use the Apple Pay button. For more information, see:
- Check supported browsers and devices—Apple Pay services are available on:
- Supported browsers (Safari version 17.5 or above)
- Apple Pay (v3) supported devices
Before you begin
Review and follow the guidelines, terms, and conditions:
- Follow the Acceptable Use Guidelines for Apple Pay on the Web for Apple Pay assets and button designs.
- Agree to the Apple Payments Inc. Terms & Conditions to use Apple Pay integrations.
Add button for Apple Pay transactions
- On the Clover iframe, use the
paymentRequestButtonelement to add a button for Apple Pay transactions.
Note: When creating a newpaymentRequestButtonthe paymentamount(in cents) is required. - Use specific size properties for the Apple Pay payment button:
- display: inline-block;
- background-size: 100% 60%;
- background-repeat: no-repeat;
- background-position: 50% 50%;
- border-radius: 5px;
- padding: 0px;
- box-sizing: border-box;
- Default width:
300px (min-width: 200px;) - Default height:
40px (min-height: 32px;)(max-height: 64px;) - Values for
max-widthandmax-heightare set by the width and height of the<div>container you use for mounting thepaymentRequestButton (<div id="payment-request-button"></div>).
- Use a wrapper for the custom view.
// Sample payment amount
const applePayRequest = clover.createApplePaymentRequest({amount: 1290, countryCode: 'CA', currencyCode: 'USD'});

//By default USD and US, amounts should be sent in cents.
// Example:

const applePayRequest = clover.createApplePaymentRequest({amount: 1290});

//Example of response:
{
"countryCode":"US",
"currencyCode":"USD",
"merchantCapabilities":["supports3DS","supportsEMV"],
"supportedNetworks":["visa","masterCard","amex","discover"],
"total":{
"label":"Amount to be   charged", "type":"final",
"amount":"12.90"
},
"requiredShippingContactFields":["email"],
"requiredBillingContactFields":["postalAddress","name"]
}

// Create paymentRequestButton & mount to <div> container
const paymentRequestAppleButton = elements.create('PAYMENT_REQUEST_BUTTON_APPLE_PAY', {
    applePaymentRequest: applePayRequest, sessionIdentifier: '{clover merchant uuid/clover app uuid}'
  });
Note: If merchants register their domains in the Merchant Dashboard, they are required to pass merchant uuid. Also, if developers register their domains through the developer_app settings on the Developer Dashboard, they are required to pass developer_app uuid.

  paymentRequestAppleButton.mount('#{apple-div}');

Note://#{apple-div} is an element ID where a button will be mounted

//Use the following method if you update the amount during the session:
clover.updateApplePaymentRequest({amount: 2400, countryCode: 'US', currencyCode: 'USD'})

Note: Pass the same country and currency codes that are used during the initial request creation.
Tip: The ApplePay button provides an encrypted Clover payment token. When the token is received, a charge or pay session is initiated separately.
When you click the Apple Pay button, a new window displays for the Apple Pay transaction flow. The button size is rendered based on the width and height of the #payment-request-button element.
Configure webhooks
You need to receive and respond to the following webhook notifications:
- Add an Event Listener for Payment Method—Before creating a payment session, set up an event listener for the
paymentMethodevent on the window object. This lets you get the token details when the event occurs.
Use the following sample to update the status:
window.addEventListener('paymentMethod', (event) => {
const { tokenRecieved, customerEmail, status } =  event?.detail;
/*
    The Structure of the tokenRecieved Object ::
    tokenRecieved?.id :: clover_token
    tokenRecieved?.wallet?.address_line1 :: Customer's address Line 1
    tokenRecieved?.wallet?.address_line2 :: Customer's address Line 2
    tokenRecieved?.wallet?.address_city :: Customer City
    tokenRecieved?.wallet?.address_state :: Customer's State
    tokenRecieved?.wallet?.address_zip :: Customer's Zip
    tokenRecieved?.wallet?.address_country :: Customer's Country
    tokenRecieved?.wallet?.exp_month :: Customer's Card expiry month
    tokenRecieved?.wallet?.exp_year : Customer's Card expiry year
    tokenRecieved?.wallet?.last4  :: Customer's Card last 4
    tokenRecieved?.wallet?.first6 :: Customer's Card first 6
*/
});
Note: The Apple Pay session lasts for 30 seconds. Therefore, complete the charge process and SDK status update (Success or Fail) within 30 seconds.
- Update Apple Pay Session Status—After the transaction is complete, whether it succeeds or fails, update the Apple Pay session status.
Use the following sample to update the status:
// if the transaction is a successful transaction, update the apple session object by executing
clover.updateApplePaymentStatus('success')
//else
clover.updateApplePaymentStatus('failed')
Note: If a customer cancels an active Apple Pay transaction session while the payment is in progress or if the session times out, initiate a void for the payment.
Sample: Use the following sample to update the status:
window.addEventListener('paymentMethodEnd', (event) => {
  const { eventMessage, status } = event?.detail
  if (status === 'session_cancelled') {
    //void the payment if it was executed or initiated
  }
});
Apple Pay button
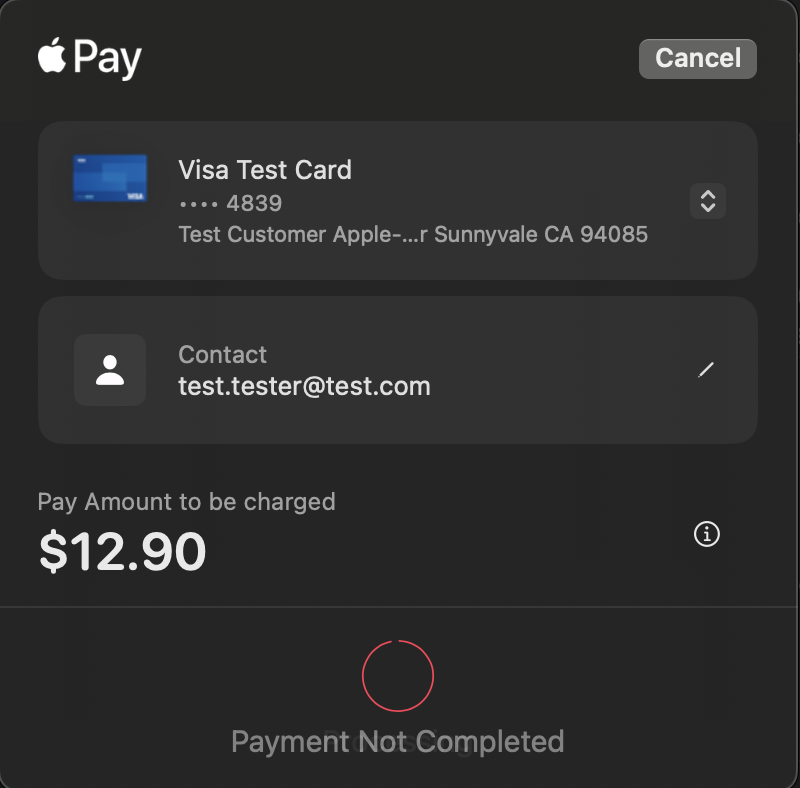
Apple Pay payment button with credit card
Updated about 1 month ago