Use Android Debug Bridge over USB or Wi-Fi
North America
Europe
Latin America
You can use your Clover Dev Kit in the sandbox environment to run published apps and allow non-root connections with the Android Debug Bridge (ADB). To use adb commands:
- Install and properly configure ADB on your computer.
- Connect the device either with your computer through USB or over a WiFi network.
Note: You cannot connect or debug Clover Station in the sandbox environment over USB. To use ADB with a sandbox Clover Station, connect through Wi-Fi. Clover Station TCP/IP port is set to 5555.
Enable Android Debug Bridge
- Open the
adb_usb.inifile in a text editor.
- On operating system X, this file is located at
~/.android/. - On Windows, this file is located at
C:\Users\[username]\.android.
- Add a new line with the value
0x28f3. Theadb_usb.inifile sample:
# ANDROID 3RD PARTY USB VENDOR ID LIST -- DO NOT EDIT.
# USE 'android update adb' TO GENERATE.
# 1 USB VENDOR ID PER LINE.
0x28f3 #clover vendor id
- Save and close the file.
Use Android Debug Bridge over USB
You can use ADB to access your Dev Kit directly using a micro USB/USB A-to-B cable. To connect your computer and the Dev Kit:
- Connect the micro USB A end of the cable to your computer.
- Connect the other end of the cable to your Dev Kit as follows:
| Dev Kit | Description | Image |
|---|---|---|
| Station Solo | Connect the micro USB cable to the hub under the merchant device. |
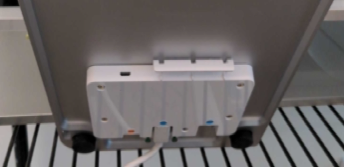
Station Solo micro USB cable |
| Station Duo | Connect the micro USB cable to the hub under the merchant device. |
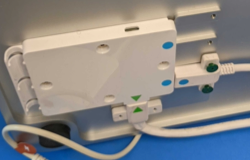
Station Duo micro USB cable |
| Mini |
Use a standard micro USB A-to-B cable to the hub. Cable sources: ShowMeCables, Monoprice, StarTech. |

Mini micro USB A-to-B cable |
| Flex 3 |
Connect a standard micro USB A-to-B cable to the hub. Watch video: How to set up the Flex 3 Developer Kit. Note: Flex 3 uses proprietary signals over the USB-C port when connecting to the hub. ADB works in a single orientation. Rotate the USB-C end of the hub so that the flat part of the green screws faces down. Cable sources: ShowMeCables, Monoprice, StarTech. |
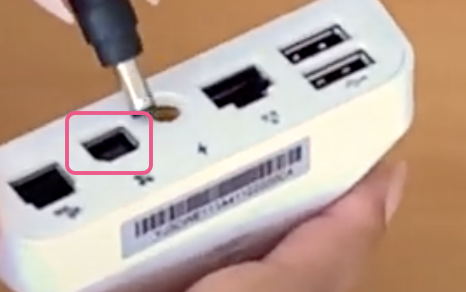
Flex 3 micro USB A-to-B cable |
| Flex |
Connect the micro USB A-to-B cable to the hub under the merchant device. Cable sources: ShowMeCables, Monoprice, StarTech. |
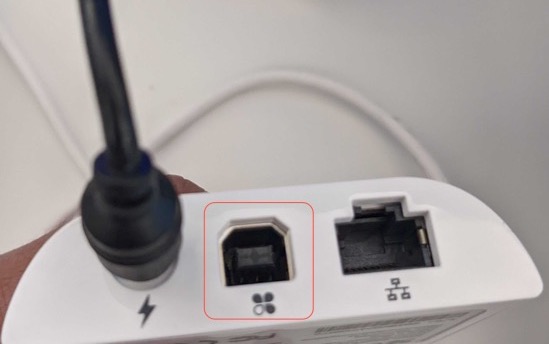
Flex micro USB A-to-B cable |
| Station 2018 |
Use a standard USB-to-micro-USB cable to connect to the debugging port. Watch video: How to plug in a micro-USB debug cable in Sandbox Station 2018. |
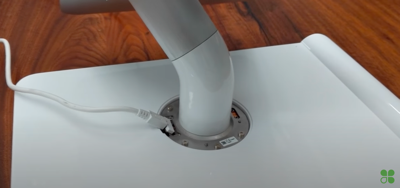
Station 2018 micro USB cable |
| Mobile | Connect the micro USB cable to the port at the bottom of the handle. This is the same port used to connect the Dev Kit to the USB wall charger. |
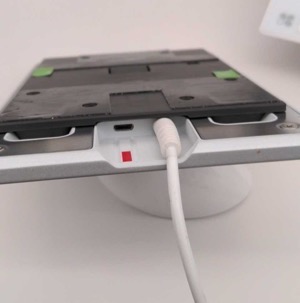
Mobile micro USB cable |
