Manage app settings
On the legacy Developer Dashboard
You can use the following information to set up a new app or edit the settings of an existing app.
Access settings for your app
- Log in to the Developer Dashboard.
- From the left navigation menu, click Your Apps > App name > App Settings. The App name - App Settings page lets you view and configure settings and permissions that your app requires to access Clover merchant data.
- On the App Settings page, review or edit information in the fields.
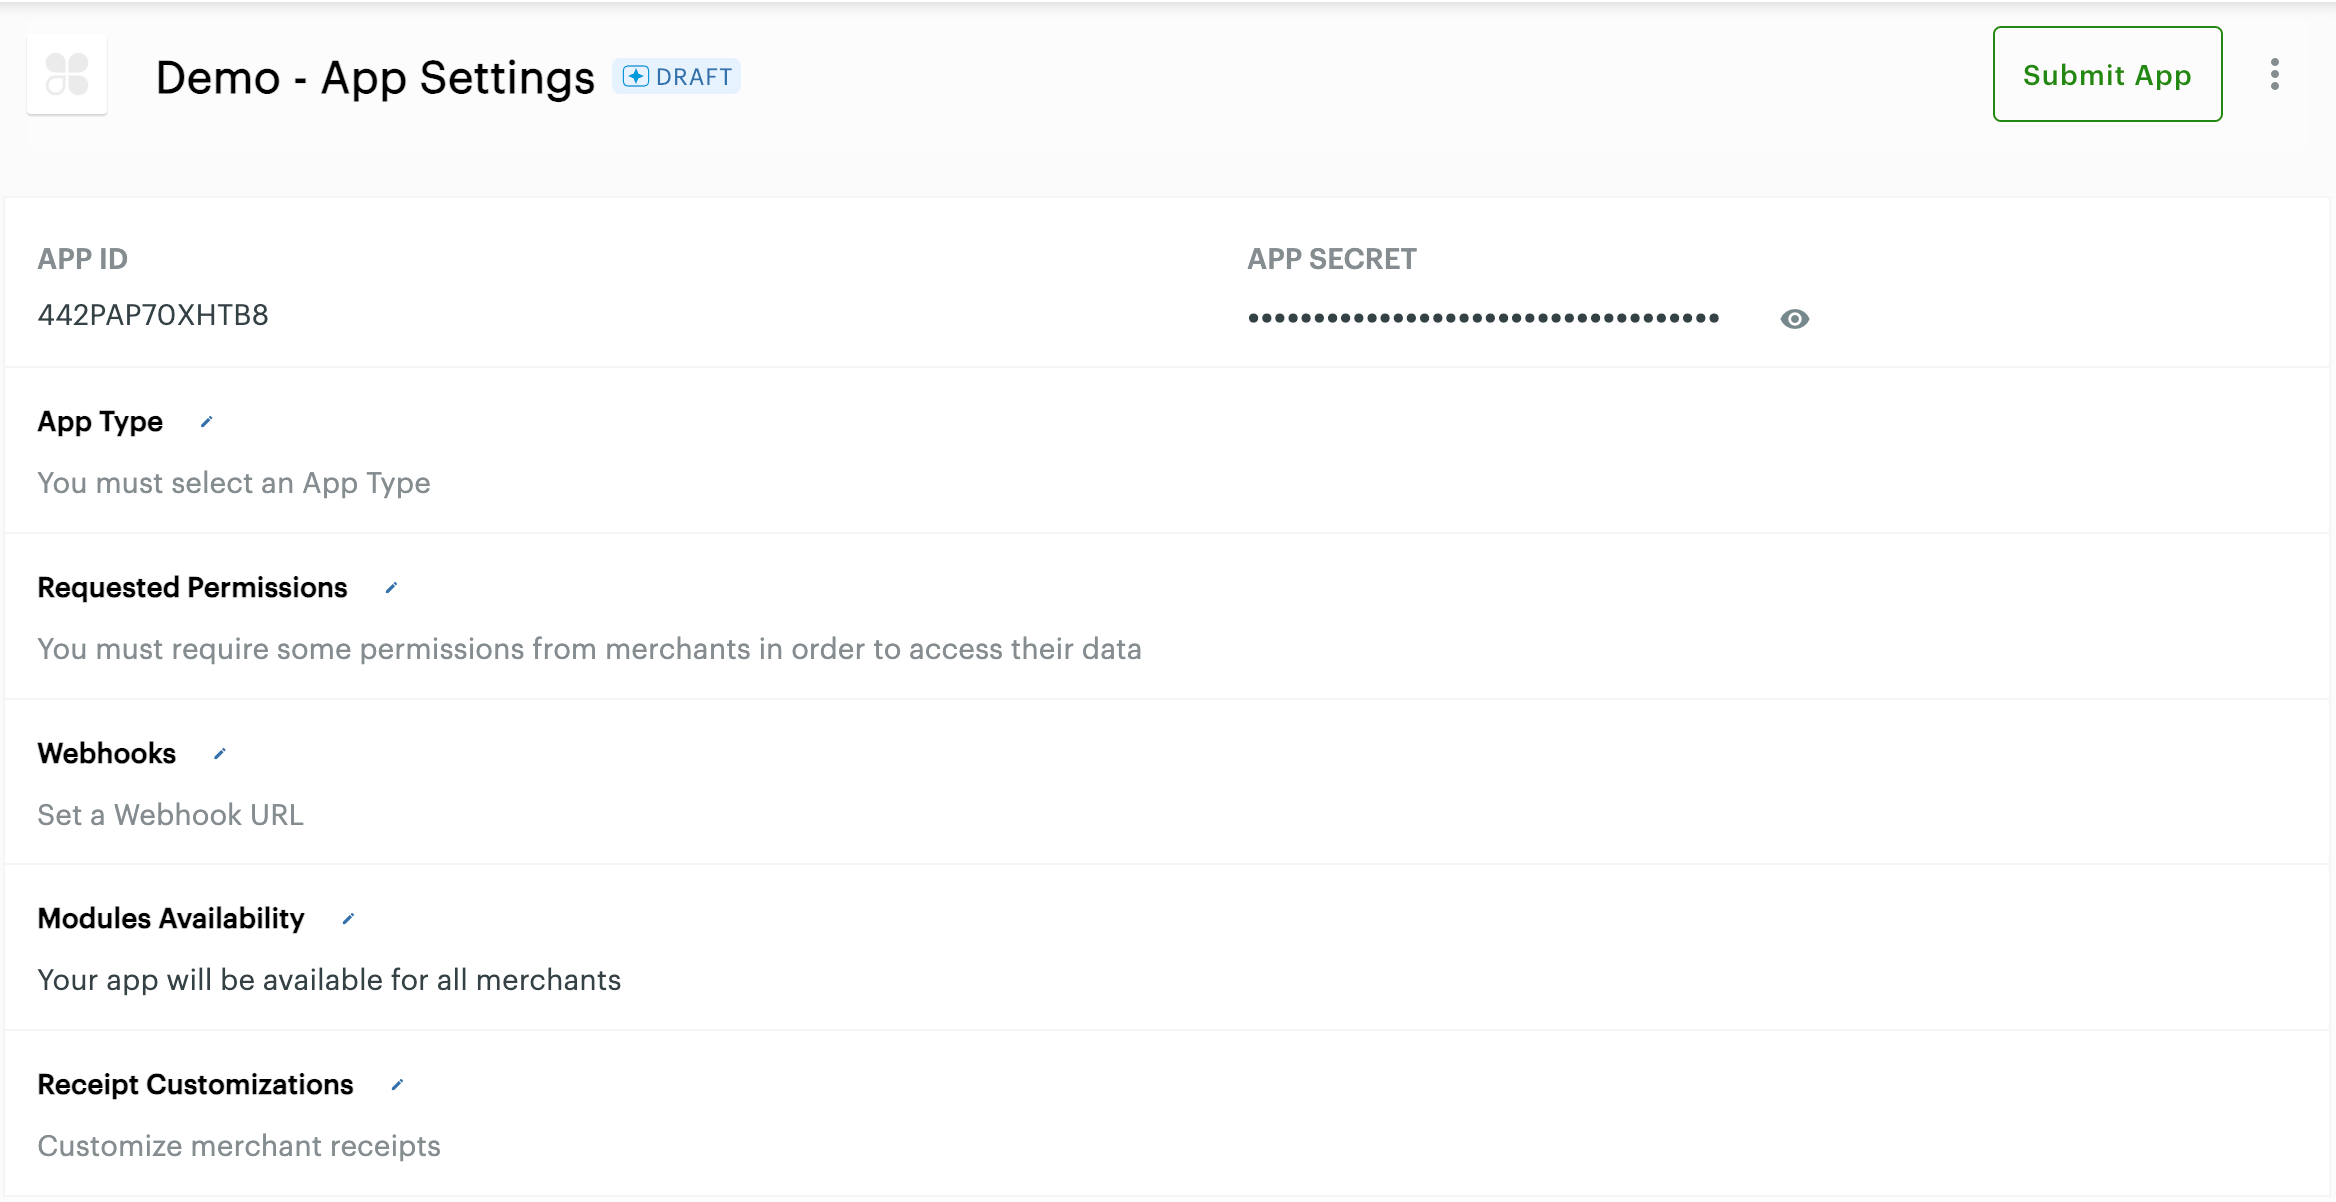
App settings page
Edit the App Name
- Complete steps to access settings for your app.
- From the left navigation menu, click Market Listing. The App name - Market Listing page appears.

Market Listing page
- Click the app name. The Edit App Name and Icon window appears.

Edit App Name and Icon pop-up
- In the App Name field, enter the new app name. You can also upload an image file as the app icon.
- Click Save.
View App ID and App Secret
App ID and App Secret values uniquely identify your app on the Clover platform. These values are required for you to make authorized and authenticated requests to Clover merchant data.
| App type | Generate an API token |
|---|---|
| Web apps | Use the app ID and secret in the Clover OAuth flow to retrieve an API token for permissions granted by a Clover merchant. The API token lets you access merchant data. |
| Android apps | Use the app ID and secret to generate an API token. The API token can help you query web services using the Clover Android SDK. |
Select App Type
App Type indicates whether you are building an Android app, a web app, or a semi-integration with Clover devices. You can build apps for:
- Clover App Market or Public
- Semi-integration with a Clover device, where a third-party point of sale (POS) system uses Clover for processing payments
- Clover Go
- Private or merchant-specific
You can select multiple app types based on the solution you are building for a Clover merchant.
- Complete the steps to access settings for your app.
- Click App Type. The App Type page appears.
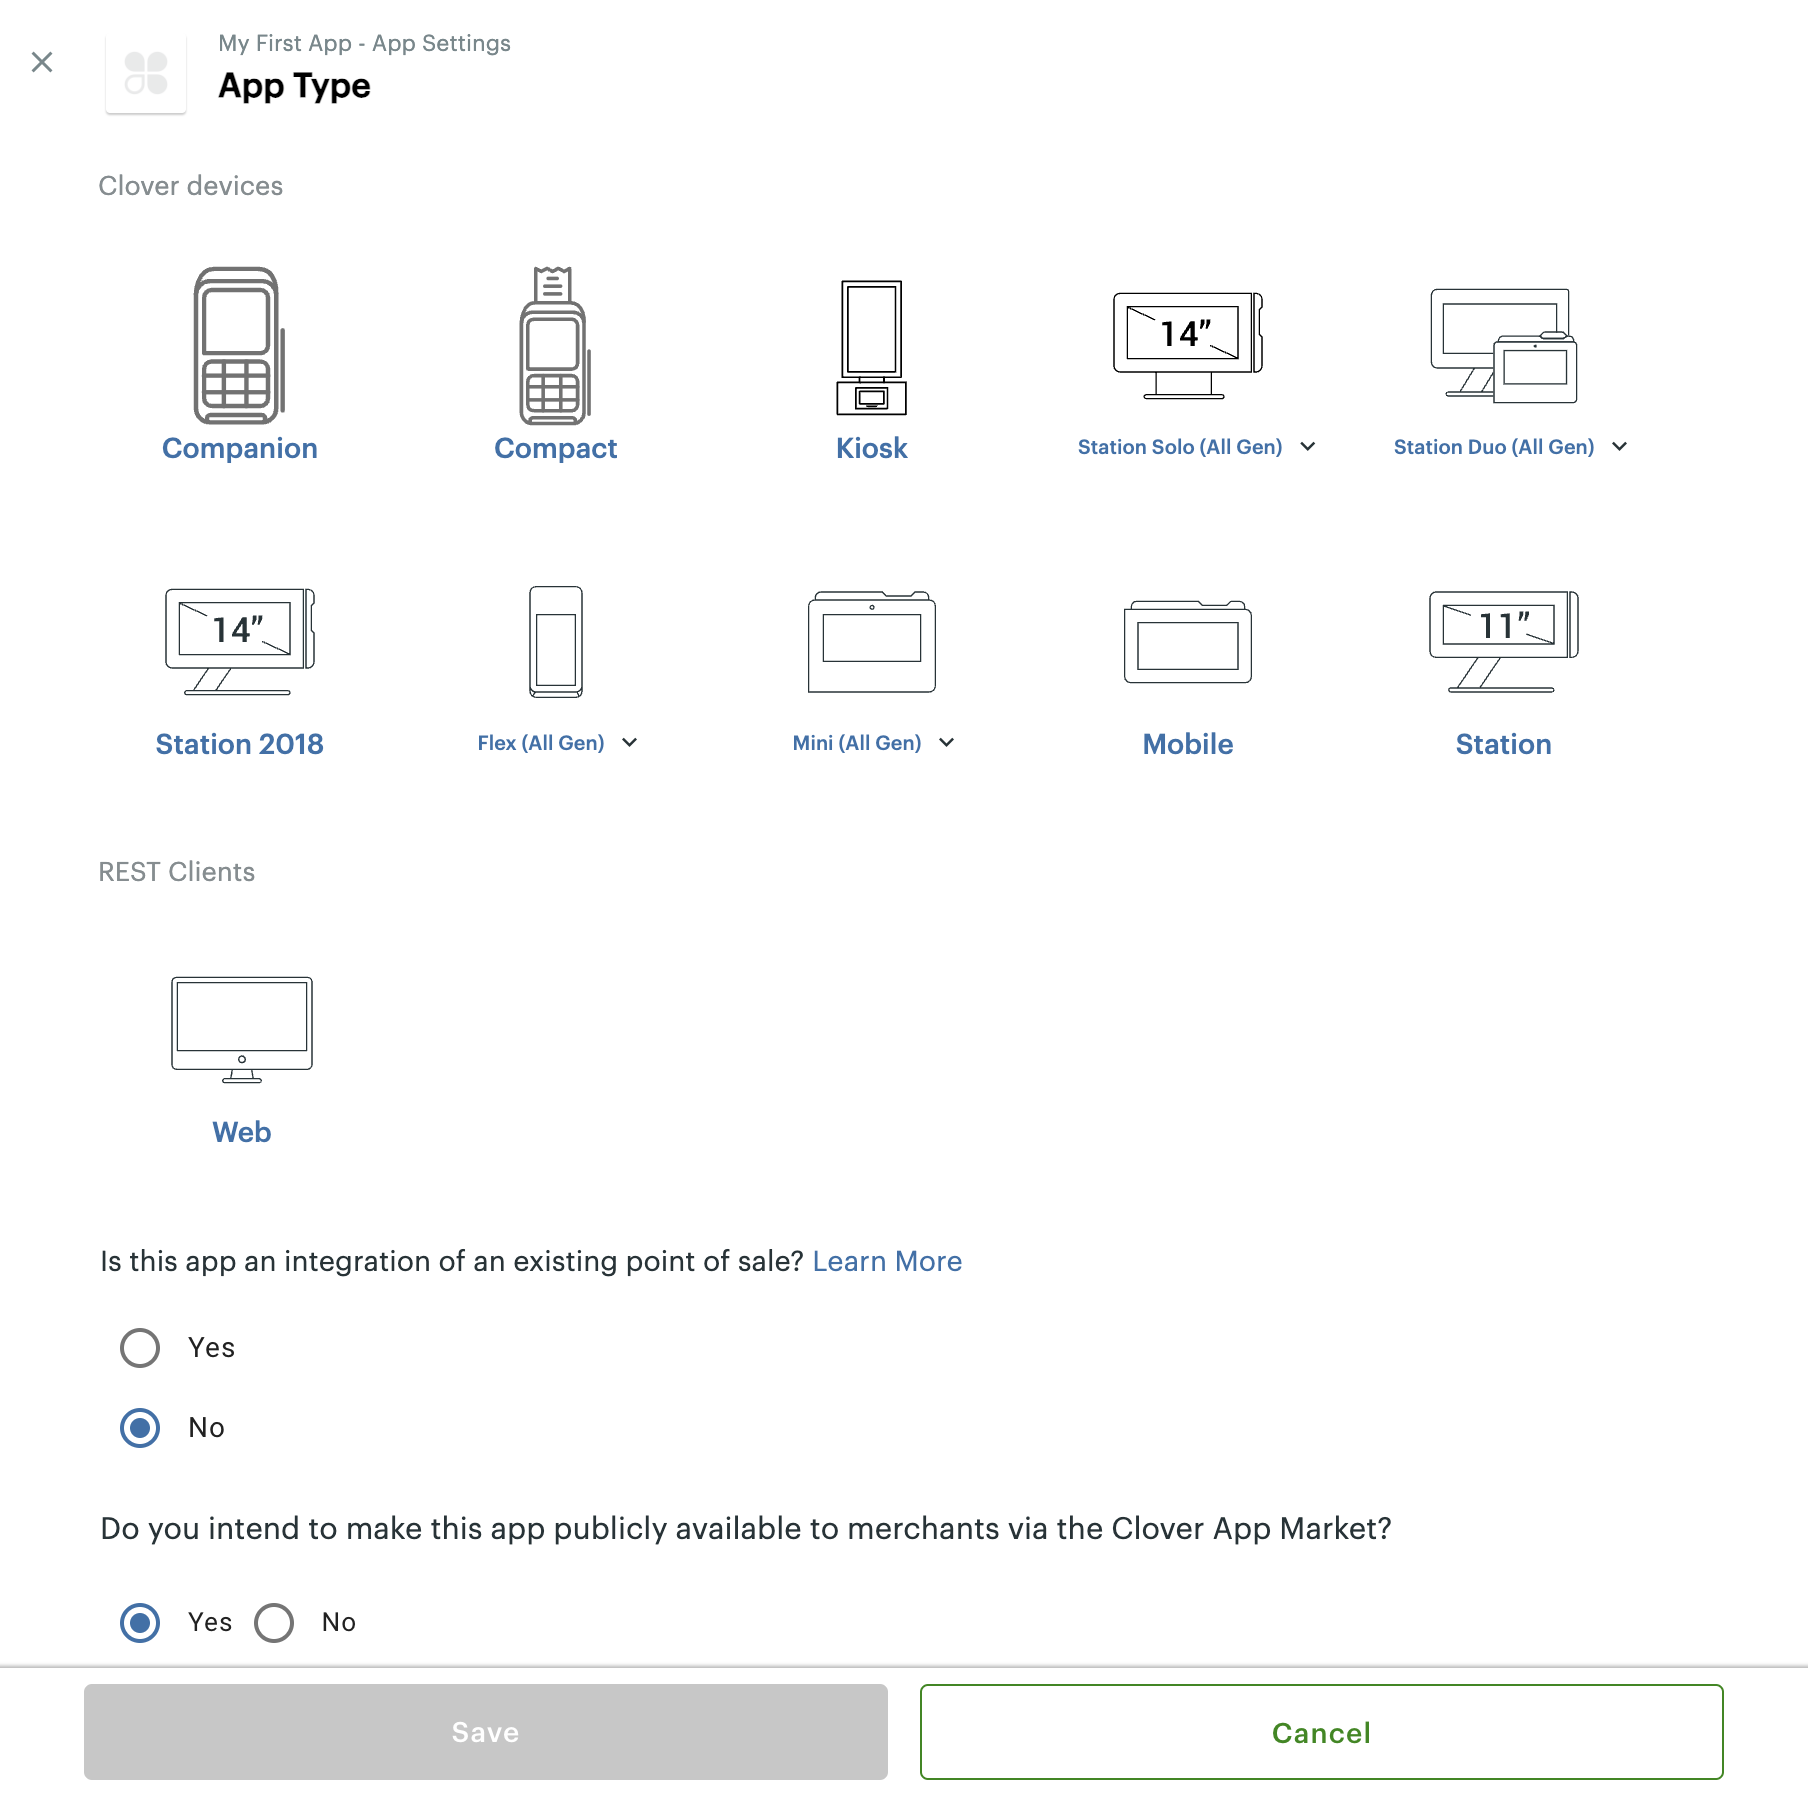
App Type page
-
Select an app type:
App type Description Android app Select Clover devices only if you want your Android app to run on the Clover device. After you click Save, the App Settings page displays the Android APKs field. Use the field to upload and manage your Android APKs. For more information, see Manage Android app releases. Web app In the REST Clients section, click Web. After you click Save, the REST Configuration field displays on the App Settings page. See Add web app settings. Semi-integrated app For the option - Is this app an integration of an existing point of sale? option - select Yes. After you click Save, the App Settings—App Type section displays a Remote App ID (RAID) that uniquely identifies your semi-integrated app. For more information, see Create your Remote App ID.

App Settings page
Edit Requested Permissions
Define the app permissions for customers, employees, merchants, inventory, orders, payments, and ecommerce. If you change app permissions after a merchant (including your test merchant) downloads your app, the new permissions don't take effect until the merchant uninstalls and reinstalls the app. For more information on app permissions, see Set app permissions.
- Complete steps to access settings for your app.
- Click Requested Permissions. The Edit Requested Permission page appears.

Requested Permissions page
- Review or edit information on the page.
Note: Ecommerce is currently not available in Europe. - Click Save to save any edits.
Use webhooks
Webhooks allow your app to receive notifications when merchants who have installed your app perform certain actions. For example, if a merchant has granted you READ_INVENTORY permission and changes their inventory, you'll receive a POST request to the specified endpoint for updating the inventory. For more information, see Use webhooks.
Set modules availability
Each Clover merchant subscribes to a software-as-a-service (SaaS) plan customized for their specific business needs. These SaaS plans provide merchants with access to specific modules within categories of functionality. Use the Modules Availability setting to select only the modules that apply to your app. For more information, see Set modules availability for your app.
Set Receipt Customizations
Smart receipts allow you to add information to Clover paper and web receipts for the customer. For more information, see Customize receipts.
Add web app settings
- Select Web app on the App Type page. The REST Configuration displays on the App Settings page.
See Select App Type. - Click REST Configuration. The Edit REST Configuration page appears.

REST Configuration page
-
Enter information in the fields:
Field Description Site URL field Link (URL) for your app. After a merchant installs and launches your app from the Merchant Dashboard, they are redirected to the Site URL through the /oauth/authorizeendpoint. The merchant can log in or select their merchant account before accessing your app. Example: Link (URL) of your web app homepage.Alternate Launch Path (optional) Link (URL) path for your app required when OAuth is initiated from the left navigation menu in the Merchant Dashboard or directly from the Clover App Market. Clover uses this path to redirect merchants to your app and initiate the OAuth flow. This path is appended to the Site URL to form the full launch URL. CORS Domain (optional) If you are integrating with Cloud Pay Display, enter a domain link (URL). When you set a Cross-Origin Resource Sharing (CORS) domain URL, your web app can make calls to the Clover REST API without requiring an intermediate app server. For more information, see Set app URL and CORS. Default OAuth Response field Select an option:
- Code: Default. When your test merchant is authorized through OAuth 2.0, you receive an authorization code. This code is required for you to request an API token for your app permissions.
- Token: When your test merchant is authorized, you directly receive an API token for your app permissions. See Generate an API token. -
Click Example OAuth Request to view a sample OAuth request and response in your browser address bar. Both the request and response are based on the Site URL value.
-
Click Save. The updated values display on the App Settings page.
Updated 4 months ago