Manage test merchants in production
On the legacy Developer Dashboard
Test merchant accounts allow you to simulate merchant interactions with your application. This includes installing your app, assigning permissions, and then testing all the features of your app. When you sign up to create your production developer account, you can create a test merchant after entering your developer account information. Test merchants on production environment are not billed.
Create your first test merchant
When you login to the production environment based on your merchant's location, you can create your first test merchant. You can edit this information later and create additional test merchants in the Merchant Dashboard.
- Complete steps to create a production developer account.
- On the Create your Test Merchant page, enter test merchant information:
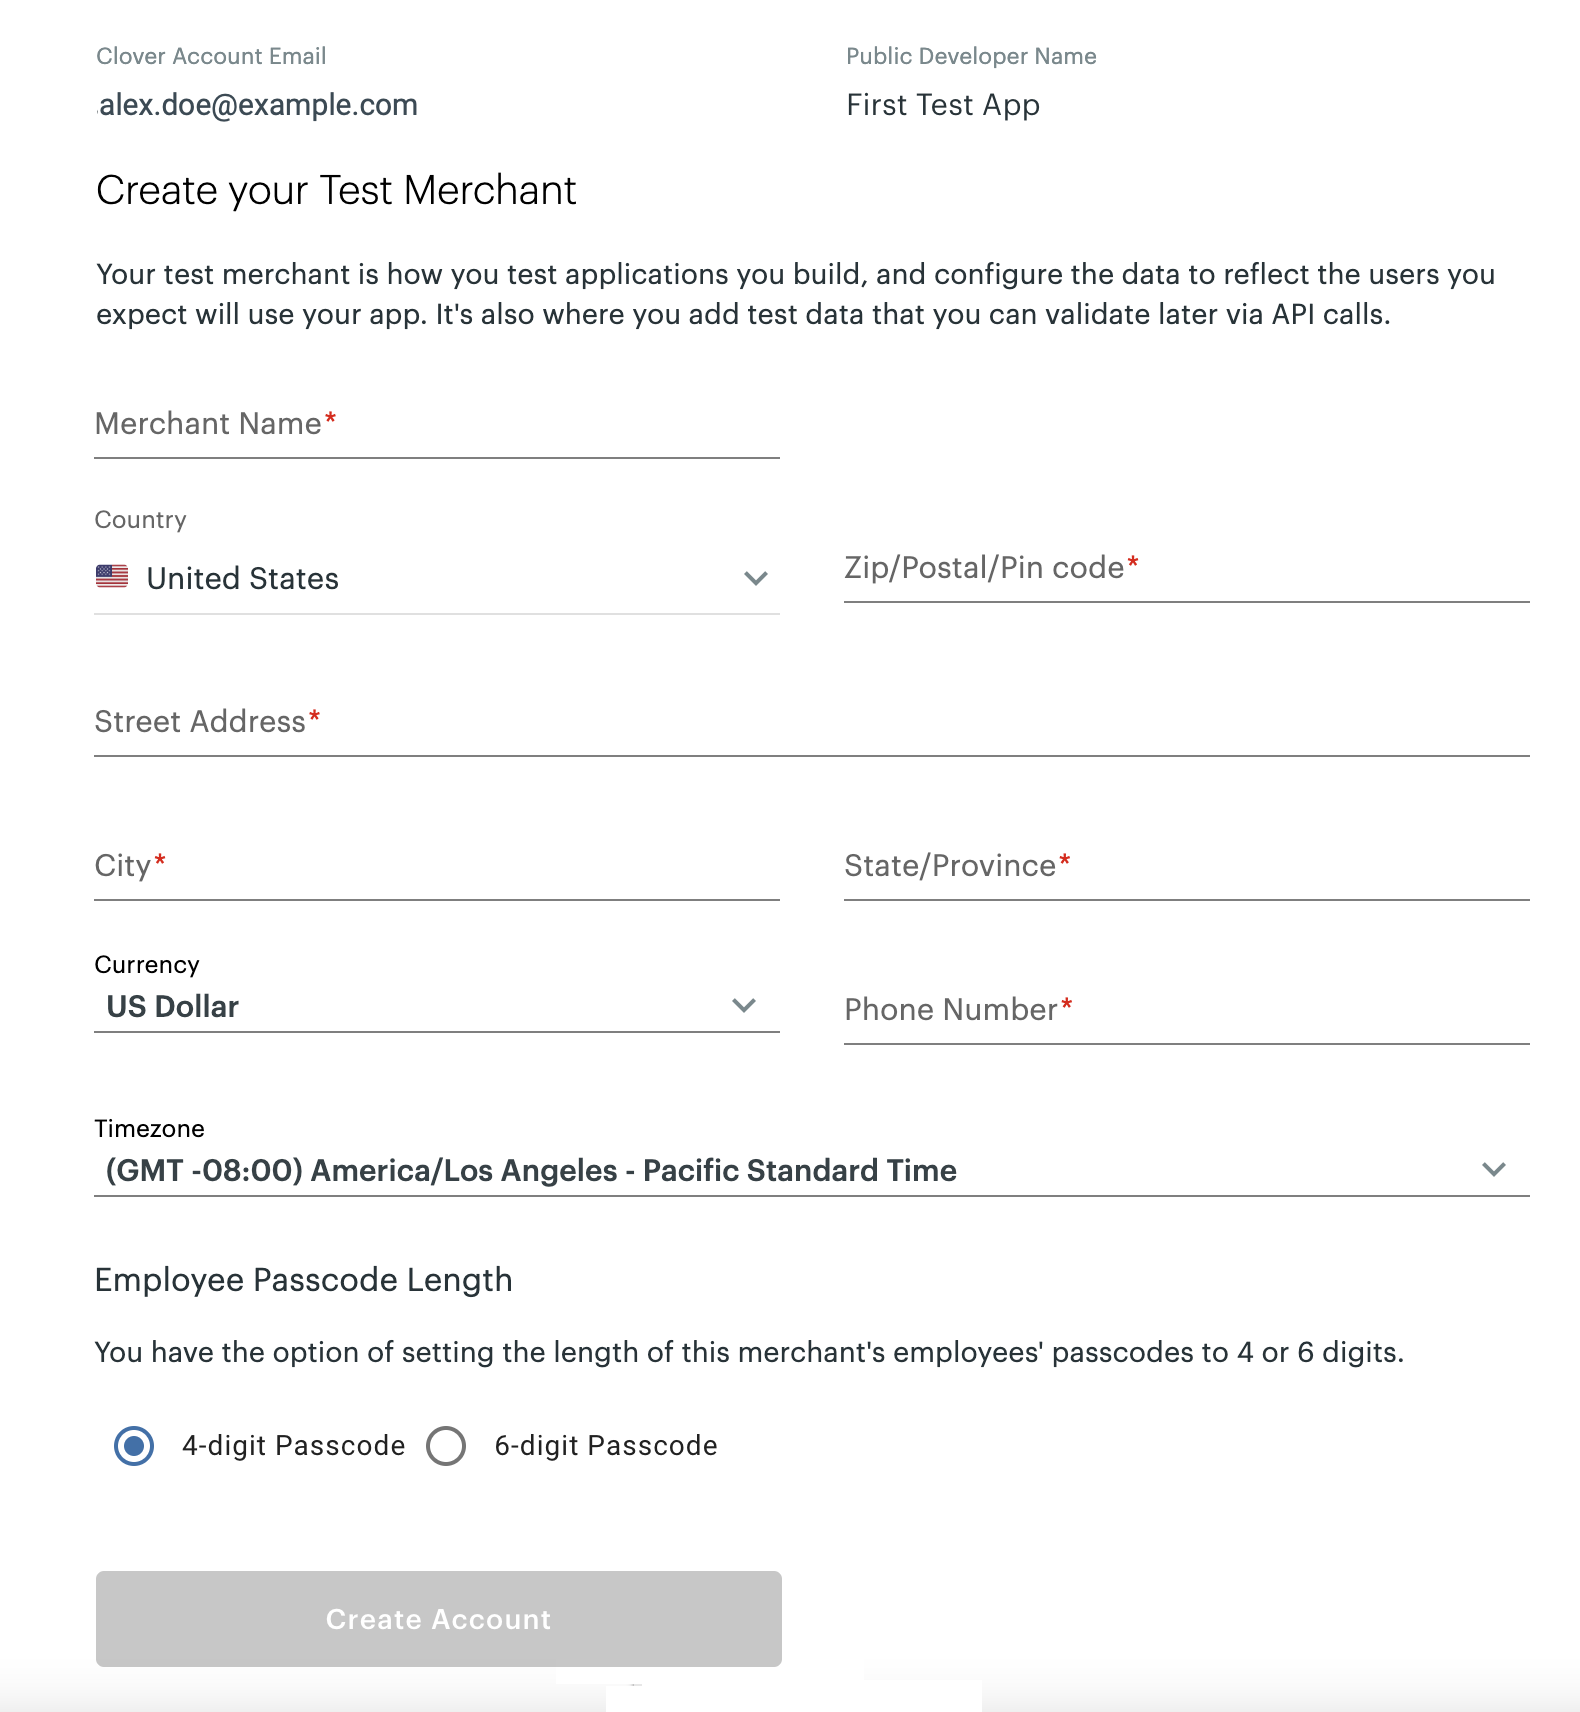
Create your Test Merchant page
| Field | Description |
|---|---|
| Merchant Name | Name of the merchant as displayed on the Merchant Dashboard. |
| Country | Country where the merchant is located. |
| Zip/Postal Code | Postal or ZIP code for the merchant location. |
| Address Line | Street and building information for the merchant location. |
| City | City of the merchant location. |
| State/Province | State or province of the merchant. If the selected country does not have states or provinces, enter n/a. |
| Phone Number | Phone number for the merchant. |
| Currency | Currency accepted by the merchant. Important: If you are creating a test merchant for any region other than the United States (US), be sure to select the correct currency for testing your app. Some regions, such as Canada, allow processing in more than one currency, and this setting cannot be changed once the test merchant is created. |
| Timezone | Timezone for the merchant. |
| Employee Passcode Length | Passcode of 4- or 6-digits that employees of the merchant business must use to log on to the test device. |
- Click Create Account. The production Developer Dashboard appears.
From here, you can:
Create additional test merchants
You can:
- Create additional test merchants for each region where you want to make your app.
- Add test merchants with different settings to simulate the effects of regions, time zones, currencies, or permissions.
- Process test transactions using the correct payment gateway for a region. A specific payment gateway is configured based on the address you enter for your test merchant. For example, if you are a developer who wants to create an app for use in Canada, create your test merchant using a Canadian address.
To create additional test merchants:
- Log in to the production Developer Dashboard.
- From the Dashboard drop-down menu, under Developer Account, click Create test location. The Create your Test Merchant page appears.
- Complete the information in the fields. For field descriptions, see Create your first merchant.
- Click Create Account. The Merchant Dashboard for the test merchant appears.
- On the Merchant Dashboard, you can complete the steps to set up your merchant account, such as:
- Update business details
- Add employees
- Set up taxes
- Build an inventory
For more information, see Clover Help.
Update merchant information
You cannot change the merchant's business information using the Setup app on a Clover device. To change your test merchant's business information:
- Log in to the production Developer Dashboard.
- From the left navigation menu, in the bottom panel, click Test Merchants. The Test Merchants page displays a list of test merchants.
- From the Actions column, click the Launch Dashboard icon next to a merchant name. The Merchant Dashboard appears.
- From the top menu, click the Settings icon. The Settings side panel appears.
- Click View all settings. The Settings page appears.
- In the About your Business section, click Business Information. The Business information page appears.
- Enter information in the fields, such as customer-facing information, doing business as (DBA) name, phone number, and address, privacy policy, and upload the business logo.
- Click Save.
Install your app to a test merchant
After you build and test your apps, you can install your app to your test merchant.
For more information, see:
Updated 4 months ago