Work with test merchants in sandbox
On the legacy Developer Dashboard
Test merchant accounts let you simulate merchant interactions with your application. This includes installing your app, assigning permissions, and then testing all the features of your app. When you sign up to create your sandbox developer account, you can create a test merchant after entering your developer and account information.
On the Test Merchants page in the Developer Dashboard, you can:
- Create and access multiple test merchant accounts.
- Manage your login credentials to access test merchants' information.
- View and manage your test merchant business information. You can click the Settings icon next to the merchant name. See Manage test merchants for more information.
Before you begin
The Developer Dashboard is on the legacy developer platform. If you have previously approved apps on this platform, you can continue to use the Developer Dashboard to manage the apps. The developer platform requires two separate developer accounts to access the sandbox and production environments.
All new developer accounts in North America, Europe, Latin America, and Asia Pacific are created on the global developer platform.
The steps in this topic are for the legacy developer platform.
Create your first test merchant
On the sandbox Developer Dashboard, when you create a sandbox developer account, you need to create your first test merchant.
Create additional test merchants
You can create additional test merchants for each country in a region where you want to publish your app. You can add test merchants with different settings to simulate the effects of different regions, time zones, currencies, or permissions schemes.
A specific payment gateway is configured based on the address you enter for your test merchant. For example, if you want to create an app for use in Canada, create your test merchant using a Canadian address. The test merchant you create processes test transactions using the correct gateway for that region.
- Log in to your sandbox Developer Dashboard.
- Do one of the following:
- From the Dashboard drop-down menu, under Developer Account, click Create test location.
- From the left navigation menu, in the bottom panel, click Test Merchants.
The Test Merchants page displays the list of test merchants.
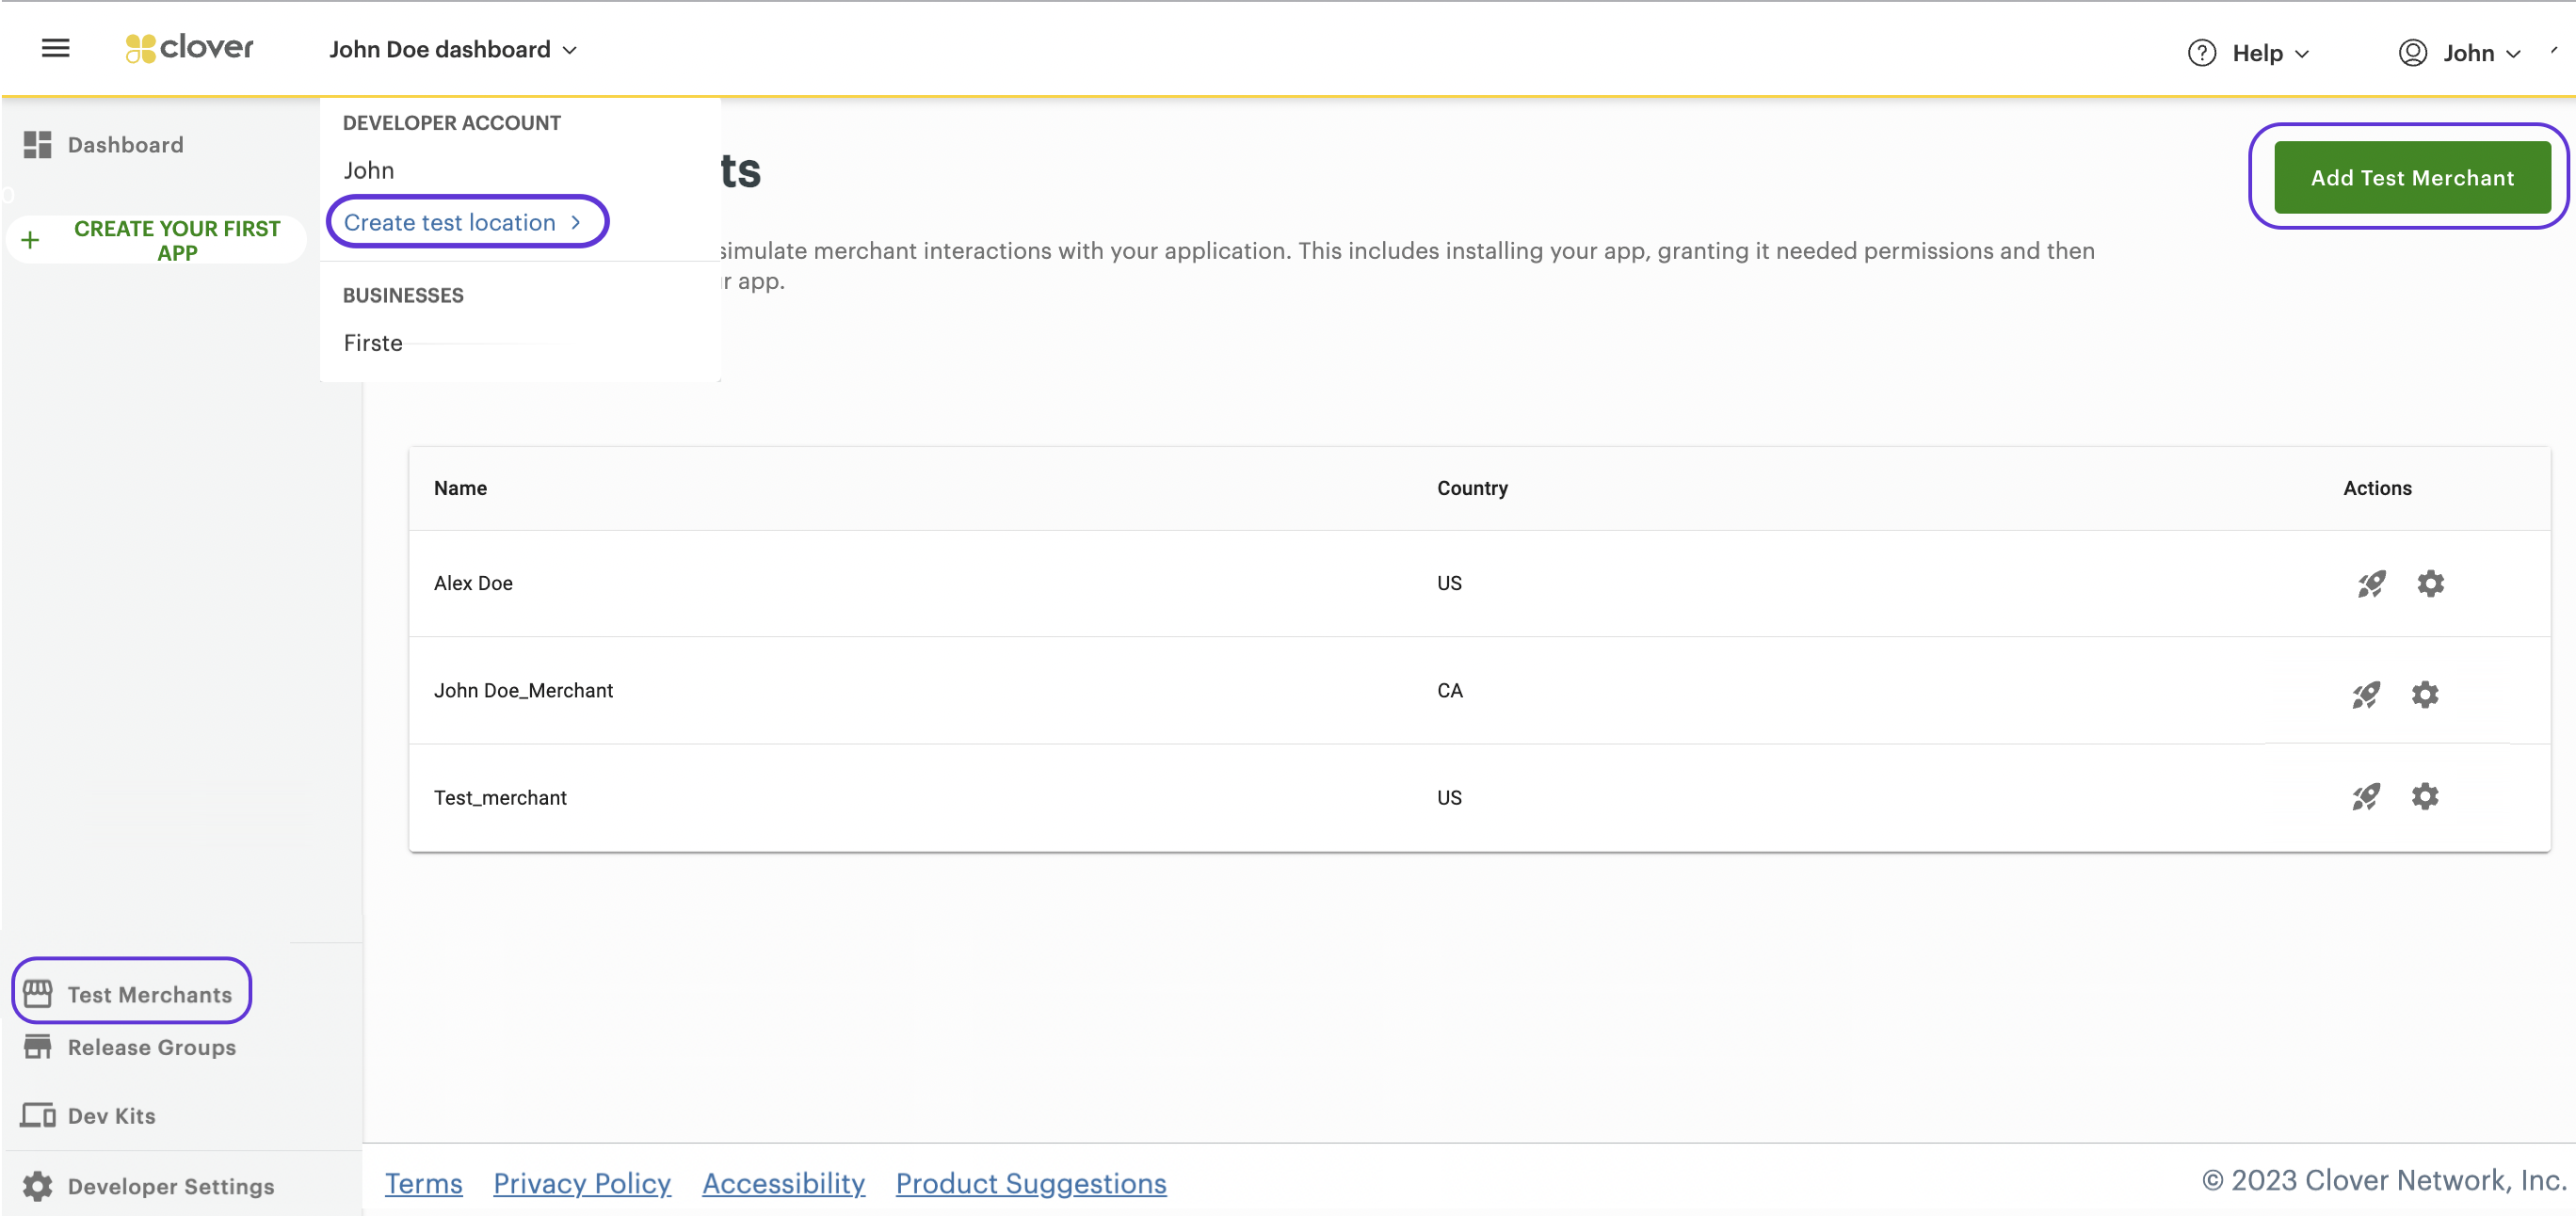
Test Merchants page - Create test location
- Click Add Test Merchant. The Create your Test Merchant page appears.
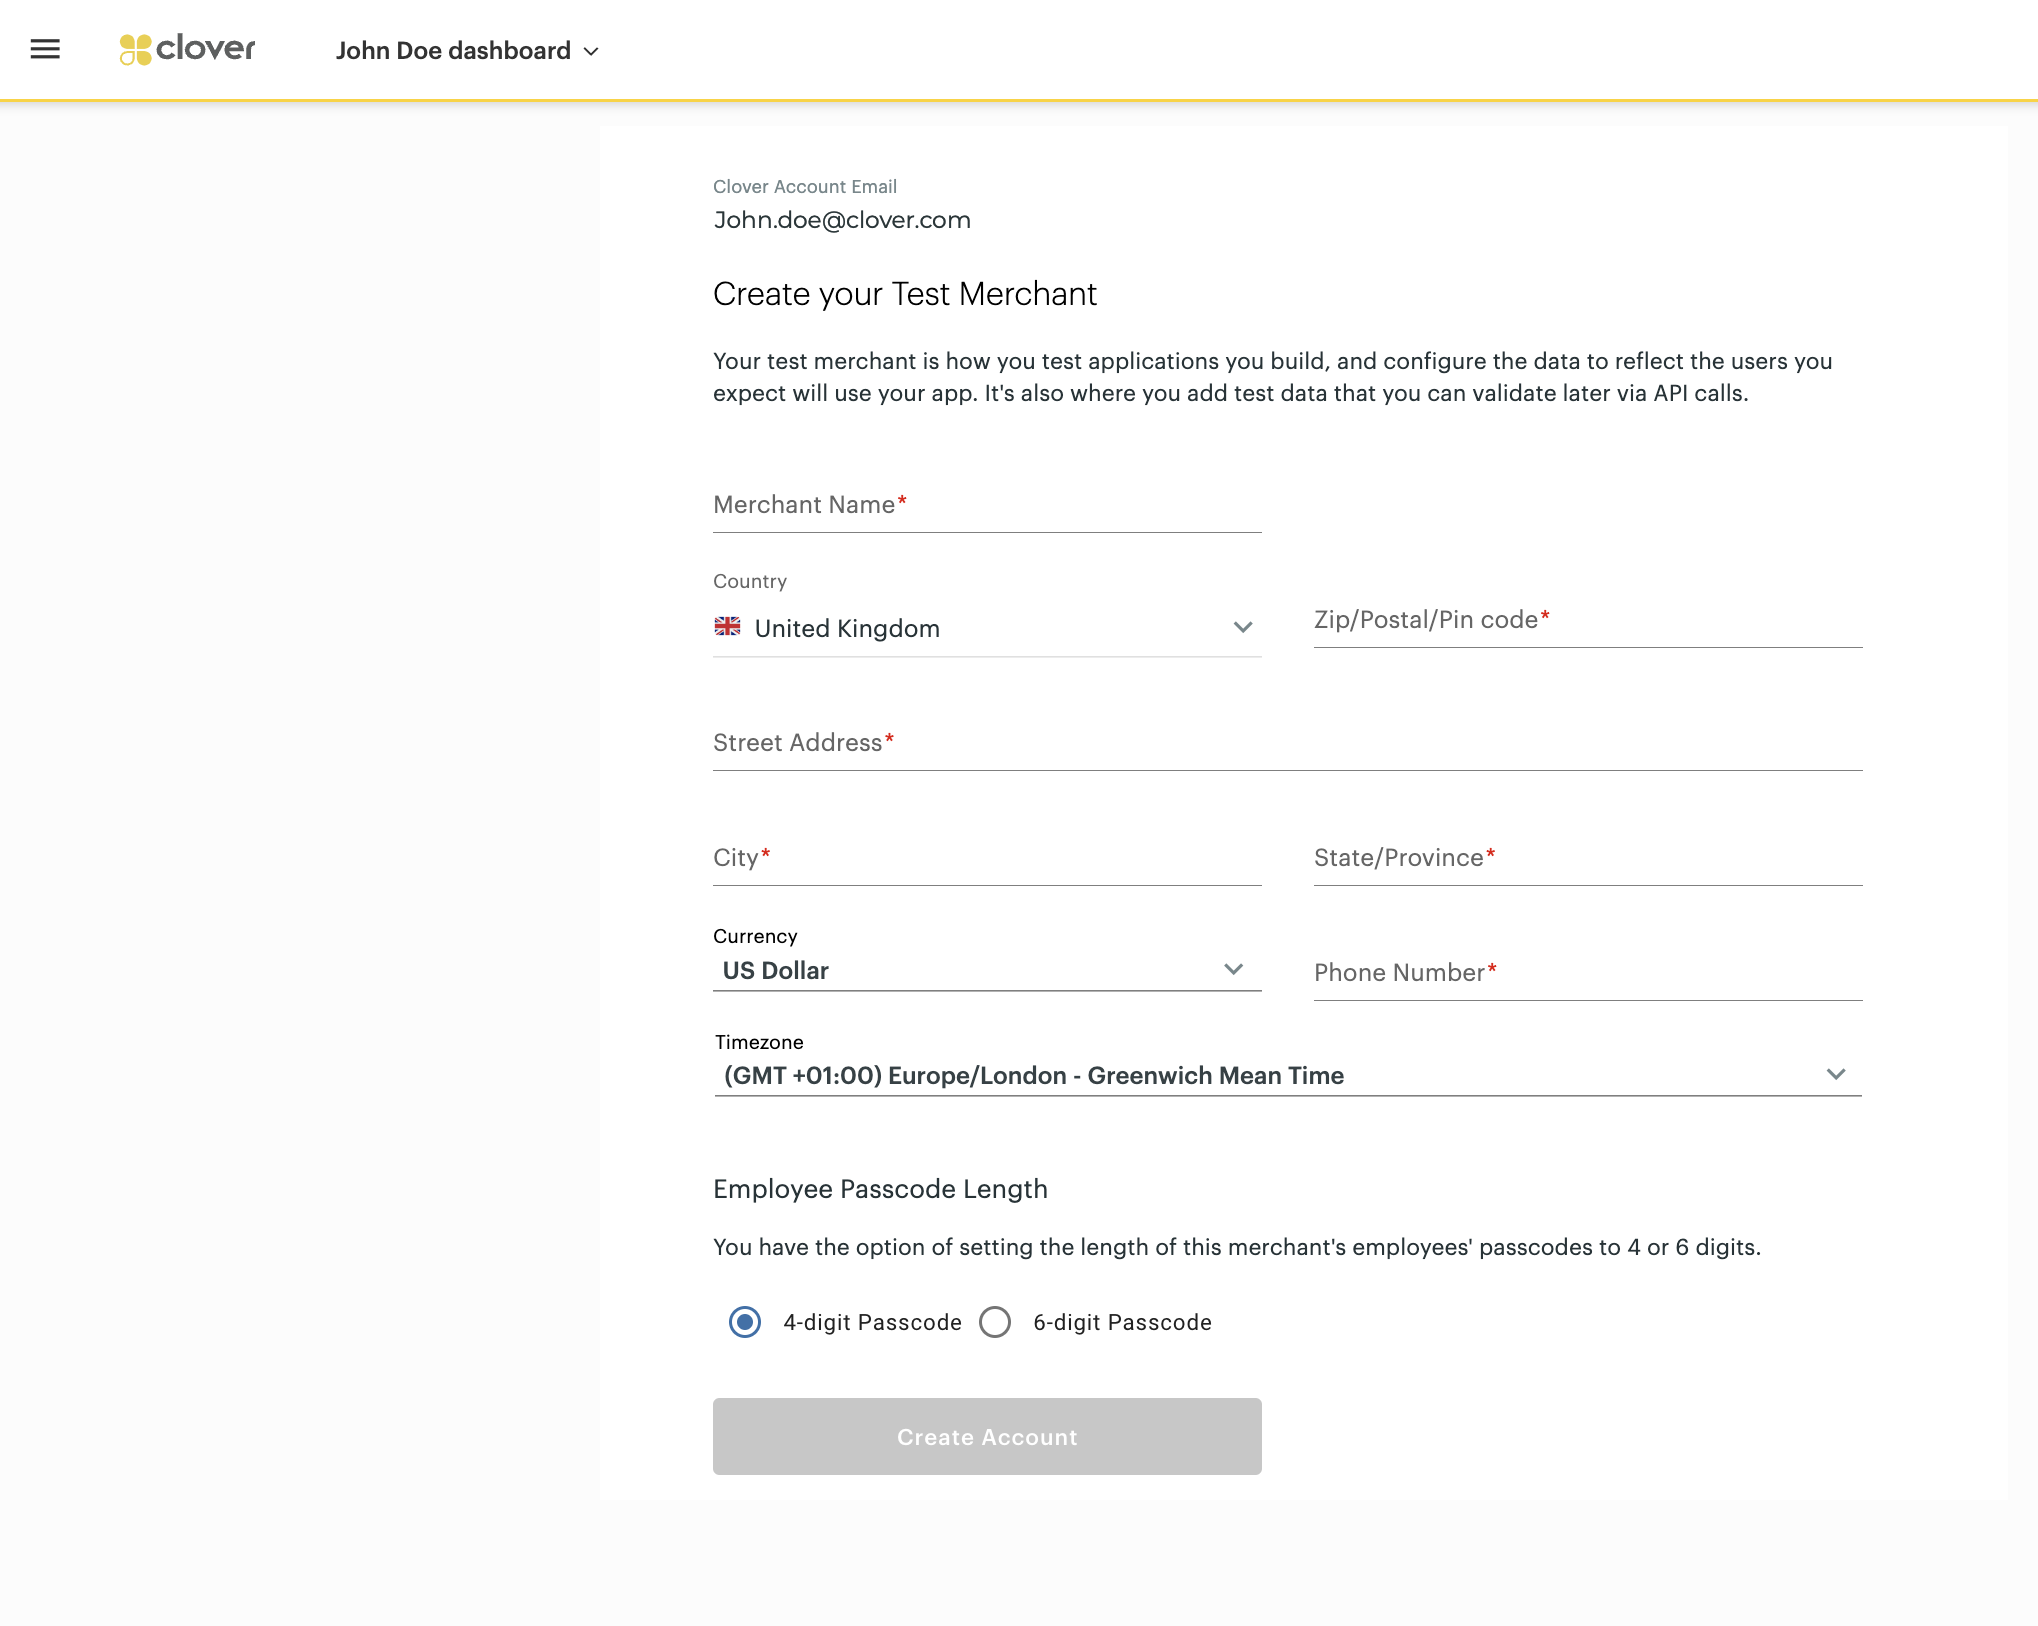
Create your Test Merchant page
- Add information in the following fields:
- Click Create Account. The merchant you added displays in the test merchants list.
| Field | Description |
|---|---|
| Merchant Name | Name of the merchant that displays on the Test Merchants page and Dev Kits associated with the account. |
| Country | Country where the merchant is located. |
| Zip/Postal Code | Postal code for the merchant location. |
| Address Line | Street and building information for the merchant location. |
| City | City of the merchant location. |
| State/Province | State or province of the merchant. If the selected country does not have states or provinces, enter n/a. |
| Phone Number | Phone number for the merchant. |
| Currency | Currency accepted by the merchant. |
| Timezone | Timezone for the merchant. |
| Employee Passcode Length | Passcode of 4- or 6-digits that employees of the merchant business must use to log on to the test device. |
Update test merchant settings
You can update settings only for test merchants in the United States (US) region.
-
Log into the Developer Dashboard.
-
From the left navigation menu, in the bottom panel, click Test Merchants. The Test Merchants page displays the list of test merchants.

Test Merchants - Settings icon
- From the Actions column, click the Settings icon next to a merchant name. The Settings pop-up appears.
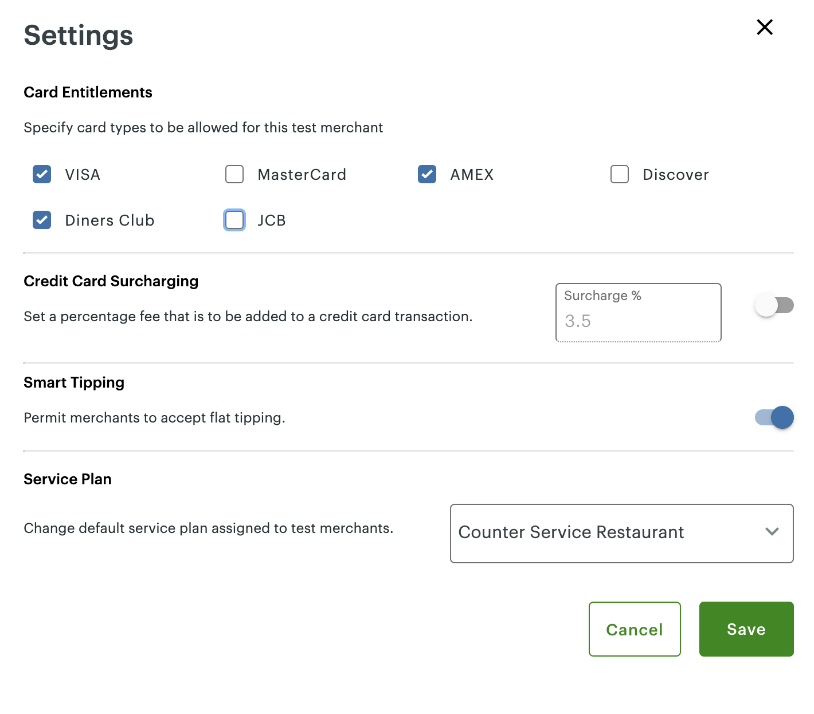
Test Merchants - Settings pop-up
Note: If the Settings page fails to load, add a new test merchant for the US region to use this feature.
- Update the following information:
| Field | Description |
|---|---|
| Card Entitlements | Select checkboxes for the card types your merchant can use to process payments. Note: You need to select at least one card type to proceed. |
| Credit Card Surcharging | Use the toggle icon to turn on the feature and enter the fee in percentage (%) that the merchant can charge a customer for payment using a credit card. A merchant decides the surcharge percentage based on state rules. They can view the credit surcharge fee applied to transactions in the Virtual Terminal and on Clover devices and receipts. For more information, see: - Use test cards for surcharging |
| Smart Tipping | Use the toggle icon to turn on or off the Smart Tipping feature that displays on the Merchant Dashboard. If Smart Tipping is available, merchants can add a flat tip amount to the total sales value through their merchant settings. |
| Service Plans | Select a merchant service plan from the drop-down list. See Test an app with different merchant service plans. Default: Standard Merchant Plans for the test merchants in the United States (US) region. |
- Click Save. The Test Merchants page displays a confirmation message.
Use test cards for surcharging
Use the following cards to test the surcharging feature:
| Card type | Card issuer | Card number | CVV | Expiry date |
|---|---|---|---|---|
| Credit | Mastercard® | 5405 9800 0000 8303 | 201 | 12/23 |
| Credit | Visa® | 4005 5192 0000 0004 201 | 201 | 12/23 |
Update test merchant business information
You can update the merchant's business information only on the Developer Dashboard and not through the Setup app on a Clover device. To change your test merchant's business information:
- Log into your sandbox Developer Dashboard.
- From the left navigation menu, in the bottom panel, click Test Merchants. The Test Merchants page displays a list of test merchants.
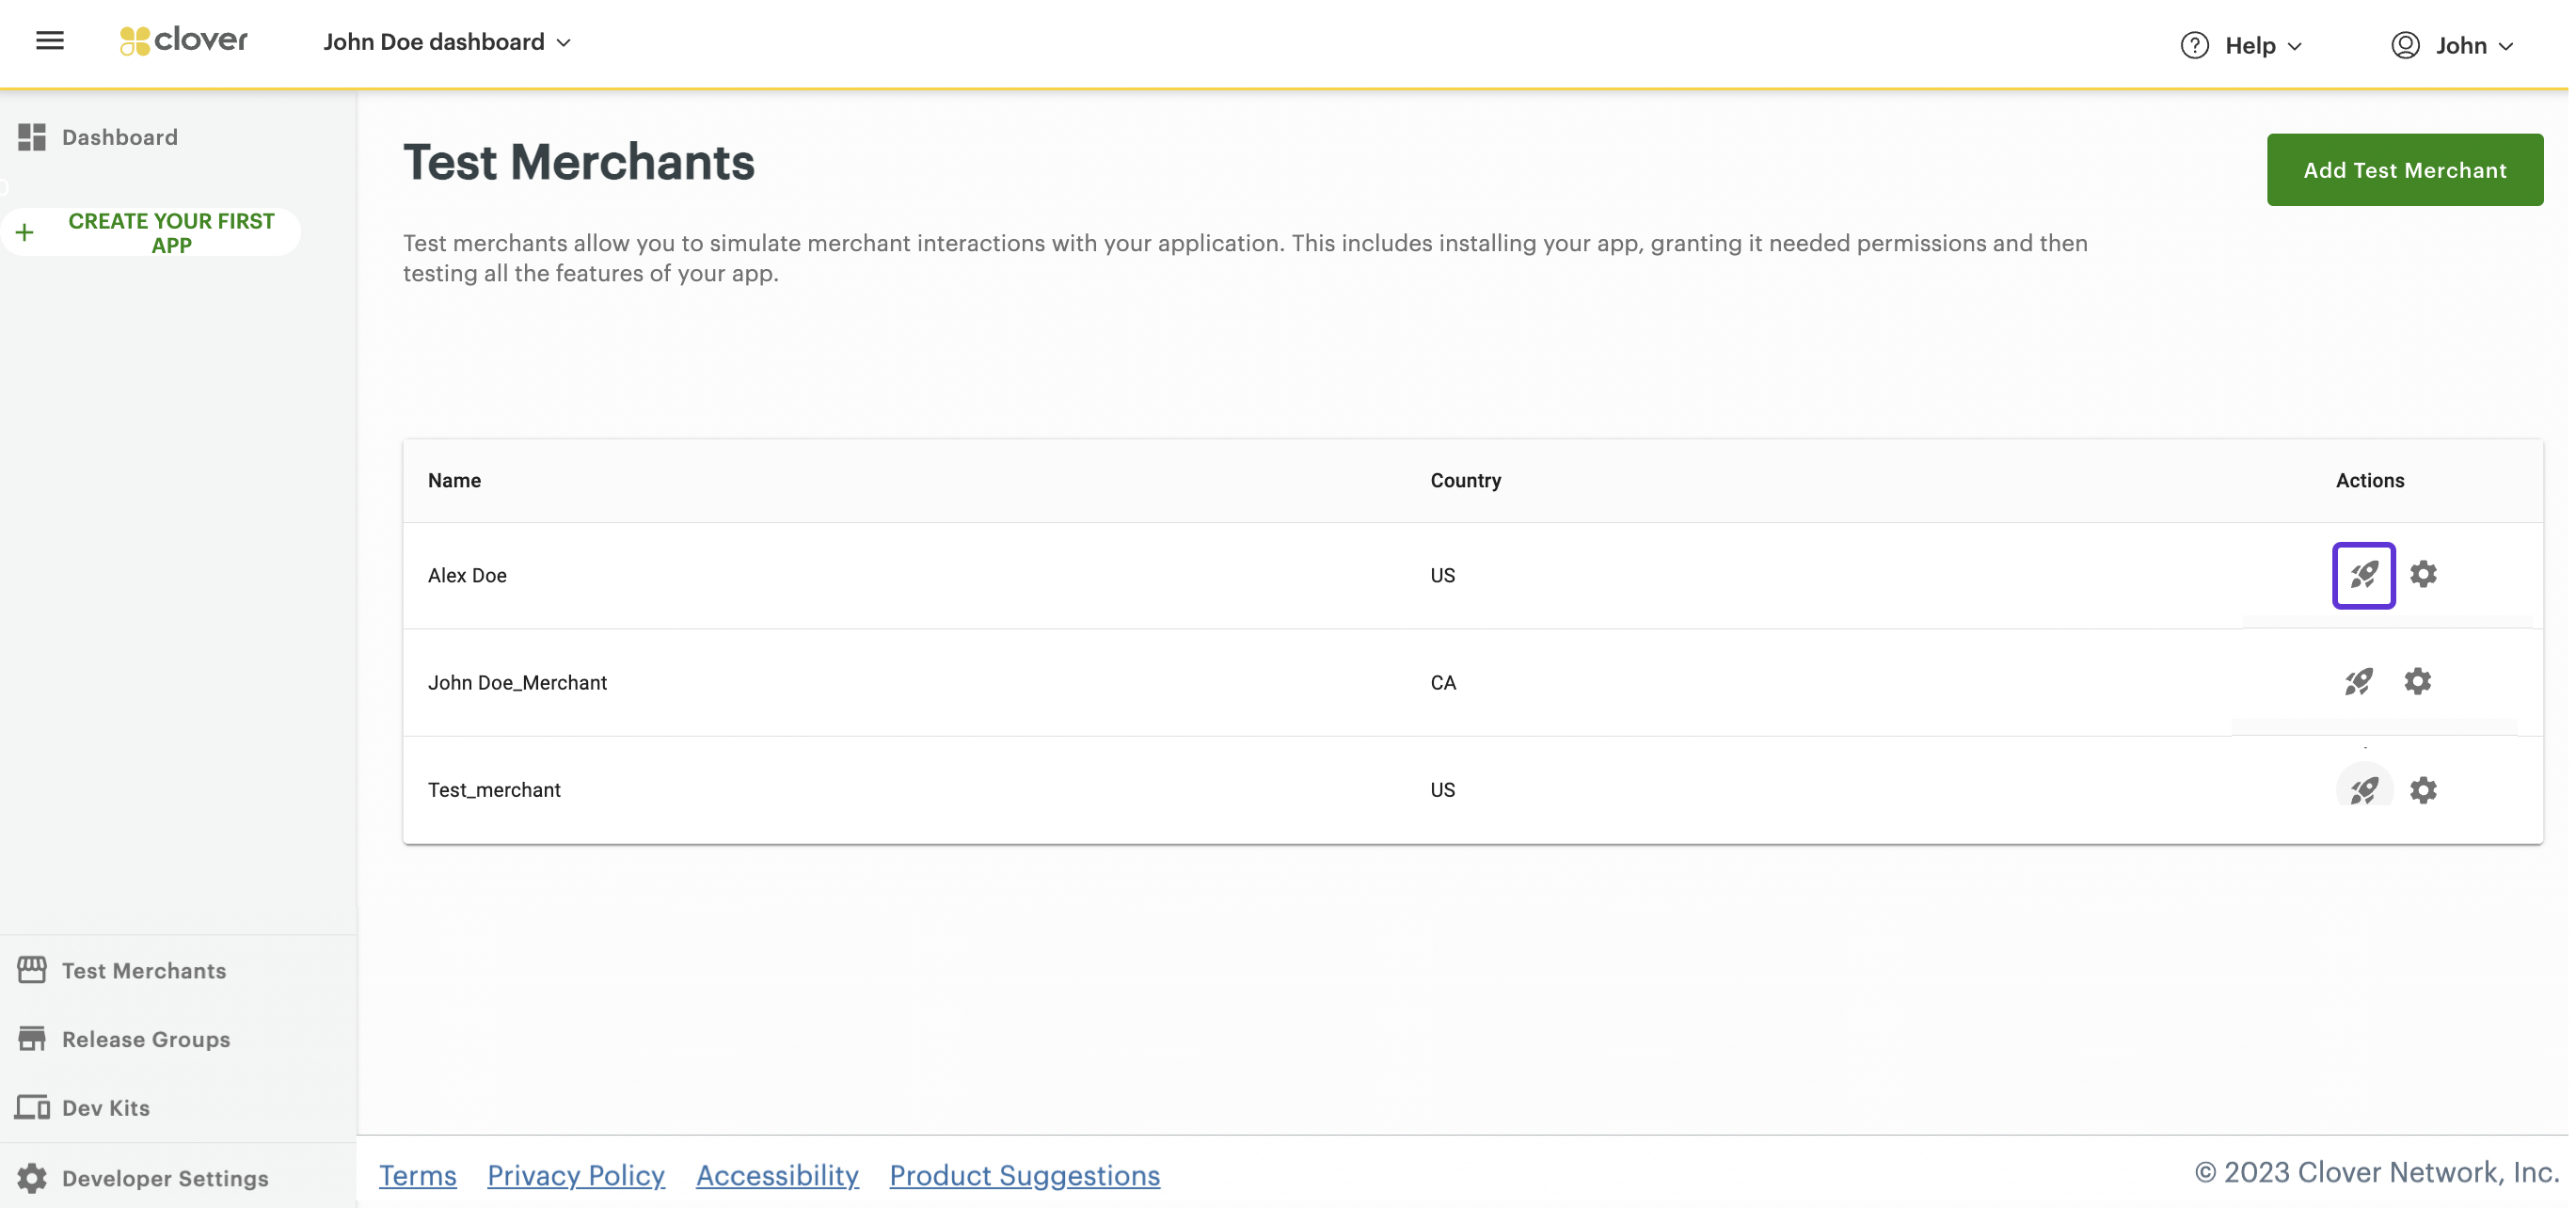
Test Merchants - Launch Dashboard icon
-
From the Actions column, click the Launch Dashboard icon next to a merchant name. The Merchant Dashboard appears.
-
From the top menu, click the Settings icon. The Settings side panel appears.
-
Click View all settings. The Settings page appears.
-
In the About your Business section, click Business Information. The Business information page appears.
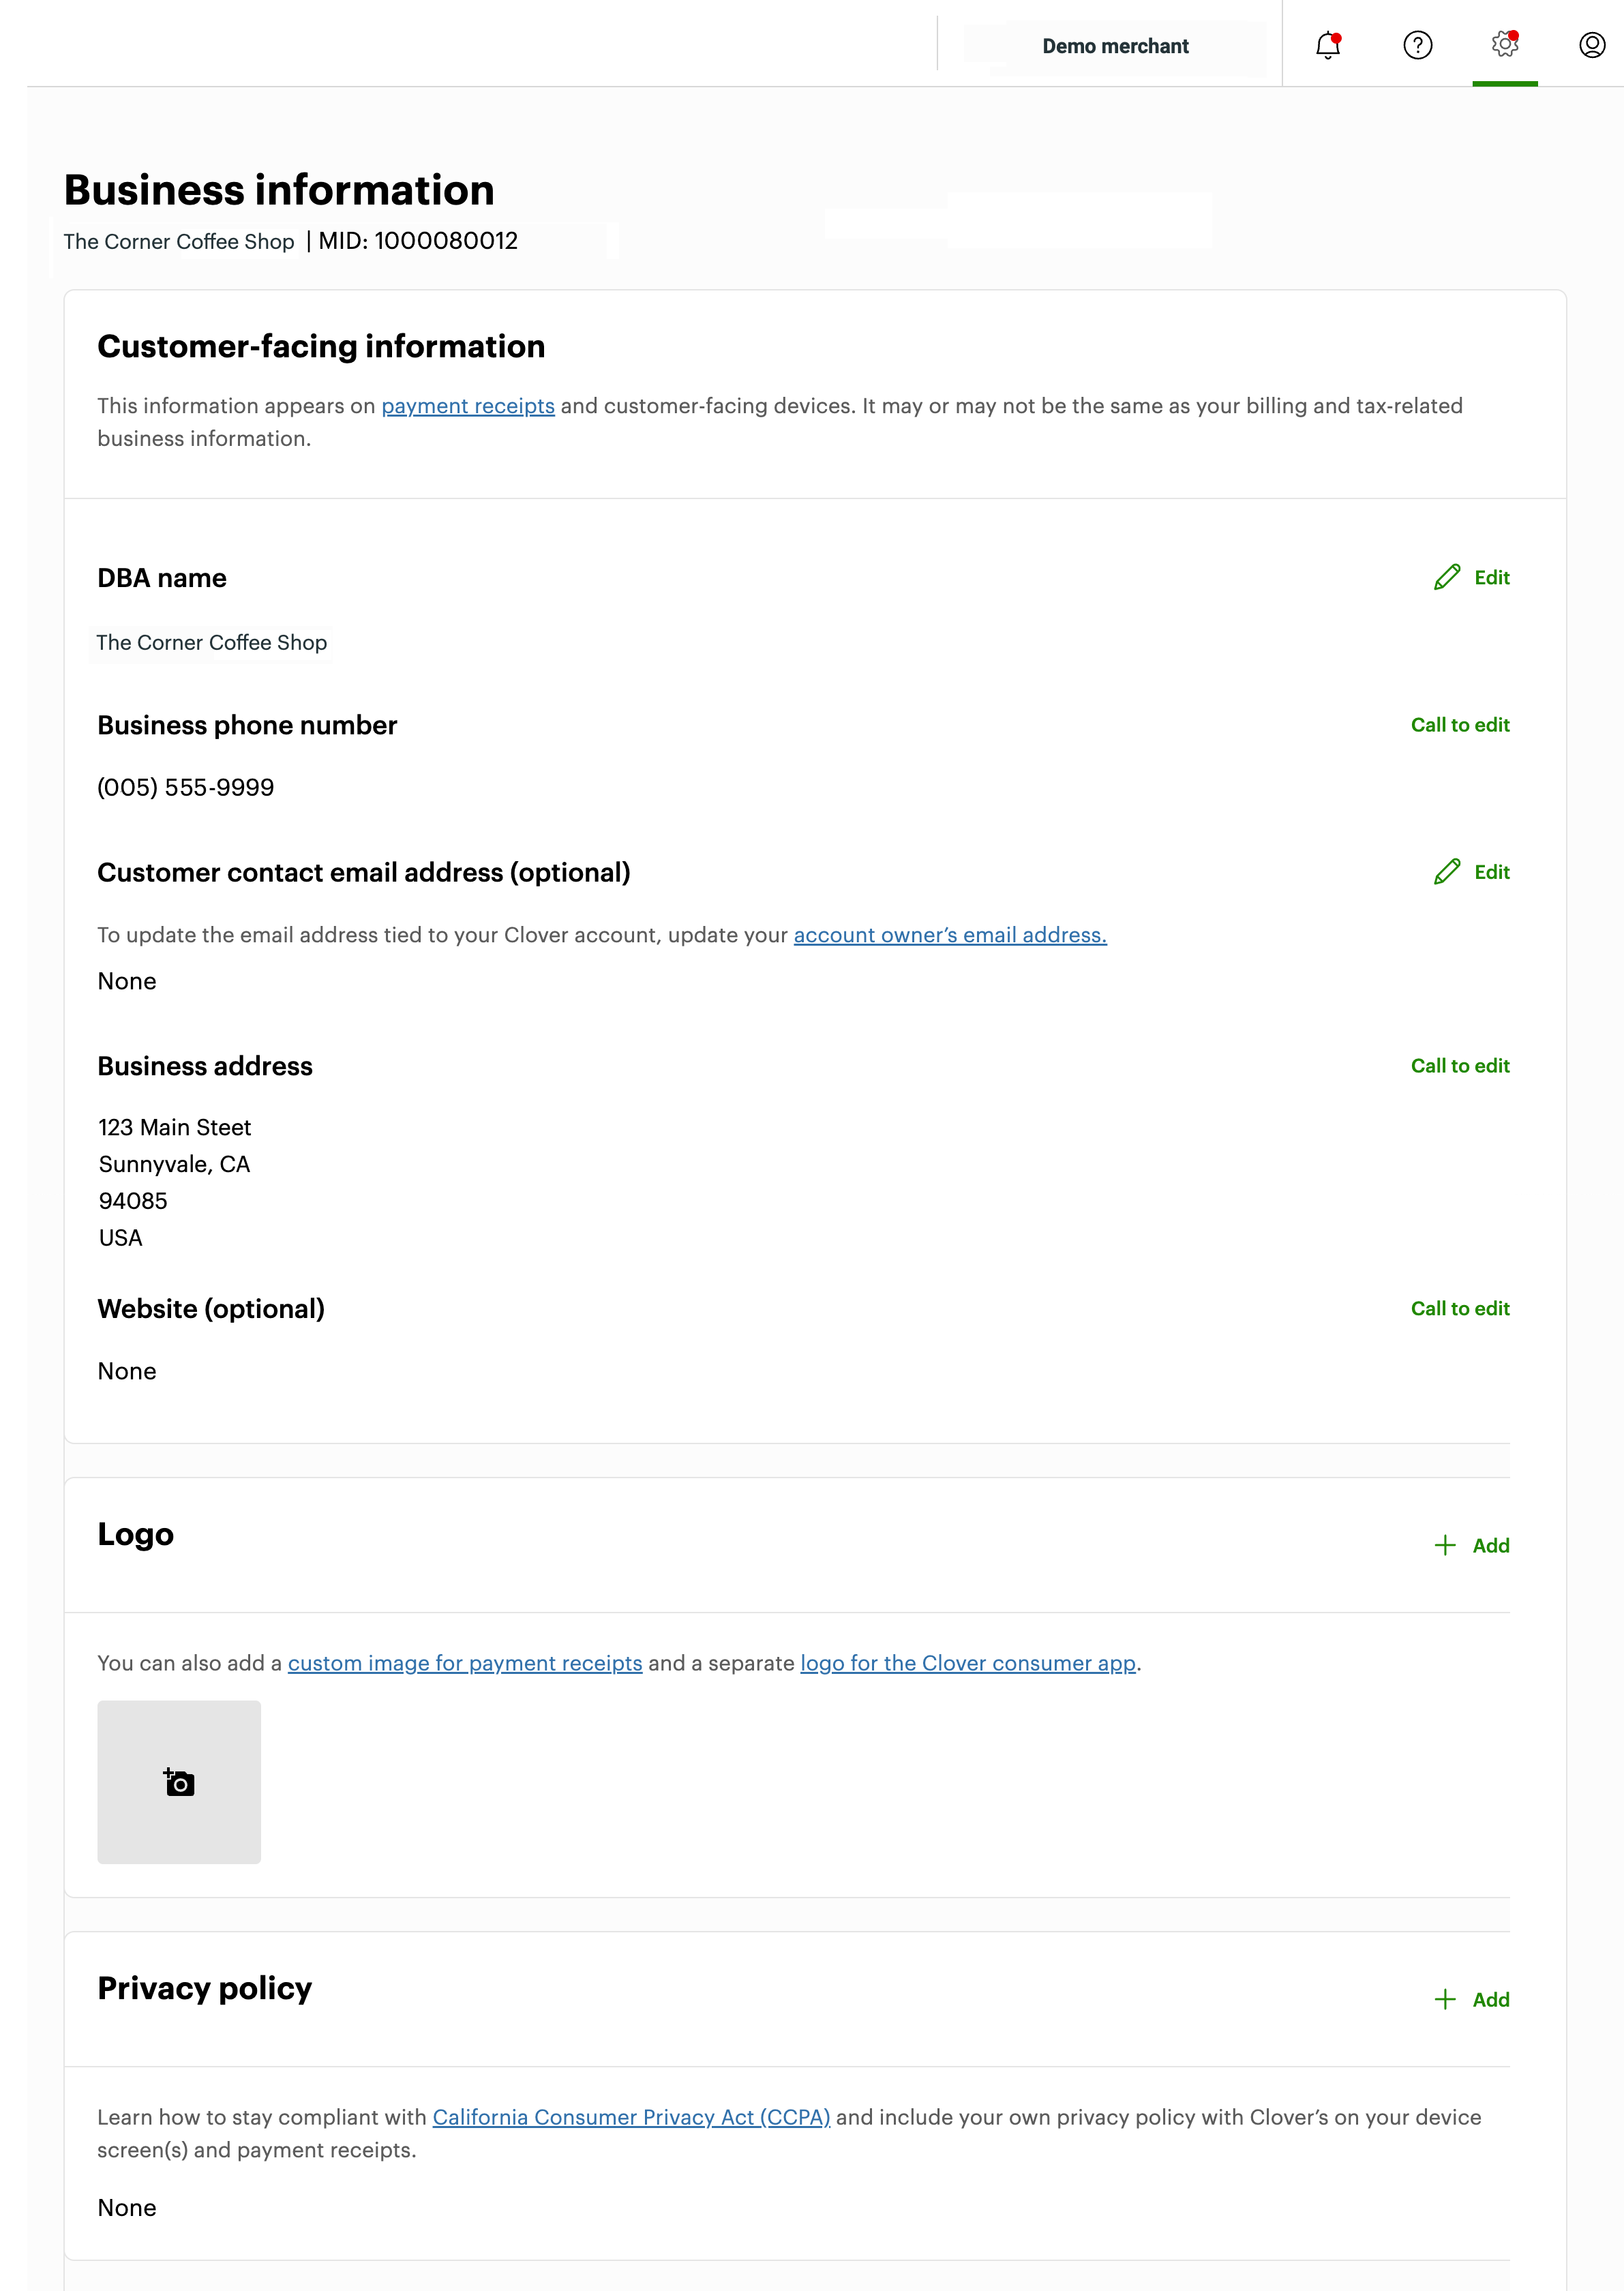
Merchant Dashboard: Business information page
-
Enter information in the fields, such as customer-facing information, doing business as (DBA) name, phone number, and address, privacy policy, and upload the business logo.
-
Click Save.
To update other test merchant settings, on the Settings side panel, click View all settings and see all available settings options on the Settings page. For more information, see Clover Help for merchants.
Updated 4 months ago