Use webhooks
Webhooks send you notifications when merchants who have installed your app perform certain events
Webhooks send you notifications when merchants who have installed your app perform certain events, such as creating an inventory or updating an order. For example, if you have Read Inventory permission and the merchant updates their inventory, you can set up webhooks to receive a POST request to an endpoint you specified. See Set up a test URL for webhooks.
Prerequisites
- Install your app on the test merchant. See Install your test app.
- Provide the Read permission that is required to receive webhook notifications for an event. For example, the Read Inventory permission is needed for events related to the inventory item webhooks. See Event type keys.
- Set up a publicly accessible HTTPs endpoint on your app as a webhook receiver. Localhost does not work for webhooks.
Set up a test URL for webhooks
You must have a simple web server running on your computer that can receive a webhook setup request and verification code. You can:
- Create a web server and test the webhook notifications. You can use a tool, such as Postman, for testing. See Use Postman to test your webhook.
- Use one of the following tools to make your localhost available for testing after your web server is running:
Step 1: Configure a callback link (URL)
You need to configure a callback link (URL) to receive notifications. Clover supports only HTTPS-enabled callbacks. The response to the server's request from your URL needs to be a 200 OK code. To configure a callback URL:
- Log in to your sandbox Developer Dashboard.
- From the left navigation menu, click Your Apps > App name > App Settings. The App name - App Settings page appears.
- Click Webhooks. The Edit Webhooks page appears.
- In the Webhook URL field, enter a callback link (URL). Example: You can use Postman to create a mock server link (URL) and then use it in the Webhook URL field:
https://021f8db8-195b-45b2-b7ae-0c4173efcdfb.mock.pstmn.io/nwtr.
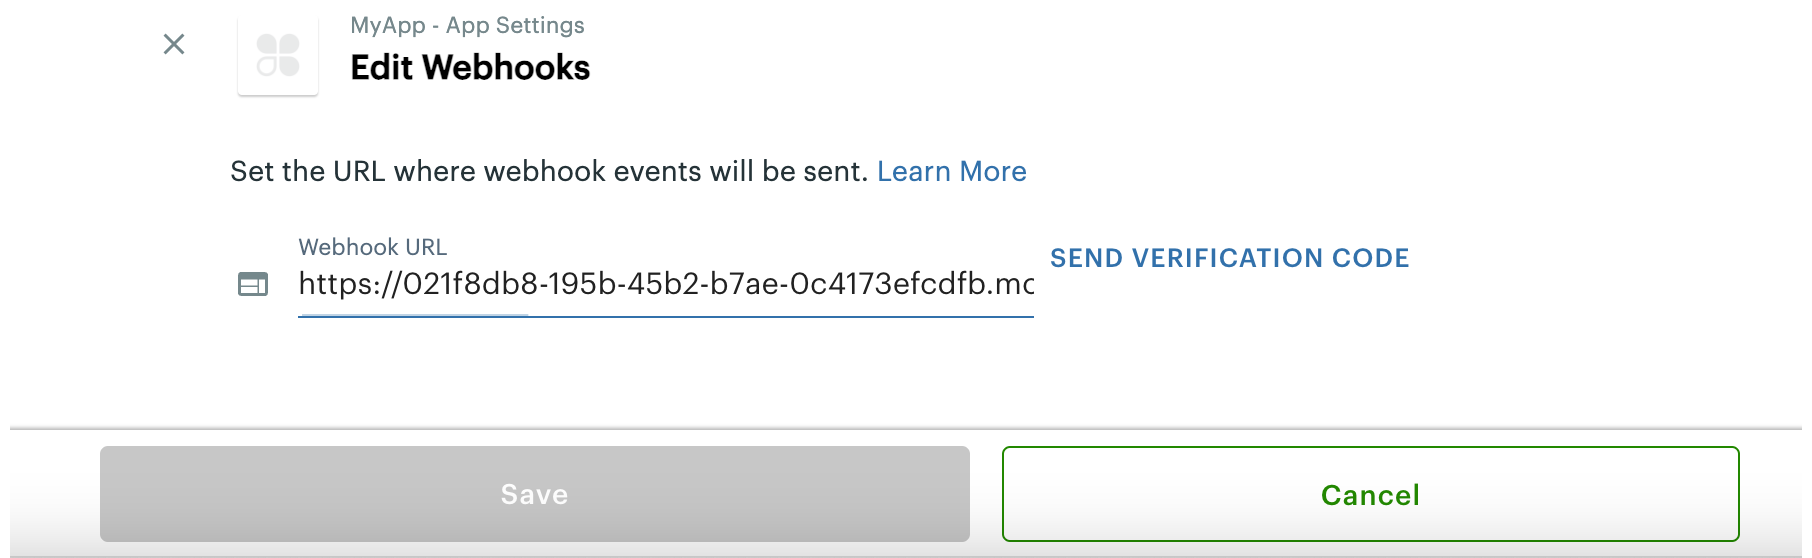
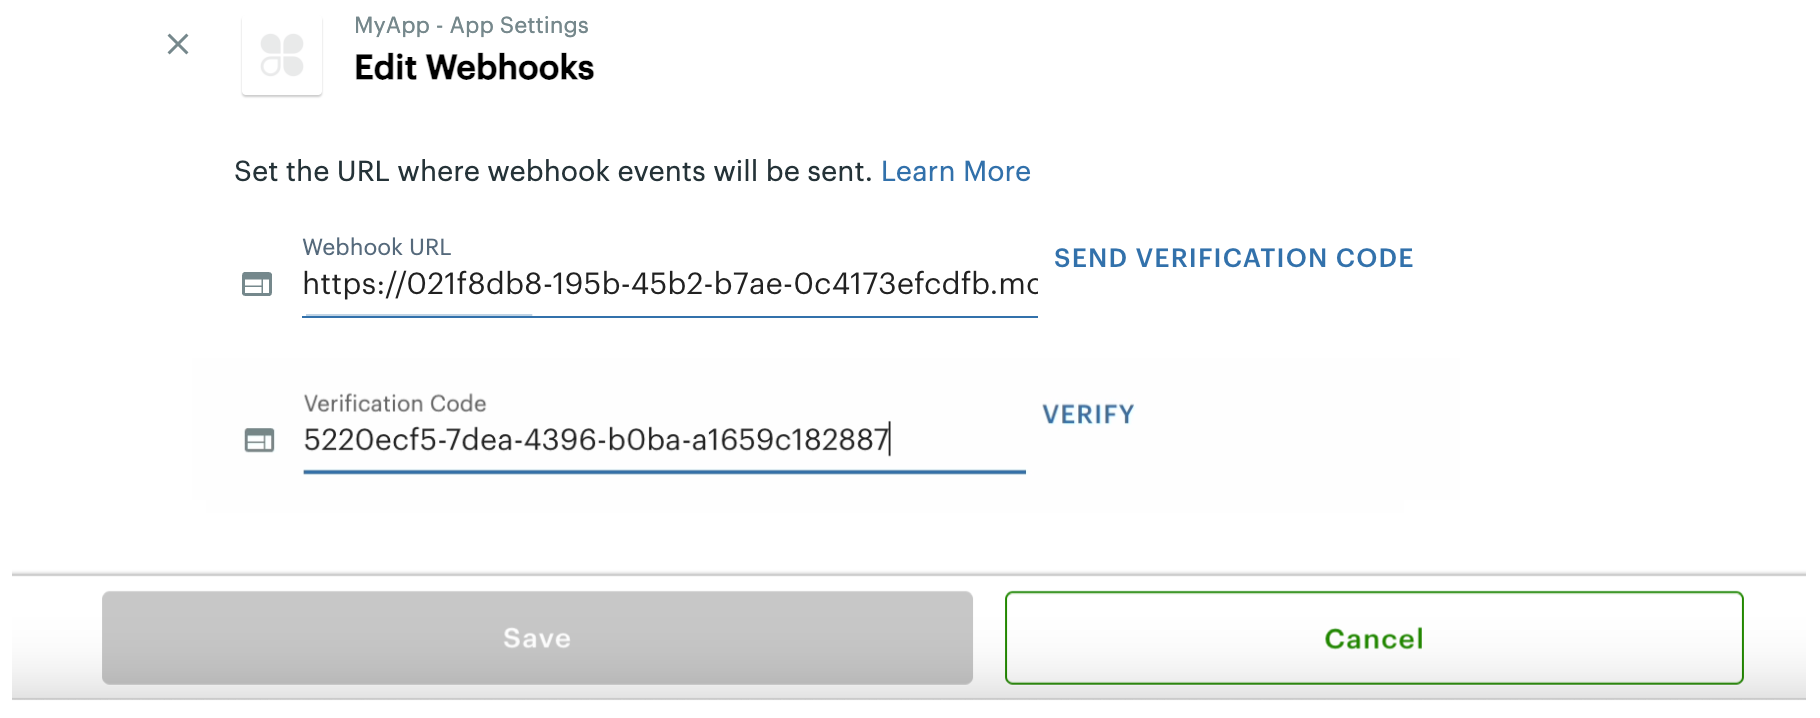
- Click Send Verification Code.
- The Verification Code field displays on the Edit Webhooks page.
- A POST request with a verification code is sent to your callback URL.
{"verificationCode":"5220ecf5-7dea-4396-bOba-a1659c182887"}- From the POST request, copy the verificationCode value, paste it in the Verification Code field, and then click Verify.
- Click Save. The Events Subscriptions section displays on the Edit Webhooks page.
Step 2: Subscribe to event types
You need to subscribe to event types to send webhook notifications based on event triggers in your app.
- After you complete the steps to configure your callback URL, you can subscribe to categories of event types in the Edit Webhooks—Events Subscriptions section.
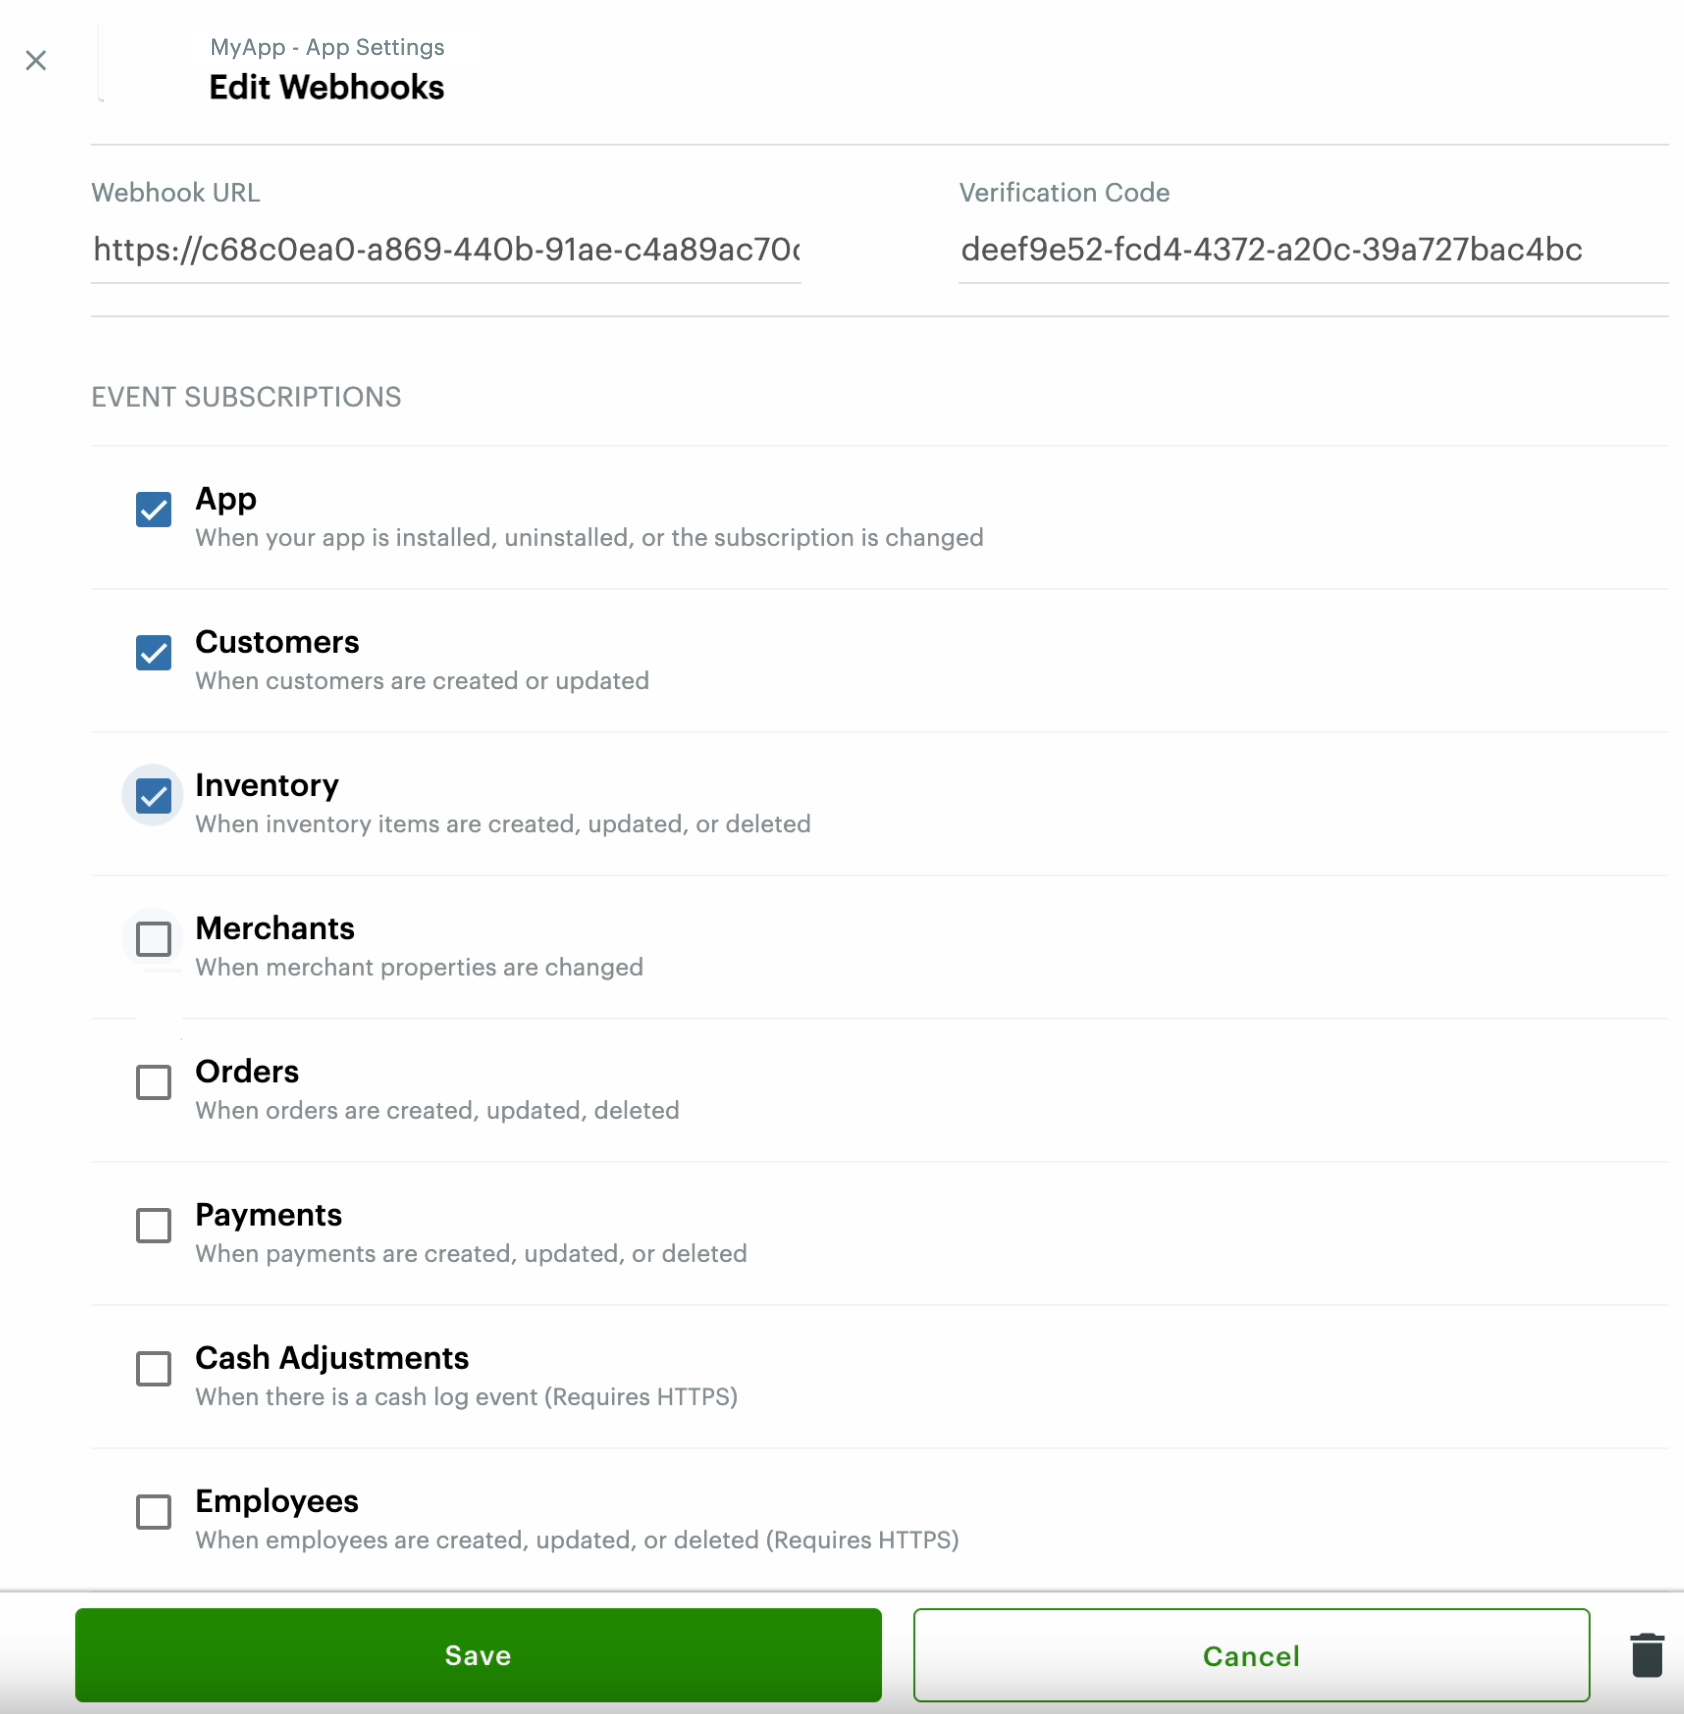
- Select a checkbox to subscribe to an event type.
- Click Save. The webhook callback URL and verification code displays in the Webhooks section on the App Settings page.
IMPORTANTEach event type subscription requires the corresponding read permission from the merchant. If you change permissions after a merchant installs your app, the permissions won't update for that merchant until the merchant uninstalls and reinstalls the app.
For more information, see Set app permissions.
Step 3: Validate and test notifications success rate
After the webhook setup for an event is complete, you receive webhook requests at the callback URL each time the event occurs.
Verify the Clover auth code header
Use the Clover Auth Code key to verify that your webhook messages originate from Clover.
- Log in to the Developer Dashboard.
- From the left navigation menu, click Your Apps > App name > App Settings. The App name - App Settings page appears. The Webhooks section displays the Clover Auth Code key. This key displays in every message header after the webhook callback URL is validated.
"X-Clover-Auth":"0307e264-b33a-4913-88aa-37b10014a0b8"Test webhook notifications
Clover recommends that you test the success rate of notifications received through the webhook service.
- Log in to the Merchant Dashboard.
- From the left menu, click Inventory > Item. The available items appear.
- Select an item checkbox. The Item Basics page appears.
- Edit the item name and click Save. Clover sends out a notification to the webhook endpoint.
Sample notification
{
    "appId":"DRKVJT2ZRRRSC",
    "merchants":
    {
        "XYZVJT2ZRRRSC":[
            {
                "objectId":"O:GHIVJT2ABCRSC",
                "type":"CREATE",
                "ts":1537970958000
            },
            {
                "objectId":"O:ABCVJTABCRRSC",
                "type":"UPDATE",
                "ts":1536156558000
            }
        ],
        "MNOVJT2ZRRRSC":[
            ...
        ]
    }
}
Understand the message format and event objects
Webhook message format
The messages that Clover sends to your webhook URL contain the following information:
| Field | Description |
|---|---|
appId | Identifier (ID) of the application that sends the data updates. |
merchants | One or more merchant arrays indicated by the merchant identifier (mID). |
update | One or more - |
Update object
Each update is indicated by a JSON or XML object for the webhook event containing the following information:
| Field | Description |
|---|---|
objectId | <key of event type>:<event object ID> See Event type keys. |
type | Operation type: CREATE, UPDATE, or DELETE. |
ts | Time stamp. Format: Unix time in milliseconds |
Event type keys
The objectId value begins with a key to indicate the event type. The Clover webhook event types are as follows:
| Key | Event type | Description | Permissions |
|---|---|---|---|
A | Apps | App is installed, uninstalled, or the subscription is changed. Tip: To gain insights into the performance of your published apps, you can use out-of-the-box install and revenue metrics. | Read merchant |
C | Customers | Customer record is created, updated, or deleted. | Read customers |
CA | Cash adjustments | Cash log event occurs. | Read merchant |
E | Employees | Employee record is created, updated, or deleted. | Read employees |
I | Inventory | Inventory item is created, updated, or deleted. | Read inventory |
IC | Inventory category | Inventory category is created, updated, or deleted. | Read inventory |
IG | Inventory modifier group | Inventory modifier group is created, updated, or deleted. | Read inventory |
IM | Inventory modifier | Inventory modifier is created, updated, or deleted. | Read inventory |
O | Orders | Order is created, updated, or deleted. | Read orders |
M | Merchants | Merchant property is changed, or a new merchant is added. | Read merchant |
P | Payments | Payment is created or updated. | Read payments |
SH | Service hour | Service hour is created, updated, or deleted. | Read merchant |
Troubleshoot webhook notifications
If you are not receiving webhook notifications, use the following checklist:
| Checkbox | Description |
|---|---|
| ✅ | Verify that your webhook URL is correct. |
| ✅ | Verify that the webhook URL is set up to accept POST requests. |
| ✅ | Make sure your endpoint is an HTTPS webhook address with a valid SSL certificate that can correctly process event notifications. |
| ✅ | Verify if your app is already subscribed to a webhook if you set up a new webhook server. For example, if your app is already subscribed to inventory webhooks, you need to: - Clear the inventory webhook and save the changes. |
| ✅ | Make sure you are subscribed to the event type for which you want to receive a notification. |
| ✅ | Verify that your app has required permissions for that event type. For example, the Read inventory permission is needed for inventory item webhooks. |
| ✅ | Check if the merchant has uninstalled and then reinstalled the app if you have changed app permissions after the merchant installed your app. See Set app permissions. |
Appendix: Use Postman to test your webhook
If you have a Postman account, you can use it to create a mock server for the callback link (URL), get a verification code, and test your webhook.
Step 1: Create a Webhook collection in Postman
- Log in to Postman and access your Workspace.
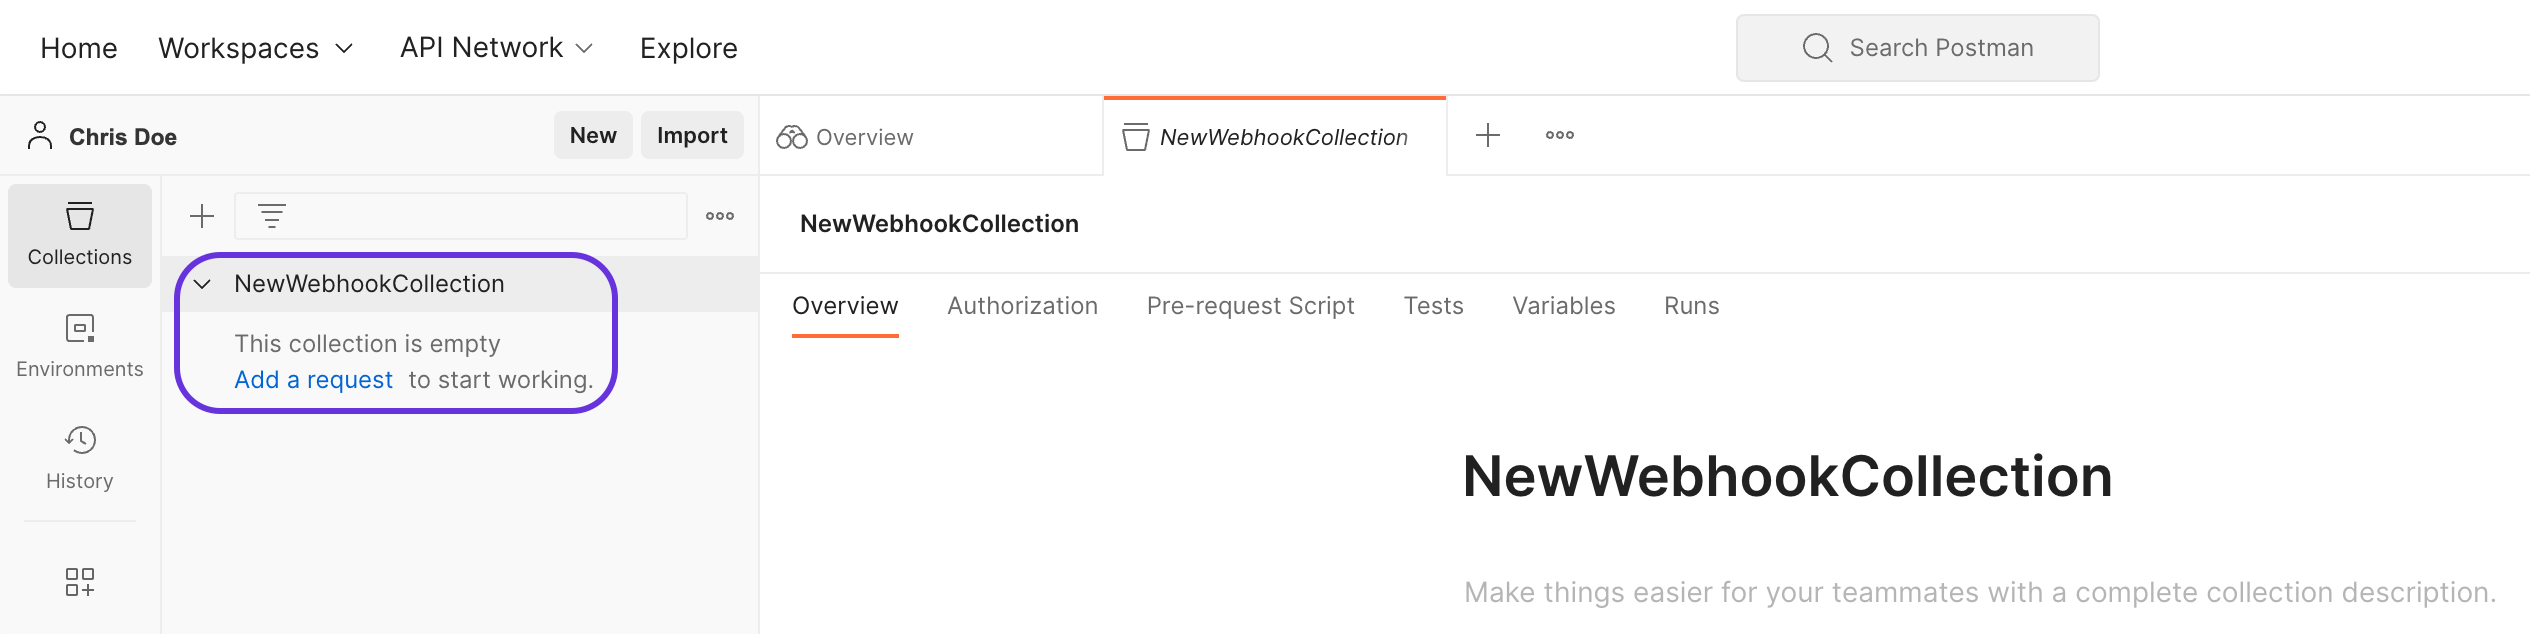
- Click Create New Collection > Blank Collection. The New Collection page appears.
- Rename the new collection to indicate your webhook collection, for example, NewWebhookTest.
- In the left navigation menu, under the new collection, click Add a request.
The HTTP/Webhook Collection/New Request displays a blank GET Request page.
- Replace the New Request with the name of your request, for example, NWTR, to indicate a new webhook test request.
- From the HTTP method drop-down list, select POST and enter the new request name, that is, NWTR.
Note: POST webhook requests respond to the request body and also contain properties like authentication tokens. - Click Save.
- In the left navigation menu, click the ellipsis icon next to the POST request and click Add example.

An example is added under the POST request.
- In the POST request—Body section, enter a sample response, for example,
{"testResponse: "pass"}.

- Click Save.
Step 2: Create a mock server
Mock servers let you simulate API endpoints by returning example responses linked to each request.
- After you create a POST request for your webhook collection, you need to run it as a server.
- In the left navigation menu, click the ellipsis icon next to the webhook collection name and click Mock collection.
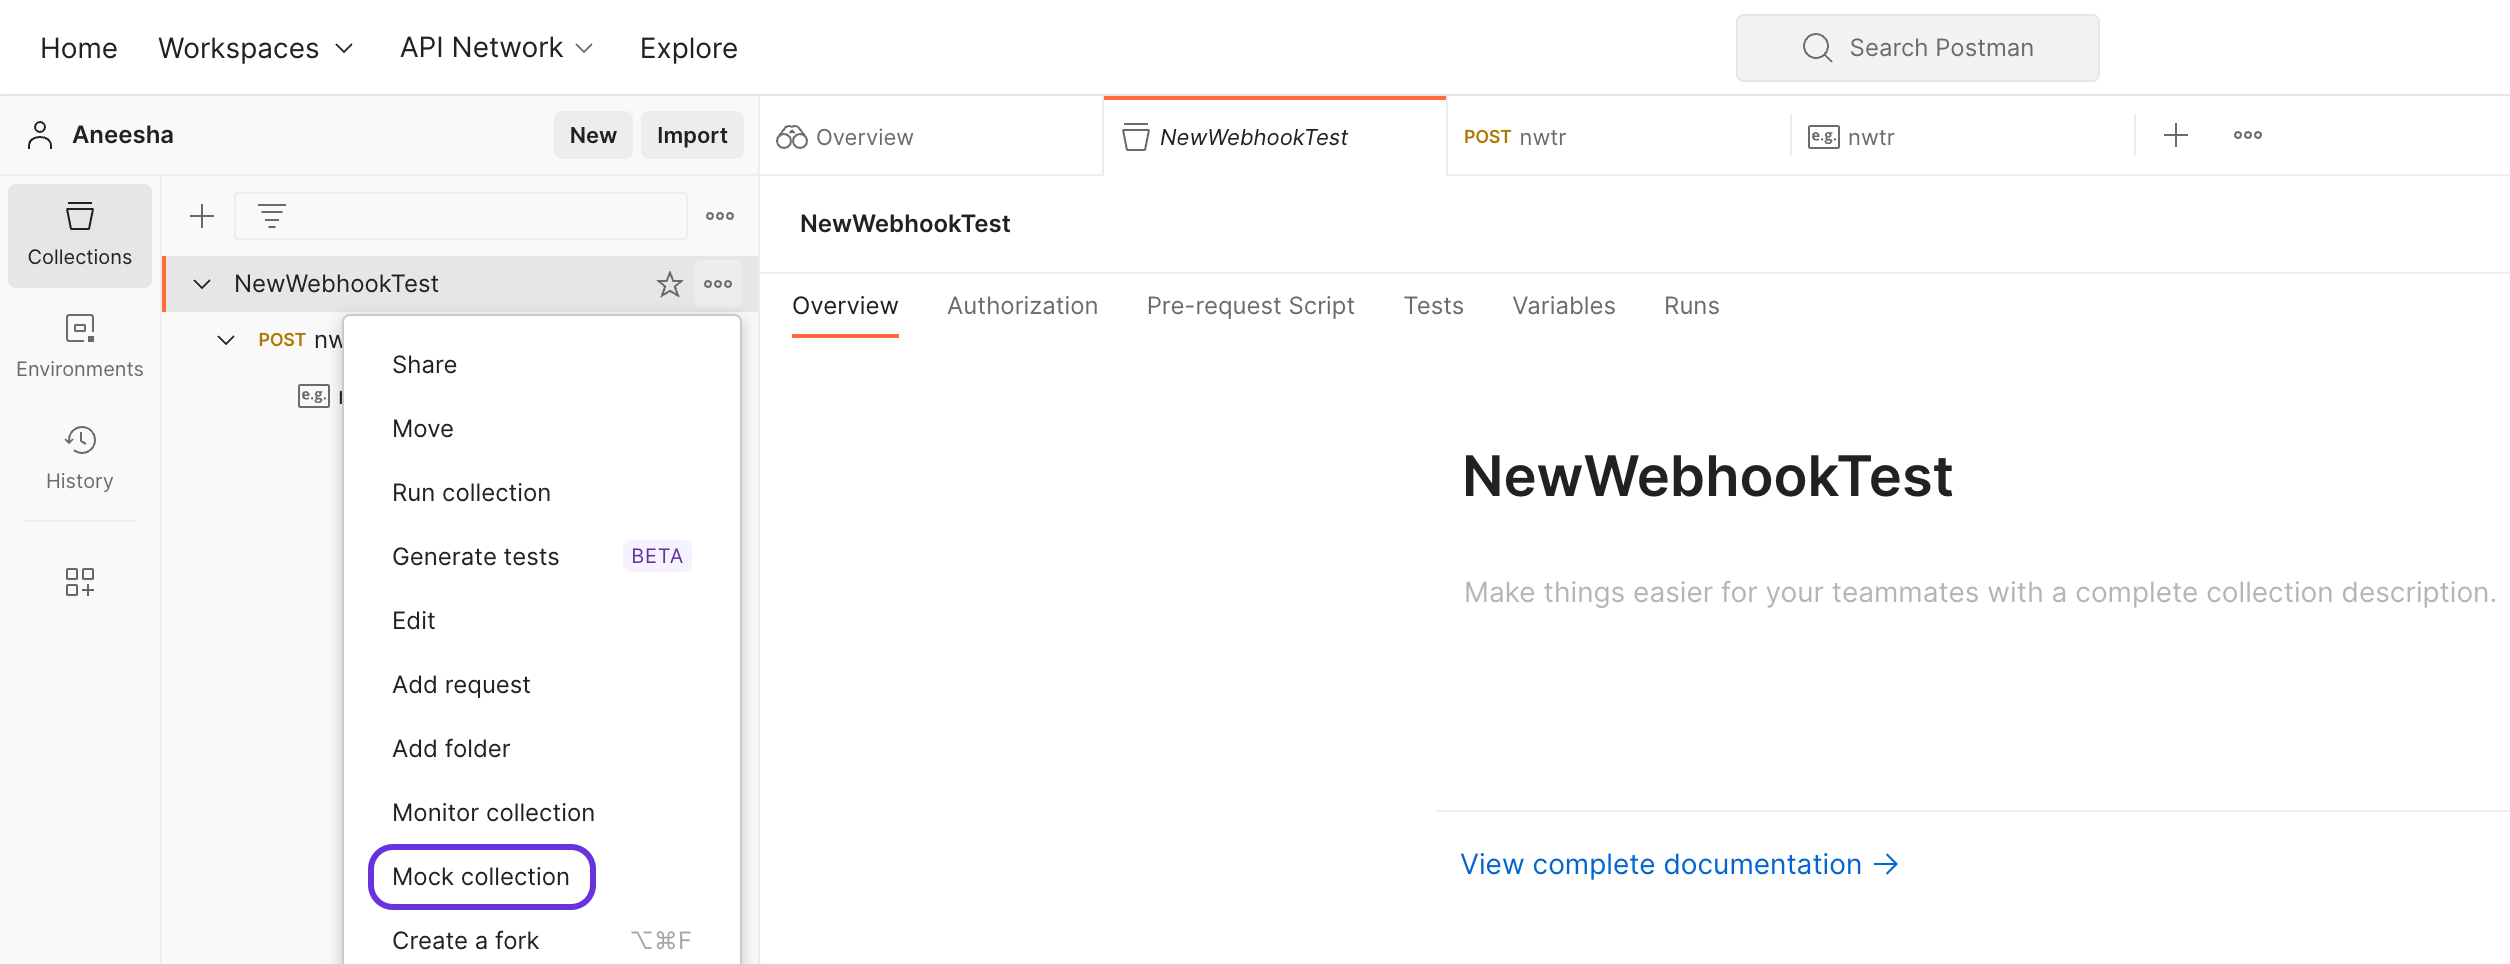
The Create a mock server page appears.
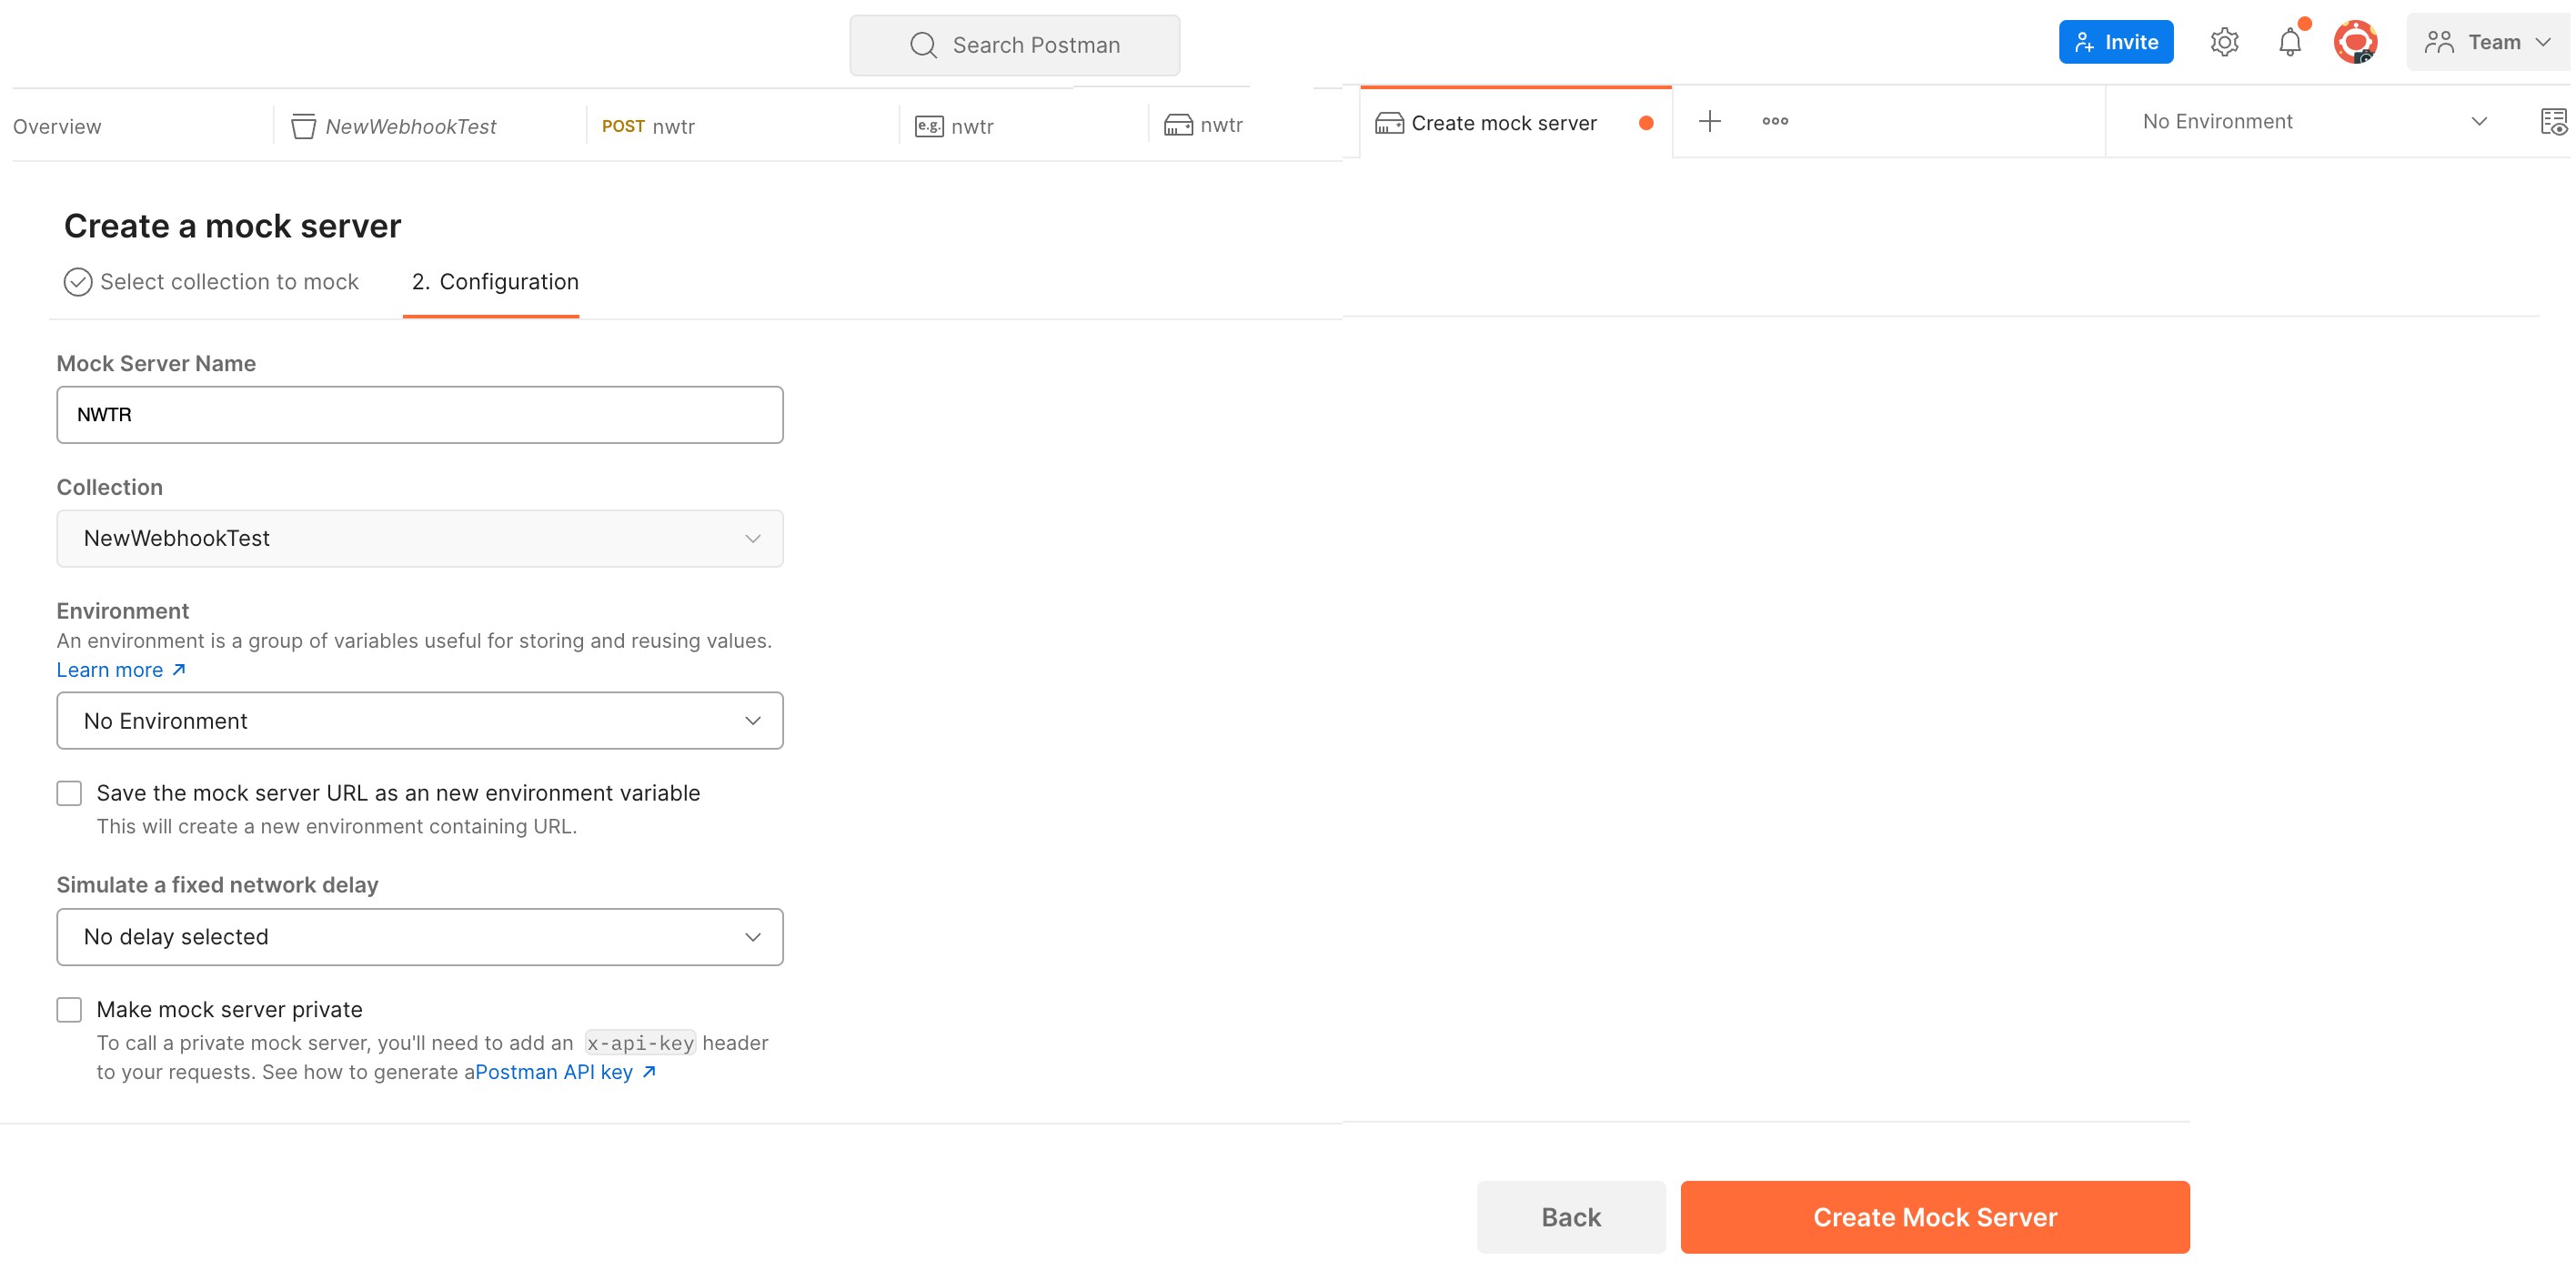
- In the Mock Server Name field, enter the POST request name, for example, NWTR.
- Click Create Mock Server. After the server is running, when a request is sent, the logs display on the Mock server calls page.
- From the top right corner, click Copy URL to copy the mock server link (URL). You need this URL to set up webhooks in your Developer Dashboard. See Step 1: Configure a callback link (URL).
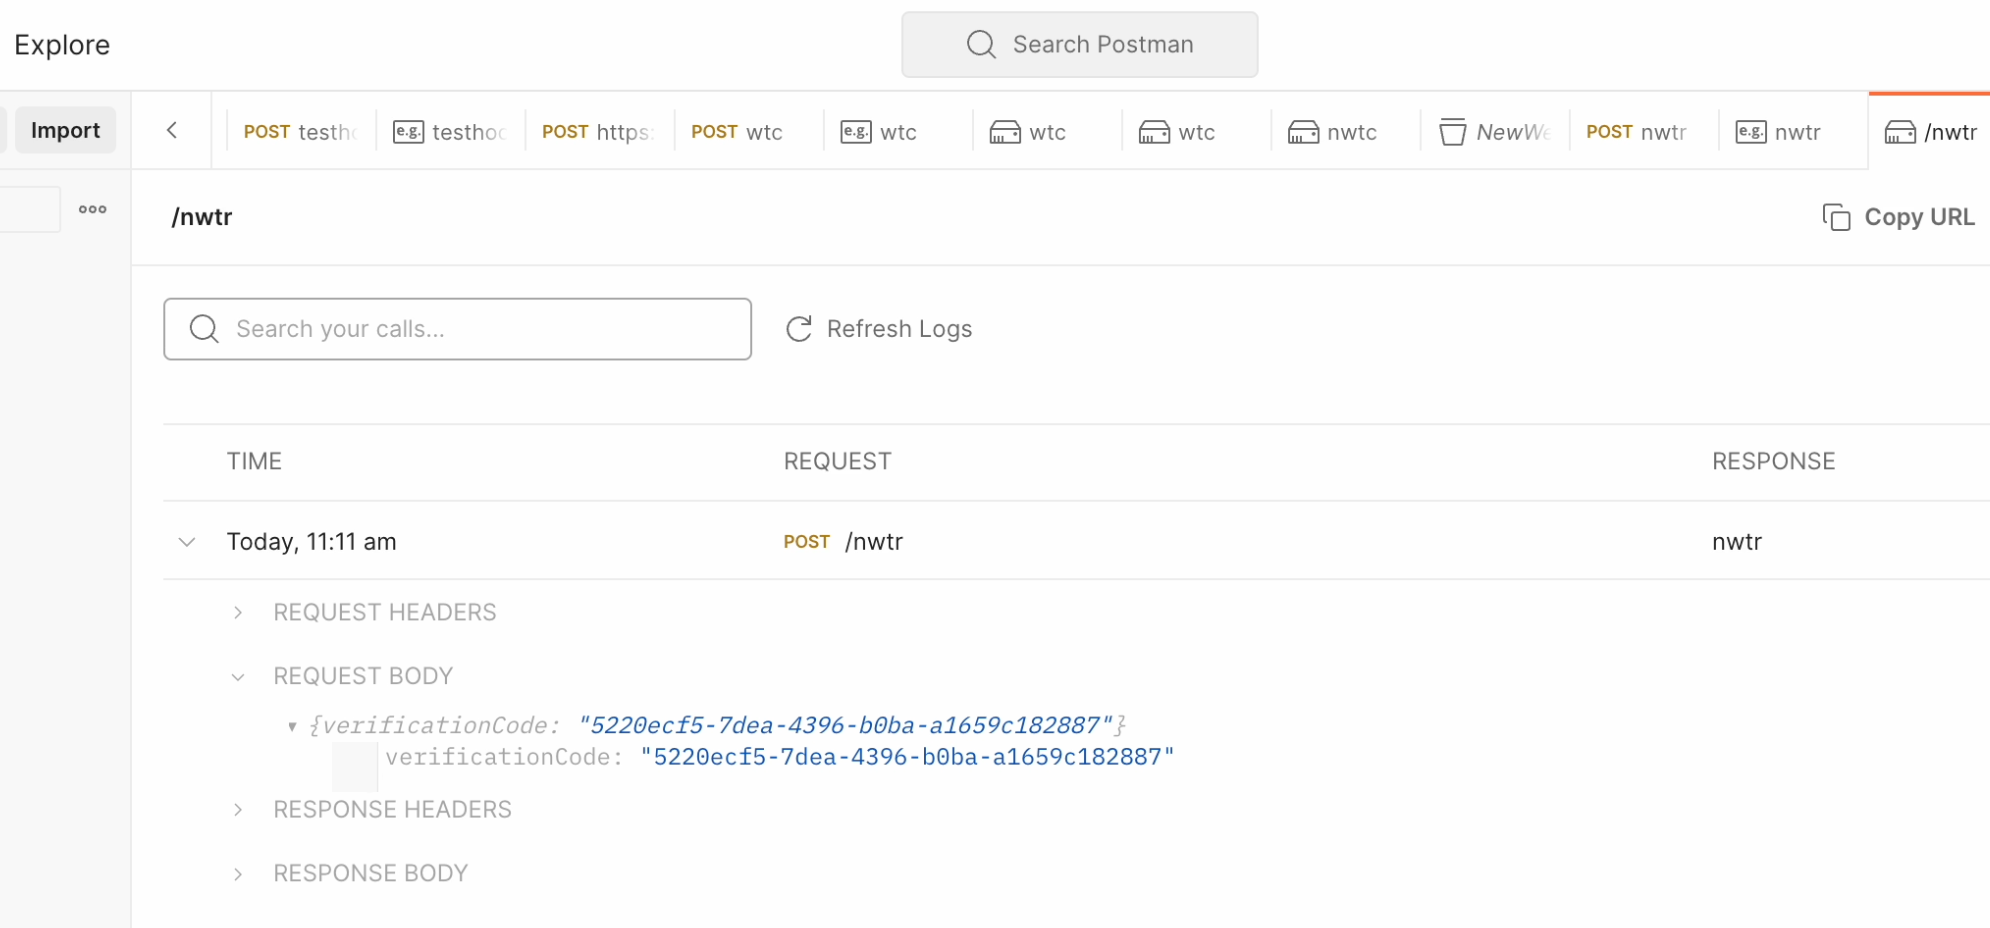
- In your Postman Workspace, click Refresh Logs and copy the verification code that displays.
- In the Developer Dashboard—Edit Webhooks page, in the Verification Code field, enter the copied verification code and click Verify.
- Complete steps to test webhook notifications, and in your Postman Workspace, click Refresh Logs. Review the notification payload that displays.