Redirect merchants to your app
You can build Clover web apps using the Clover REST API. The Clover integration for web applications uses the OAuth 2.0 protocol to secure API tokens for merchants. When setting up a web app, you must enter the app link or site URL that merchants are redirected to after installing and launching an app from the Merchant Dashboard. This link is set in the sandbox Developer Dashboard for testing and in the production Developer Dashboard to launch an approved app and publish it in the Clover App Market.
1. Set app link (URL) redirects for test merchants
Clover redirects test merchants to the app link or site URL that you set on the sandbox Developer Dashboard. For information, see how to set up the app link (URL) and CORs domain.
This URL is used when merchants:
- Install and launch your web app from the Clover App Market.
- Launch your web app from the sandbox or test Merchant Dashboard.
As part of the site URL redirect, Clover appends certain URL parameters, including merchantId of the business and employee_id of the current user. To view all query parameters included in these redirects, see how to receive an authorization code.
2. Authenticate merchants and users
If users browse directly to your web app, rather than launch it from the Merchant Dashboard, you need to redirect them to Clover for authentication using OAuth flows in Clover.
In the OAuth response, you can view the following information:
- The
employee_idof the current user associated with the merchant. A business can have multiple devices and employees. The owner of the business, along with managers and employees, have anemployee_idassociated with their account. - The
merchantIdof the business. ThemerchantIdis a universally unique identifier (UUID) that Clover assigns to a merchant business, and it is used when making REST API calls.
You can use the merchant identifier (merchantId) and employee identifier (employee_id or empId) to determine if the merchant has used your app before and provide a user-friendly app install and setup experience.
Locate the merchant identifier (merchantId)
Clover assigns a universally unique identifier (UUID) known as the merchantId to every merchant business. You can search for and view merchantId in both the sandbox and production environments. This merchantId is needed when you make Clover REST API calls.
To locate the merchantId:
- Log in to the Developer Dashboard.
- From the Developer Account drop-down list, select a merchant name under Businesses. The Merchant Dashboard for the selected merchant appears.
- From the top-right menu, click Settings > View all settings. The Settings page appears.
- In the About Your Business section, click Merchants.

Merchant Dashboard—Settings
The User Settings page displays the merchantId for the selected merchant. The merchantId is the 13-alphanumeric identifier below the merchant name in the Merchant column. The same id displays in the browser URL for the selected merchant's Merchant Dashboard, for example: https://clover.com/merchants/3D19QN31ANYR5

Merchant Dashboard—User Settings
- To view another merchantId, enter search criteria in the Search merchants by name, ID, city field, and click Search. The merchant information displays in the search results grid.
Locate the employee ID
- Log in to the Developer Dashboard.
- From the Developer Account drop-down list, select a merchant name under Businesses. The Merchant Dashboard for the selected merchant appears.
- From the left navigation menu, click Emoployees. The Employees page appears. Employee ID is the 13-alphanumeric identifier that displays in the ID column.
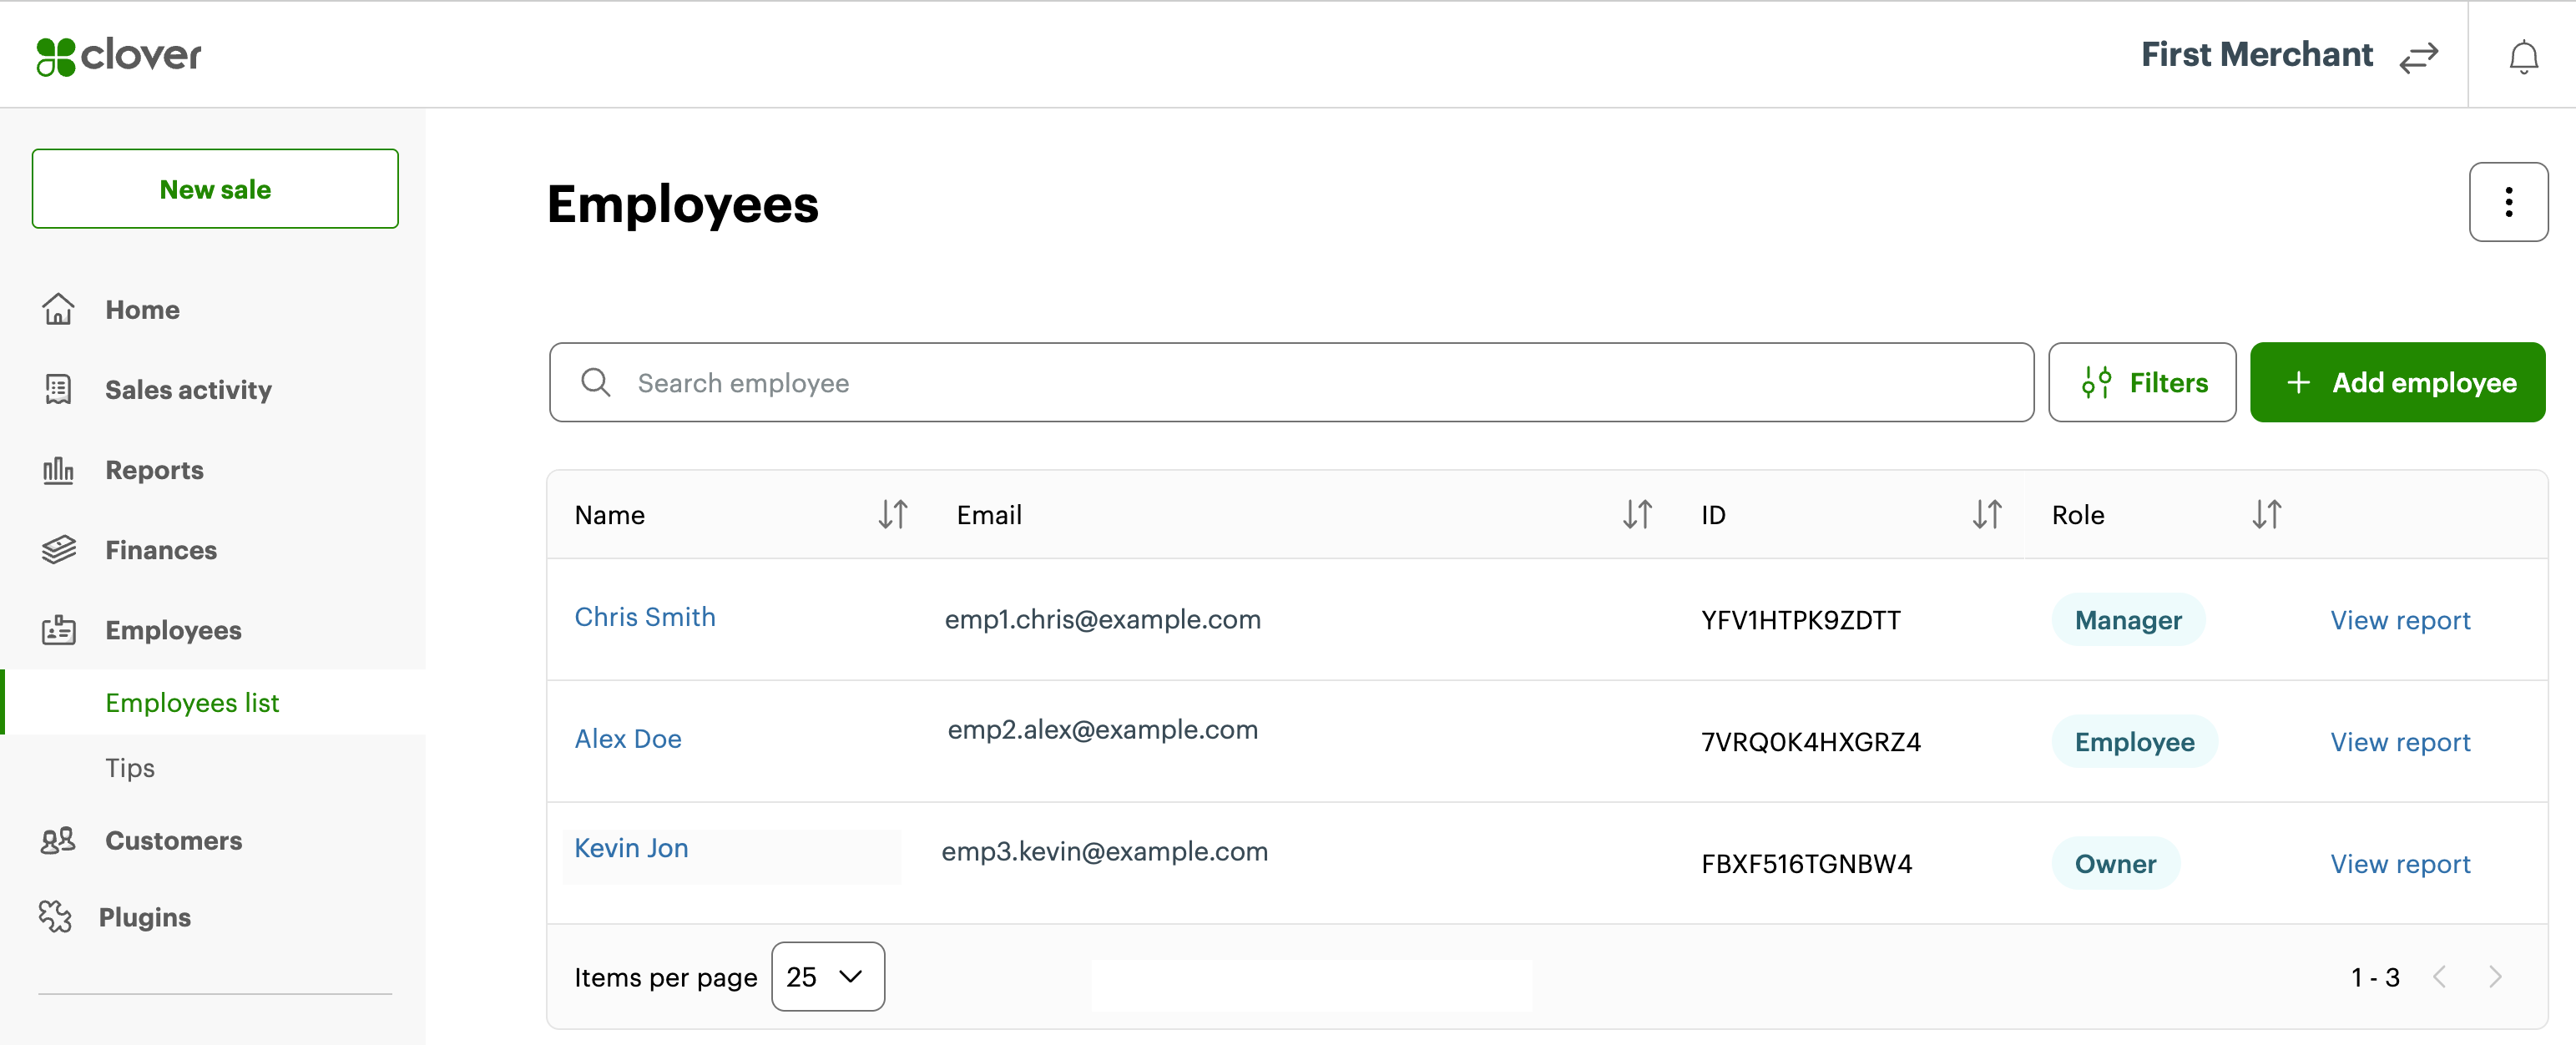
Merchant Dashboard—Employees list
- To view another employee ID, enter search criteria in the Search employees field, and click Search. The employee information displays in the search results grid.
3. Install your test app
To install your app on a test merchant account:
- Log in to the Developer Dashboard.
- From the left navigation menu, click Your Apps > App name > Market Listing. The App name - Market Listing page appears.
- Click Preview in App Market. The Merchant Dashboard for your test merchant account displays the App Market preview of your app.
- Click Connect. When you accept the installation, the app is installed for your test merchant account on the Merchant Dashboard.
Updated 4 months ago