Set app permissions for endpoints and integrations
Permissions are two-fold:
- Permissions set on the Developer Dashboard based on the Ecommerce integration types.
- Permissions your app integration must request from merchants to access and update their data.
Your app should only request the minimum permissions required for your app to function.
Set app permissions and integration type
You can view and configure the settings and permissions that your app requires for accessing Clover merchant data.
- Log in to the Global Developer Dashboard.
- Click the Sandbox toggle icon to go to either the sandbox or the production environment.
- In the My Apps section, click an app. The App name - App Settings page appears.
- Click Requested Permissions. The Edit Requested Permission page appears.
- Select your app's read or write permissions for Ecommerce API, as required. For any selected permission, provide an in-line comment about how your app is using this information.
- Click Save. Your selected permissions are displayed on the App Settings page.
- Click Ecommerce Settings. The Edit Ecommerce Settings page appears.
- Select your integration type.
- Click Save. Your selected integration type displays on the App Settings page.
Required app permissions to use Ecommerce APIs
Required permissions to use various Ecommerce endpoints are:
PAKMS service endpoint
| Operation | Request | Endpoint | Required permission |
|---|---|---|---|
| Get a public Ecommerce API key | GET | /pakms/apikey | Online payments |
Tokenization service endpoint
| Operation | Request | Endpoint | Required permissions |
|---|---|---|---|
| Create a token | POST | /v1/tokens | None. You need an Ecommerce API key. |
Ecommerce service endpoints
Charge endpoints
| Operation | Request | Endpoint | Required permissions |
|---|---|---|---|
| Create a charge | POST | /v1/charges | Online payments |
| Capture an open charge | POST | /v1/charges/{chargeId}/capture | Read payments Write payments Online payments |
| Get charges | GET | /v1/charges | Read payments |
| Get a single charge | GET | /v1/charges/{chargeId} | Read payments |
Customer endpoints
| Operation | Request | Endpoint | Required permissions |
|---|---|---|---|
| Create a card-on-file (COF) customer | POST | /v1/customers | Read customers Write customers Online payments |
| Add a card to an existing customer | PUT | /v1/customers | Read customers Write customers Online payments |
| Remove a card from an existing customer | DELETE | /v1/customers | Read customers Write customers Online payments |
Order endpoints
| Operation | Request | Endpoint | Required permissions |
|---|---|---|---|
| Create an order | POST | /v1/orders | Read merchant Read orders Write orders To add a customer: Read customers To add tax_rates to items: Read inventory |
| Get orders | GET | /v1/orders | Read orders Read payments |
| Get an order | GET | /v1/orders/{orderId} | Read customers Read merchant Read orders Read payments Note: GET request expands the following fields: - lineItems - lineItems.taxRates - payments - refunds - customers |
| Pay for an order | POST | /v1/orders/{orderId}/pay | Read customers Read inventory Read merchant Read orders Read payments Online payments |
| Return an order | POST | /v1/orders/{orderId}/returns | Read customers Read merchant Read orders Read payments Online payments |
Refund endpoints
| Operation | Request | Endpoint | Required permissions |
|---|---|---|---|
| Get refunds | GET | /v1/refunds | Read payments |
| Get a refund | GET | /v1/refunds/{refundId} | Read payments |
| Refund a charge | POST | /v1/refunds | Read customers Read merchant Read orders Read payments Online payments |
Recurring Payments service endpoints
Plan endpoints
| Operation | Request | Endpoint | Required permissions |
|---|---|---|---|
| Create plan | POST | /v1/plans | Read merchant Write merchant |
| Get a plan | GET | /v1/plans/{planId} | Read merchant |
| Edit a plan | PUT | /v1/plans/{planId} | Read merchant Write merchant |
| Deactivate a plan | PUT | /v1/plans/{planId} | Read merchant Write merchant |
Subscription endpoints
| Operation | Request | Endpoint | Required permissions |
|---|---|---|---|
| Create a subscription | POST | /v1/plans/{planId}/subscriptions | Read customers Write customers |
| Get a subscription | GET | /v1/subscriptions/{subscriptionId} | Read merchant Read customers |
| Edit a subscription | PUT | /v1/subscriptions/{subscriptionId} | Read customers Write customers |
| Cancel a subscription | PUT | /v1/subscriptions/{subscriptionId} | Read customers Write customers Read merchants |
Examples—Ecommerce permission sets for integrations and functions
Your app requires a specific set of permissions depending on its functions. The following examples indicate the different permissions needed for different integration types.
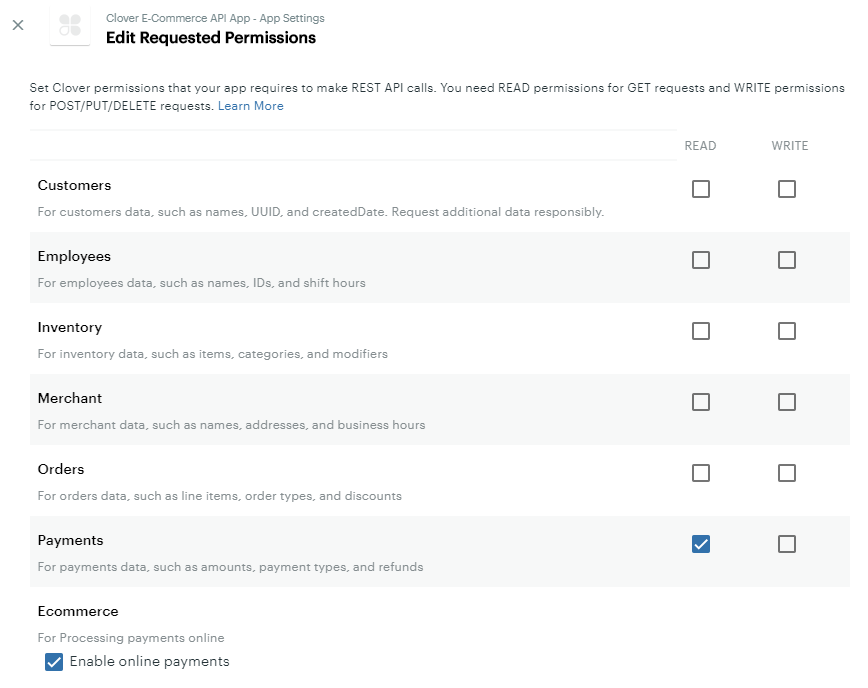
Example #1: Clover iframe integration with no order or customer management
A simple app can build an online store for a merchant and process payments in this store. The app can not track customer or order data though this is available on the Merchant Dashboard.
Two permissions are required for this app:
- Online payments
- Read payments

Edit Requested Permissions: Payments
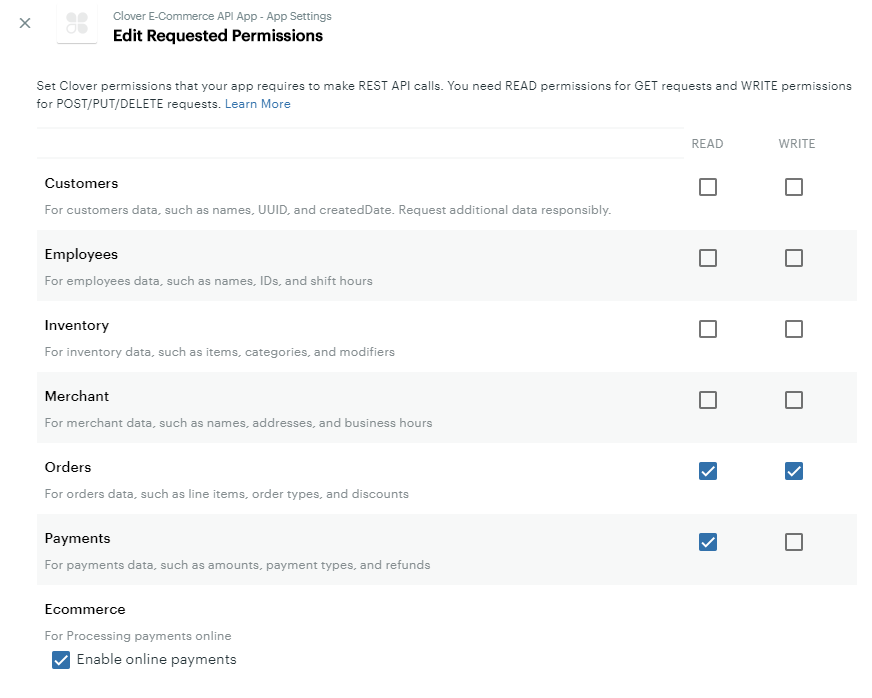
Example #2: Clover iframe integration with basic order management
A slightly more complex app can build an online store for a merchant and process payments in this store. This app can also display some basic order information to the merchant and provide order modification tools. The merchant is required to log on to the Dashboard to view or make changes to customer data.
Four permissions are required for this app:
- Online payments
- Read payments
- Read orders and write orders

Edit Requested Permissions: Orders and Payments
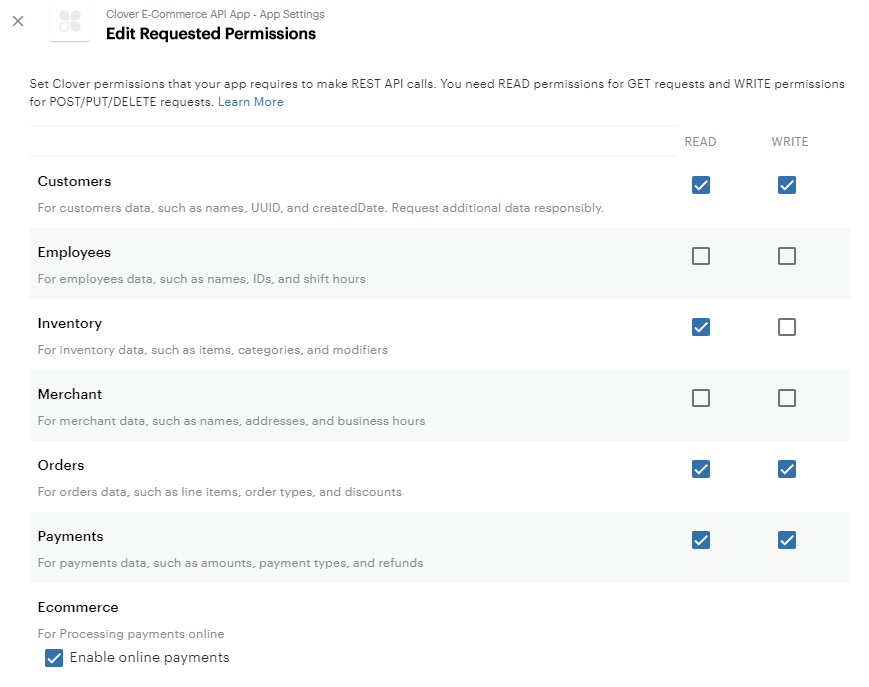
Example #3: Clover Ecommerce API integration with payment, order, and customer management features
A complex app can build a complete online store for customers with business management features for the merchant.
Eight permissions are required for this app:
- Online payments
- Read payments and write payments
- Read orders and write orders
- Read customers and write customers
- Read inventory

Edit Requested Permissions: Customers, Inventory, Orders, and Payments
Related topics
Updated 10 months ago
