Ecommerce API—Accept payments flow
With the Clover Ecommerce API and SDKs, you can build seamless Payment Card Industry (PCI) compliant payment experiences for merchants with hosted iframe and API integrations. All payments and transactions with the Clover Ecommerce API are PCI compliant and require tokenized card information.
The standard flow for accepting payments with Ecommerce API consists of two steps:
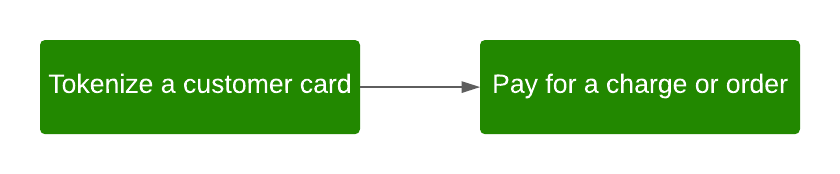
Ecommerce API standard flow to accept payments
Prerequisites
To tokenize a customer card, you need to encrypt a customer card as a source token using the Ecommerce API: Create a card token endpoint. To use the endpoint, you need an Ecommerce API token or apiAccessKey from the Public Access Key Management Service (PAKMS). The Ecommerce API key, also known as the PAKMS key, identifies the merchant who is tokenizing the customers' cards. You can use the same static Ecommerce API key to tokenize multiple cards for that merchant.
- Generate an OAuth API token or
access_token. - Review the Ecommerce API Reference for additional steps to work with charges, customers, orders, refunds, and more.
Step 1: Generate an Ecommerce API key
-
Get an authorization code or
auth_tokenthat displays ascodein the link (URL) of your test app connected with a test merchant in the sandbox. See Generate an OAuth API token oraccess_token.
Test app install: URL displays the client_id and authorization code or auth_token
-
Send a GET request using Postman to the following URL using:
App IDas theclient_id,App Secretfrom the App Settings page as theclient_secret, and- Authorization code or
auth_tokenas thecode
https://apisandbox.dev.clover.com/oauth/token?client_id={appId}&client_secret={APP_SECRET}&code={AUTHORIZATION_CODEhttps://apisandbox.dev.clover.com/oauth/token?client_id=RKxxxxxxxxS9C&client_secret=d46dxxxx-xxxx-xxxx-xxxx-xxxxxxxx1b77&code=1ccdxxxx-xxxx-xxxx-xxxx-xxxxxxxea1bIn response, the Clover server displays an API access_token.
{
   "access_token":"{API_TOKEN}"
}
{
"access_token": "ce7exxxx-xxxx-xxxx-xxxx-xxxxxxxx4b24"
}Note: All Ecommerce API endpoints require an OAuth-generated access_token with specific permissions.
-
Send a GET request to the
https://scl-sandbox.dev.clover.com/pakms/apikeyendpoint. -
Use the OAuth API token or
access_tokenas the Bearer token in your request.In response, the Clover server returns an
apiAccessKey, which is the Ecommerce API key or PAKMS key. You can use theapiAccessKeyas theapikeyheader when you tokenize a card.
curl --request GET \
--url 'https://scl-sandbox.dev.clover.com/pakms/apikey' \
--header 'Authorization: Bearer {access_token}'
{
"active": true,
"apiAccessKey": "af4exxxxxxxxxxxxxxxxxxxxxxxxd145",
"createdTime": 1722230745532,
"developerAppUuid": "RKxxxxxxxxx9C",
"merchantUuid": "6Xxxxxxxxxx91",
"modifiedTime": 1722230745532
}In Step 2: Tokenize a card, use the apiAccessKey as the apikey header.
To learn more about authorization code and the Ecommerce API key, see our blog post Fiddling Through Digital Keys: Clover Auth Tokens and Ecommerce Keys.
Step 2: Tokenize a card
- Send a
POSTrequest to the/v1/tokensendpoint. See Create a card token. - In the
apikeyheader, enter theapiAccessKeygenerated in Step 1: Generate an Ecommerce API key

Create a card token: Header apikey
curl --request POST \
  --url 'https://token-sandbox.dev.clover.com/v1/tokens' \
  --header 'accept: application/json' \
  --header 'apikey: {apikey}' \
  --header 'content-type: application/json' \
  --data '{
    "card": {
      "number": "6011361000006668",
      "exp_month": "12",
      "exp_year": "2030",
      "cvv": "123",
      "brand": "DISCOVER"
    }
  }'
{
"id": "clv_1TSTxxxxxxxxxxxxxxxxxFQif",
"object": "token",
"card": {
"exp_month": "12",
"exp_year": "2030",
"first6": "601136",
"last4": "6668",
"brand": "DISCOVER"
}
}In response, the Clover server returns a source token. All source tokens are alphanumeric and begin with clv_.
To learn more about encrypting and tokenizing card data, see Create a card token tutorial.
Step 3: Pay for a charge or order
After you tokenize a card, use the source token to pay for a charge or an order. For information on required request parameters, see Create a charge tutorial.
- Send a
POSTrequest to the/v1/chargesendpoint to pay for an $18.00 charge. - In the
authorization: Bearerheader, enter theaccess_tokengenerated in Step 1: Generate an Ecommerce API key. - In the
sourceparameter, enter the token generated in Step 2: Tokenize a customer card. Allsourcetokens are alphanumeric and begin withclv_.
curl --request POST \
  --url 'https://scl-sandbox.dev.clover.com/v1/charges' \
  --header 'accept: application/json' \
  --header 'authorization: Bearer {access_token}' \
  --header 'content-type: application/json' \
  --header 'x-forwarded-for: {client_ip}' \
  --data '{
    "amount": 1800,
    "currency": "usd",
    "source": "{token}"
  }'
In response, the Clover server returns a unique charge id, payment status, and additional information about the transaction.
To learn about the different data objects your apps interact with for different Ecommerce API flows, see Ecommerce data model.
Updated about 1 month ago