Configure Hosted Checkout webhooks
What is a webhook?
Webhooks send an HTTP callback or message to allow one server to communicate with another. Merchants can register their webhook link (URL) in the Hosted Checkout page settings on the Clover Merchant Dashboard. When a Hosted Checkout payment is processed, Clover sends a webhook notification to the merchant's configured webhook URL. For more information on webhook settings, see the Webhook site.
Prerequisites
- Create a Hosted Checkout session.
- Merchant's webhook link. For testing, you can generate a unique and secure HTTPS link (URL) on the Webhook site: When you visit the site, it automatically generates a unique URL for you. You need to copy the generated URL from the Your unique URL section. For example:
https://webhook.site/#!/5a88c091-2960-4bcf-9eec-796b80838f6f.
Configure webhook on the Merchant Dashboard
- Log in to the Global Developer Dashboard.
- Click the Sandbox toggle icon to go to either the sandbox or the production environment.
- From the left navigation menu, click Test Merchants. The Test Merchants page lists the default test merchant account.
- Click the Launch Dashboard icon. The Test Merchant Dashboard appears.
- From the top-right menu, click Settings. The Settings side panel appears.
- Go to View all settings > Ecommerce section > Hosted Checkout. The Hosted Checkout page appears.
- In the Webhook section > Webhook URL field, enter a secure HTTPS link (URL).
- Click Generate. The Signing Secret field displays a secret key.
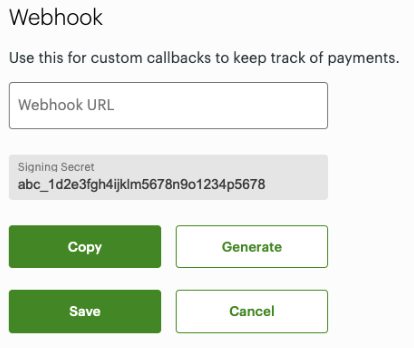
Webhook URL
- Click Save.
- Click Copy to copy the key in the Signing Secret field to receive webhook messages after the customer has made a payment in a Hosted Checkout session. You can use this secret key to validate the Clover signature header in the webhook.
Note: After a customer completes a payment on the Hosted Checkout page, a webhook notification is sent to the merchant's configured webhook URL.
Example:
Created Time
Message: Approved for 100 or Decline for 100
Status: APPROVED or DECLINED
Type: PAYMENT
Id: Payment universally unique identifier (UUID)
MerchantId: Merchant UUID
Data: Checkout Session UUID
Validate the Clover-signature header in the webhook
To secure webhooks, you need to validate the webhook source, destination, and payload. Hash-based Message Authentication Code (HMAC) is used in the signature header verification to authenticate and validate webhooks. An HMAC is calculated using a secret key and a cryptographic hash function like SHA-2 or SHA-3. This HMAC becomes the signature of the webhook; it is then used to authenticate the webhook and validate its payload.
You can include a Clover-Signature header field in the webhook message. This lets you verify the validity of a webhook message. The value for the header includes the current time, payload and the webhook secret key.
Example to validate theClover-Signature header:
Clover-Signature: t=1642599079,v1=tf1535bddbf8923d77ca9665eed5fc89b8b5506bbad137cd4ca76aa2a8d2a342.
- Append the message's timestamp with a period (
.) and the raw requestpayload. For example, using the example above—1642599079.json—wherejsonis the raw request body of the received webhook message. - Hash the value from the second string through the
HmacSHA256using the webhook secret key. The secret key displays in the Signing Secret field, generated for the webhook URL for your Hosted Checkout page. - Compare the two strings with the
v1signature value. If they match, then the validation is successful.
Related topics
Updated 28 days ago