Configure the Clover Payments for WooCommerce plugin
North America—United States and Canada
Configure the Clover Payments for WooCommerce plugin
- Log in to your WordPress Dashboard.
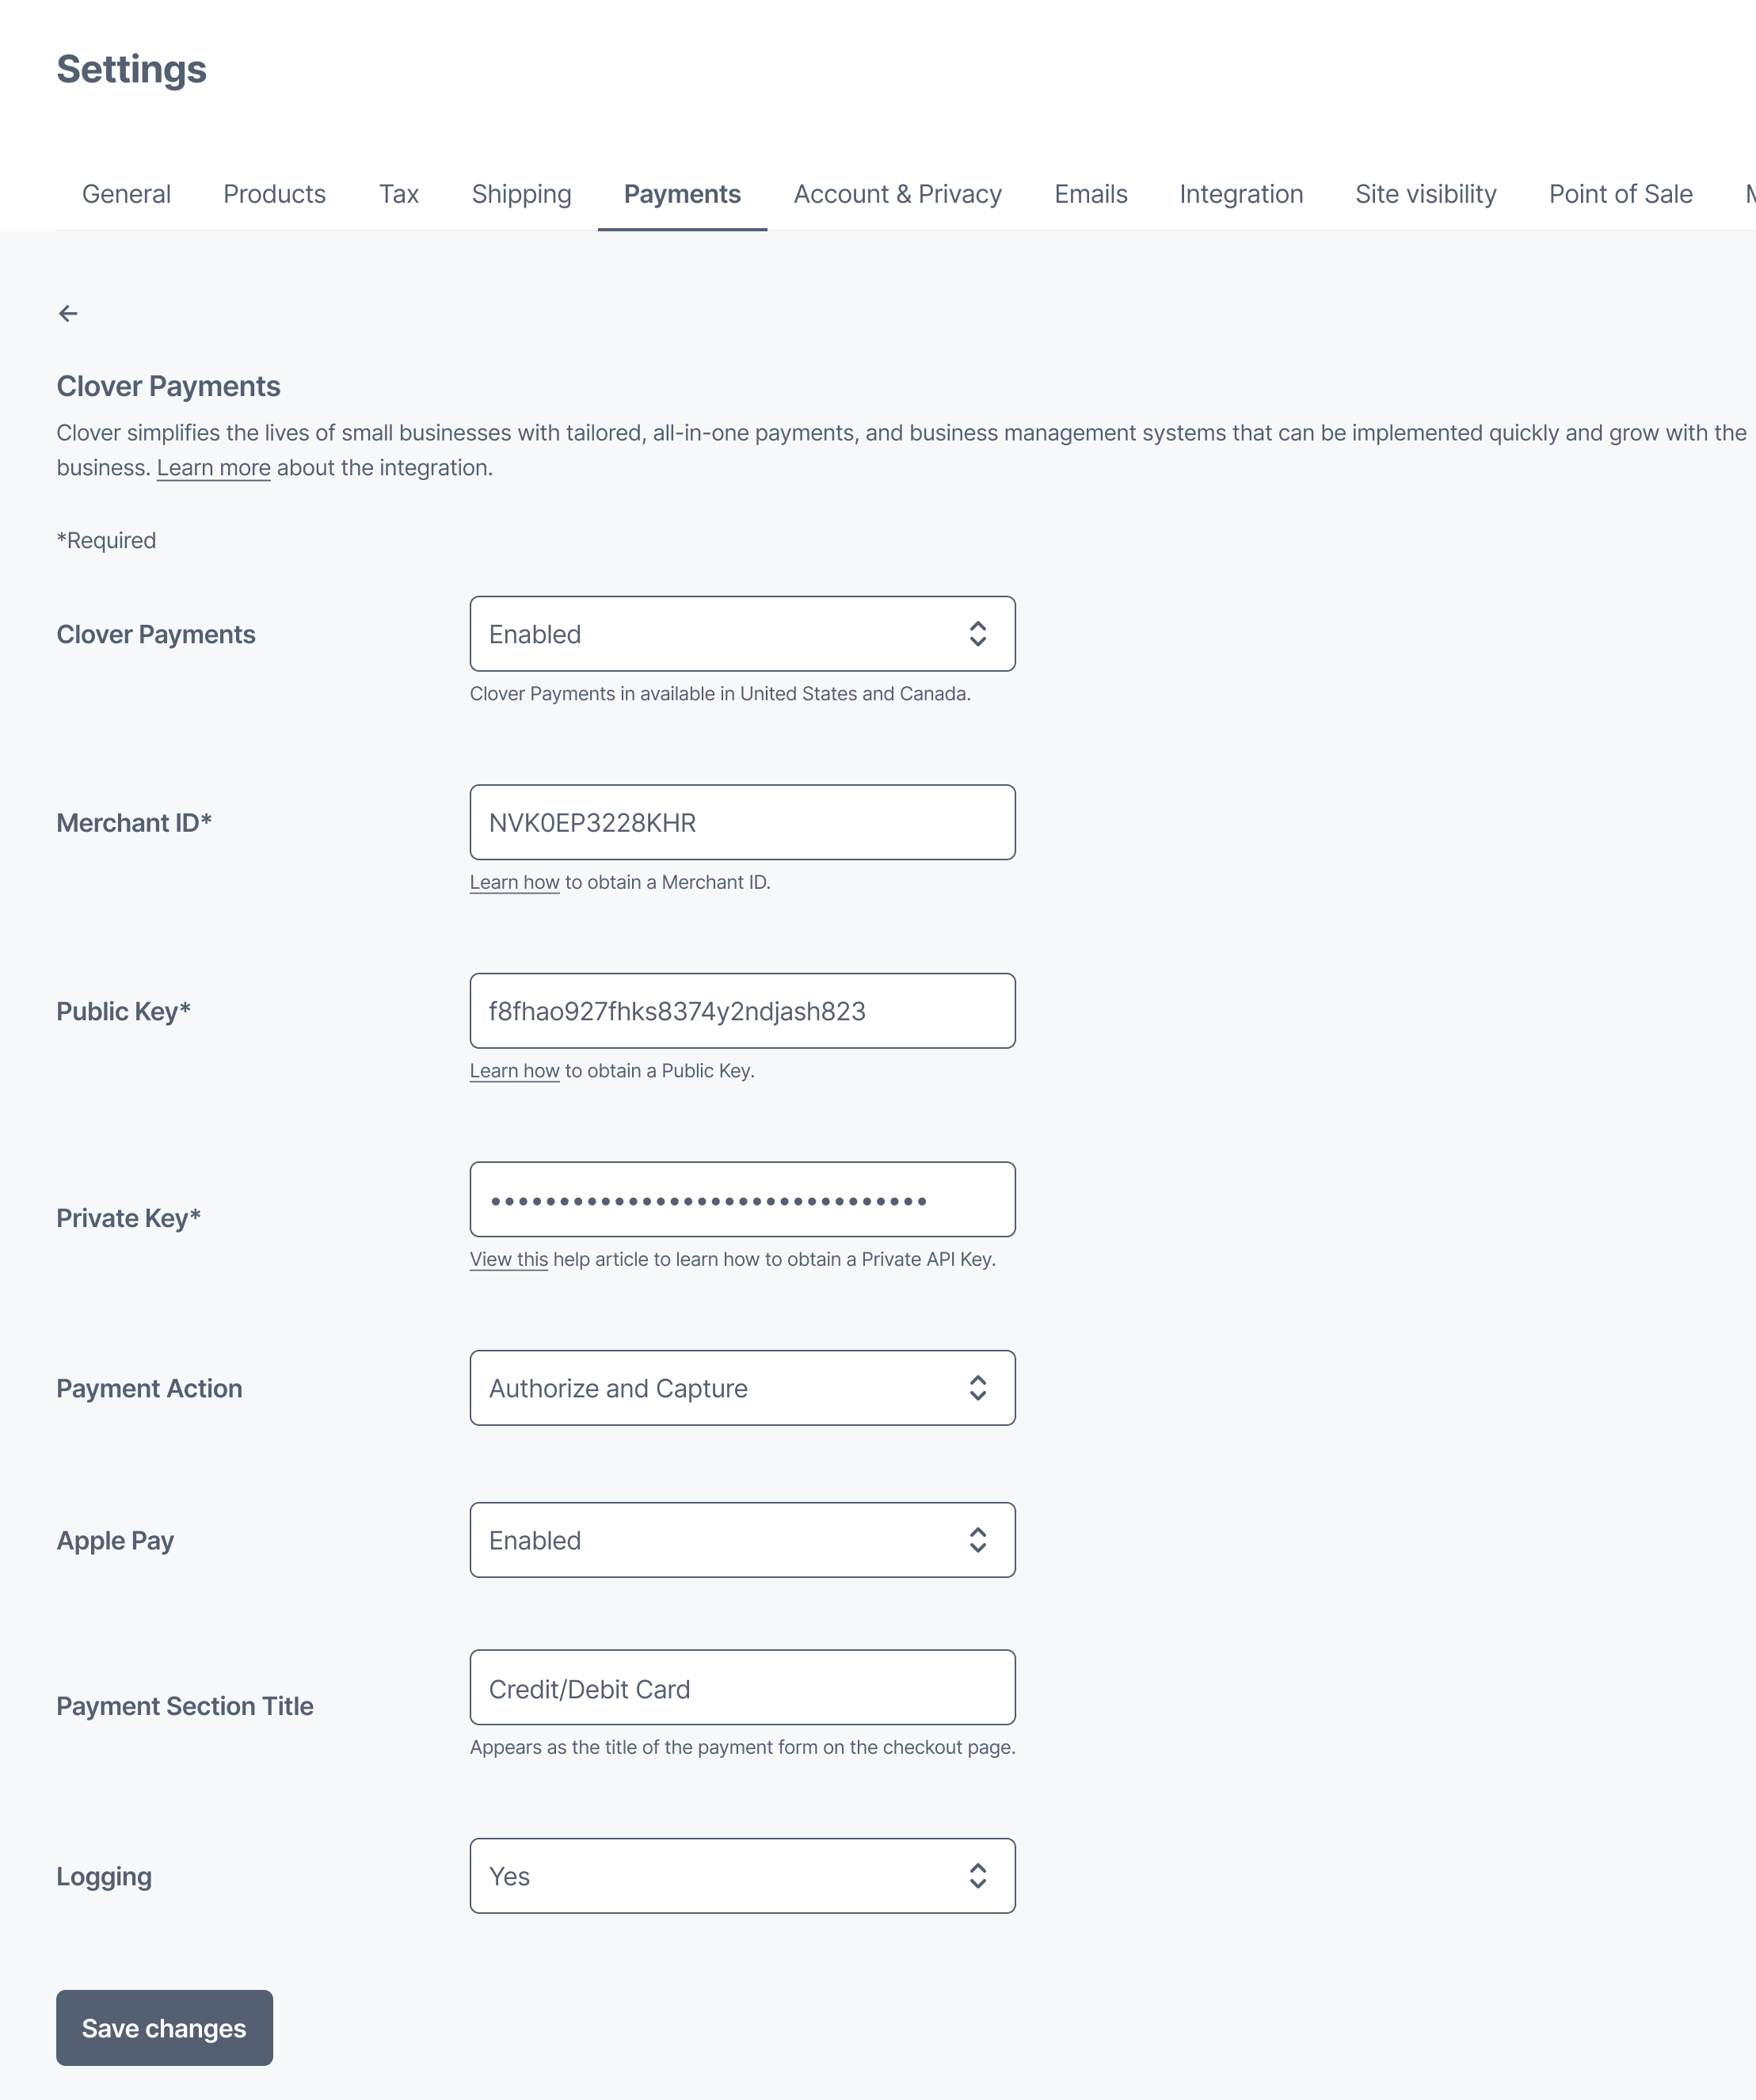
- From the left navigation menu, click WooCommerce > Plugin Settings > Payments. The Clover Payments page appears.

WooCommerce Settings—Payments
- Complete the Clover Payments configuration fields as follows:
| Field | Description |
|---|---|
| Clover Payments drop-down | Indicates if the Clover Payments Extension displays as an option for customers on the WooCommerce Checkout page. Values: - Enabled - Disabled |
| Environment drop-down | Account you want to connect with WooCommerce: - Sandbox for your Clover sandbox developer account. - Production for your Clover production developer account. |
| Merchant ID | Required. Universally unique identifier (UUID) of the merchant, also known as the merchantId created on the Clover sandbox or production environment, for every merchant business. See Locate the merchant identifier (merchantId). |
| Public Key | Required. Token required for the Clover Payments Extension to connect to your Clover sandbox or production developer account. This token or public key allows you to use the Clover payments extension in the selected environment. Note: For plugin integration, when generating a token, select the Hosted iFrame + API/SDK option. This provides both public and private keys needed for securely embedding the checkout in your cart. See Set up an API token. |
| Private Key | Required. Token required for the Clover Payments Extension to connect to your Clover sandbox or production developer account. This token or private key allows you to use the Clover payments extension in the selected environment. Note: For plugin integration, when generating a token, select the Hosted iFrame + API/SDK option. This provides both public and private keys needed for securely embedding the checkout in your cart. See Set up an API token. |
| Payment Action drop-down | Indicates how each payment transaction is handled based on the selected payment action. Values: - Authorize—Ensures that the customer’s card is in good standing and has sufficient funds to cover the purchase. An authorization transaction places a hold on the customer’s funds for the transaction amount for settlement at a later date. You can use the WooCommerce built-in process to capture an authorization. - Authorize and Capture—Ensures that authorization and capture occur simultaneously. Capture is the process of claiming authorized funds, that is, initiating the transfer of funds from the customer’s account to your merchant bank account. |
| Apple Pay drop-down | Displays only for merchants using the Checkout block theme. Indicates if the Apple Pay® button displays as a payment option for customers on the WooCommerce Checkout page. Apple Pay is a secure and contactless payment service by Apple that lets customers make purchases using their Apple devices. Values: - Enabled - Disabled (default)For more information, see Apple Pay integration for WooCommerce. |
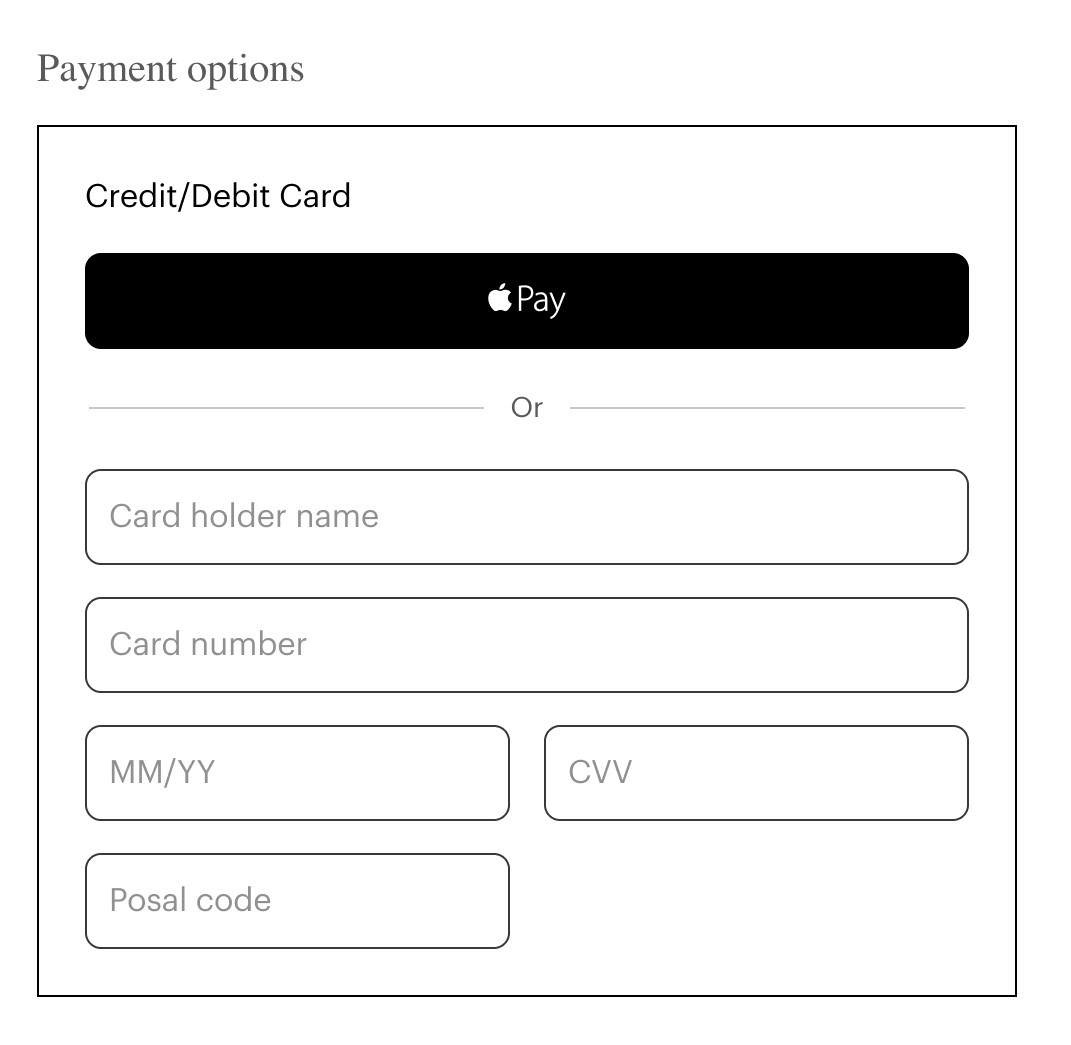
| Payment section title | Title of the payment form that displays to customers in the Payment options section on the WooCommerce Checkout page. Example: Credit/Debit card |
| Logging drop-down | Enables the debug mode for log analysis. Values: - Yes - No Note: Log messages are logged in wp-content/uploads/wc-logs/Filename display example: clover_payments-2022-04-27-c9b05b315173749bc3cb266ad98dd4e0.log |
- Click Save changes. The active payment method options display on the Checkout page.

Sample Payments Options section with Apple Pay button on the checkout page
Use Checkout blocks
Clover iframe supports WordPress blocks on the Checkout page. To use the block feature:
- In the WordPress Dashboard, from the left navigation menu, click Pages. The available pages list appears.
- Click Checkout. The Checkout page appears.
- In the right panel, click the Block tab.
- For settings information, see Checkout block.
Switch between classic and block checkout themes
The Clover Payments for WooCommerce plugin provides support for both classic and block-based checkout themes. Merchants and developers can now toggle between classic and block-based designs based on their ecommerce store needs. Block-based checkout page designs let you customize a part of your checkout page with drag-and-drop block patterns and settings, while classic themes use widgets.
Updated about 2 months ago
