Manage release groups
You can use release groups to stagger rollouts, pilot features to a subset of approved merchants, and A/B test a feature across two or more groups of merchants. Merchants must have the app installed to be eligible to join a release group.
Before you begin
Note the following about Android application packages (APKs) and merchant release groups:
- Published APK: When you publish your approved APK, it is made available to all merchants, even if the APK is part of a release group.
- Approved apps and new app versions: For approved Android apps, you can release new app versions to a release group. The merchant's existing subscription tiers continue for billing unless they select a different tier after upgrading their APK. As with any release, allow time for your merchants' devices to sync and download new versions.
- App code versions: Merchants in the release group are upgraded to the APK with the highest version code. If the beta override APK has a higher version code than the currently installed APK, the Clover app updater installs the beta APK for the merchant.
- Earlier app versions: To test earlier versions of your APK, merchants need to uninstall the app and then install the earlier app version.
Prerequisites
- Create and upload your APK.
- Submit the APK for approval.
After the APK is approved, create and manage your release group. You can view the list of created release groups along with the list of APKs associated with each group.
1. Create release groups
-
Log in to the Developer Dashboard.
-
From the left navigation, click Release Groups. The Release Groups page appears.
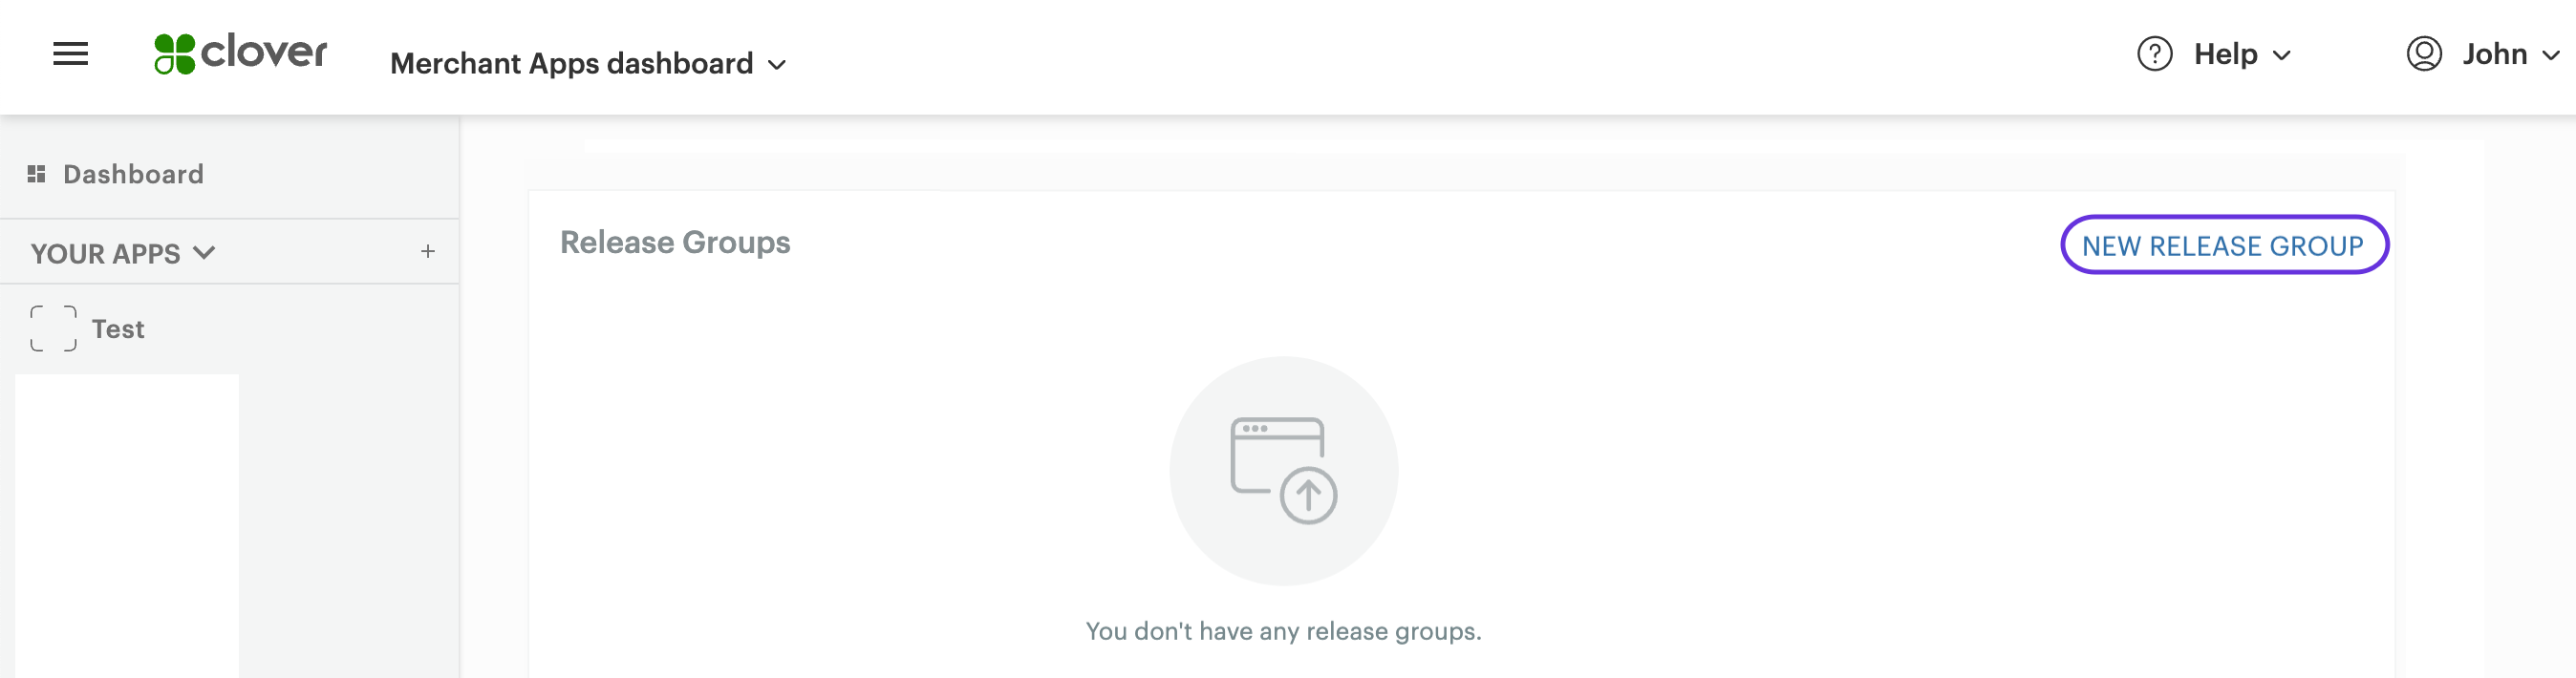
Developer Dashboard: Release Groups page
-
Click New Release Group. The New Release Group pop-up appears.
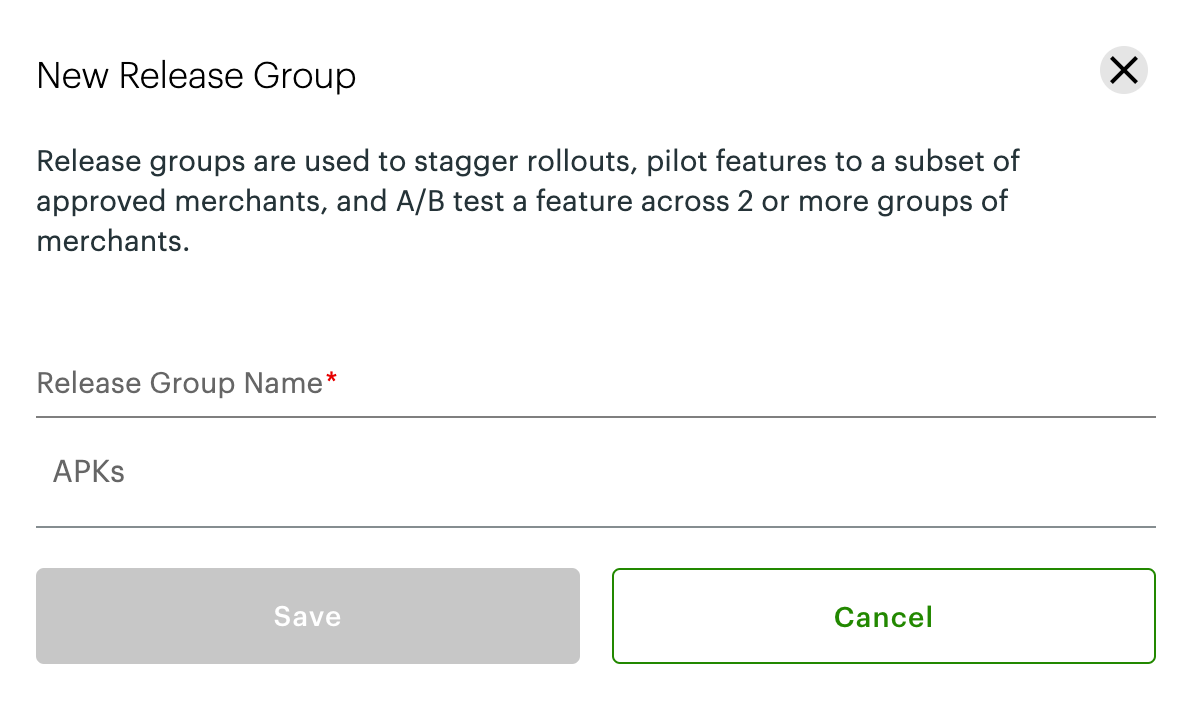
New Release Group pop-up
-
Enter a release group name and select APKs for apps that you want to associate with this group. The list of APKs is auto-generated based on the published APKs you have for each app.
-
Click Save. The Release Group details page appears. On this page, you can add and manage APKs. An APK installs on merchant devices that already have a lower version of that APK.
2. Add APKs to release groups
- Log in to the Developer Dashboard.
- From the left navigation, click Release Groups. The Release Groups page appears.
- Click the release group for which you want to add merchants. The Release Groups details page appears.
- Click Add APKs. The Add APKs page appears.
- Select APKs for apps that you want to associate with this group.
- Click Save. The added APKs display in the list of APKs on the Release Group details page.
3. Remove APKs from a release group
Removing an APK from a release group prevents it from being installed for any merchants you subsequently add to the release group. However, this change does not remove the APK from merchant devices that already have that version installed.
To remove an APK from a release group, click the delete icon for that APK on the Release Group details page.
4. Add merchants to release groups
On the Release Group details page, you can add and manage merchants either by percentage or by specific merchant identifiers (merchantId). Merchants must have the app installed to be eligible to join a release group. The merchant list is available on the Installs page on the Developer Dashboard.
To add merchants to a release group:
- Log in to the Developer Dashboard.
- From the left navigation, click Release Groups. The Release Groups page appears.
- Click the release group for which you want to add merchants. The Release Groups details page appears.
- Click Add Merchants. The Add Merchants page appears.
You can add merchants using random segments or based on specific merchant identifiers (merchantId).
4.1 Add random segments for staged rollouts
For staged rollouts, you can add merchants to your release group randomly based on the APK version. You can add a specific number or a percentage of merchants to the release group.
- On the Add Merchants page, under Add Random Segment, select an option for a number of merchants or a percentage of merchants from the list.
- Enter a number or percentage in the field.
- From the Select Version list, select the APK version. The version list is generated from the list of APKs associated with this release group.
- Select the Billable Merchants Only option to add only billable merchants to your release group.
- Click Add Condition and then select a condition from the Select Condition list. Conditions are based on merchants' Clover devices.
- Click Save. The list of selected merchants displays on the Release Group details page.
For example, create a release group containing 10% of your app subscribers. After confirming that no issues are detected within the group, add 50% of your subscribers to the group. Once you feel confident about the new version, publish the app and delete the release group.
4.2 Add specific merchants
You can push a version of your APK to a specific list of merchants.
- On the Add Merchants page, under Add Specific Merchants, search for merchants by name or the merchantId.
Note: ThemerchantIdis listed under the merchant's name on the Installs page on the Developer Dashboard. - To add merchants in bulk, click Upload CSV and then upload a CSV file of Clover
merchantIds. The added merchants are listed on the Add Merchants page. - Click Save. The list of selected merchants displays on the Release Group details page.
5. Delete a release group
To delete a release group, you must first disassociate all of the APKs associated with that group.
- If you have associated APKs with the release group, click Disassociate all APKS on the Release Group details page.
- Once you disassociate all the APKs in the group, click the delete icon at the top of the page.
- Confirm whether you want to delete the release group.
Updated 17 days ago