Add developer bank account information
On the legacy Developer Dashboard
Prerequisites
- Complete the developer identity verification process. For more information, see Developer account for approval.
- Provide business details for a business account.
- Create a developer account with an Admin or Owner role with permission to access bank details. For more information, see Developer account roles.
- Set up two-factor authentication (2FA).
Add developer bank account information
- Log in to the production Developer Dashboard.
If you do not have a production Clover developer account, create an account in your region. - From the left navigation menu, click Developer Settings > Info. The Developer Info page appears.
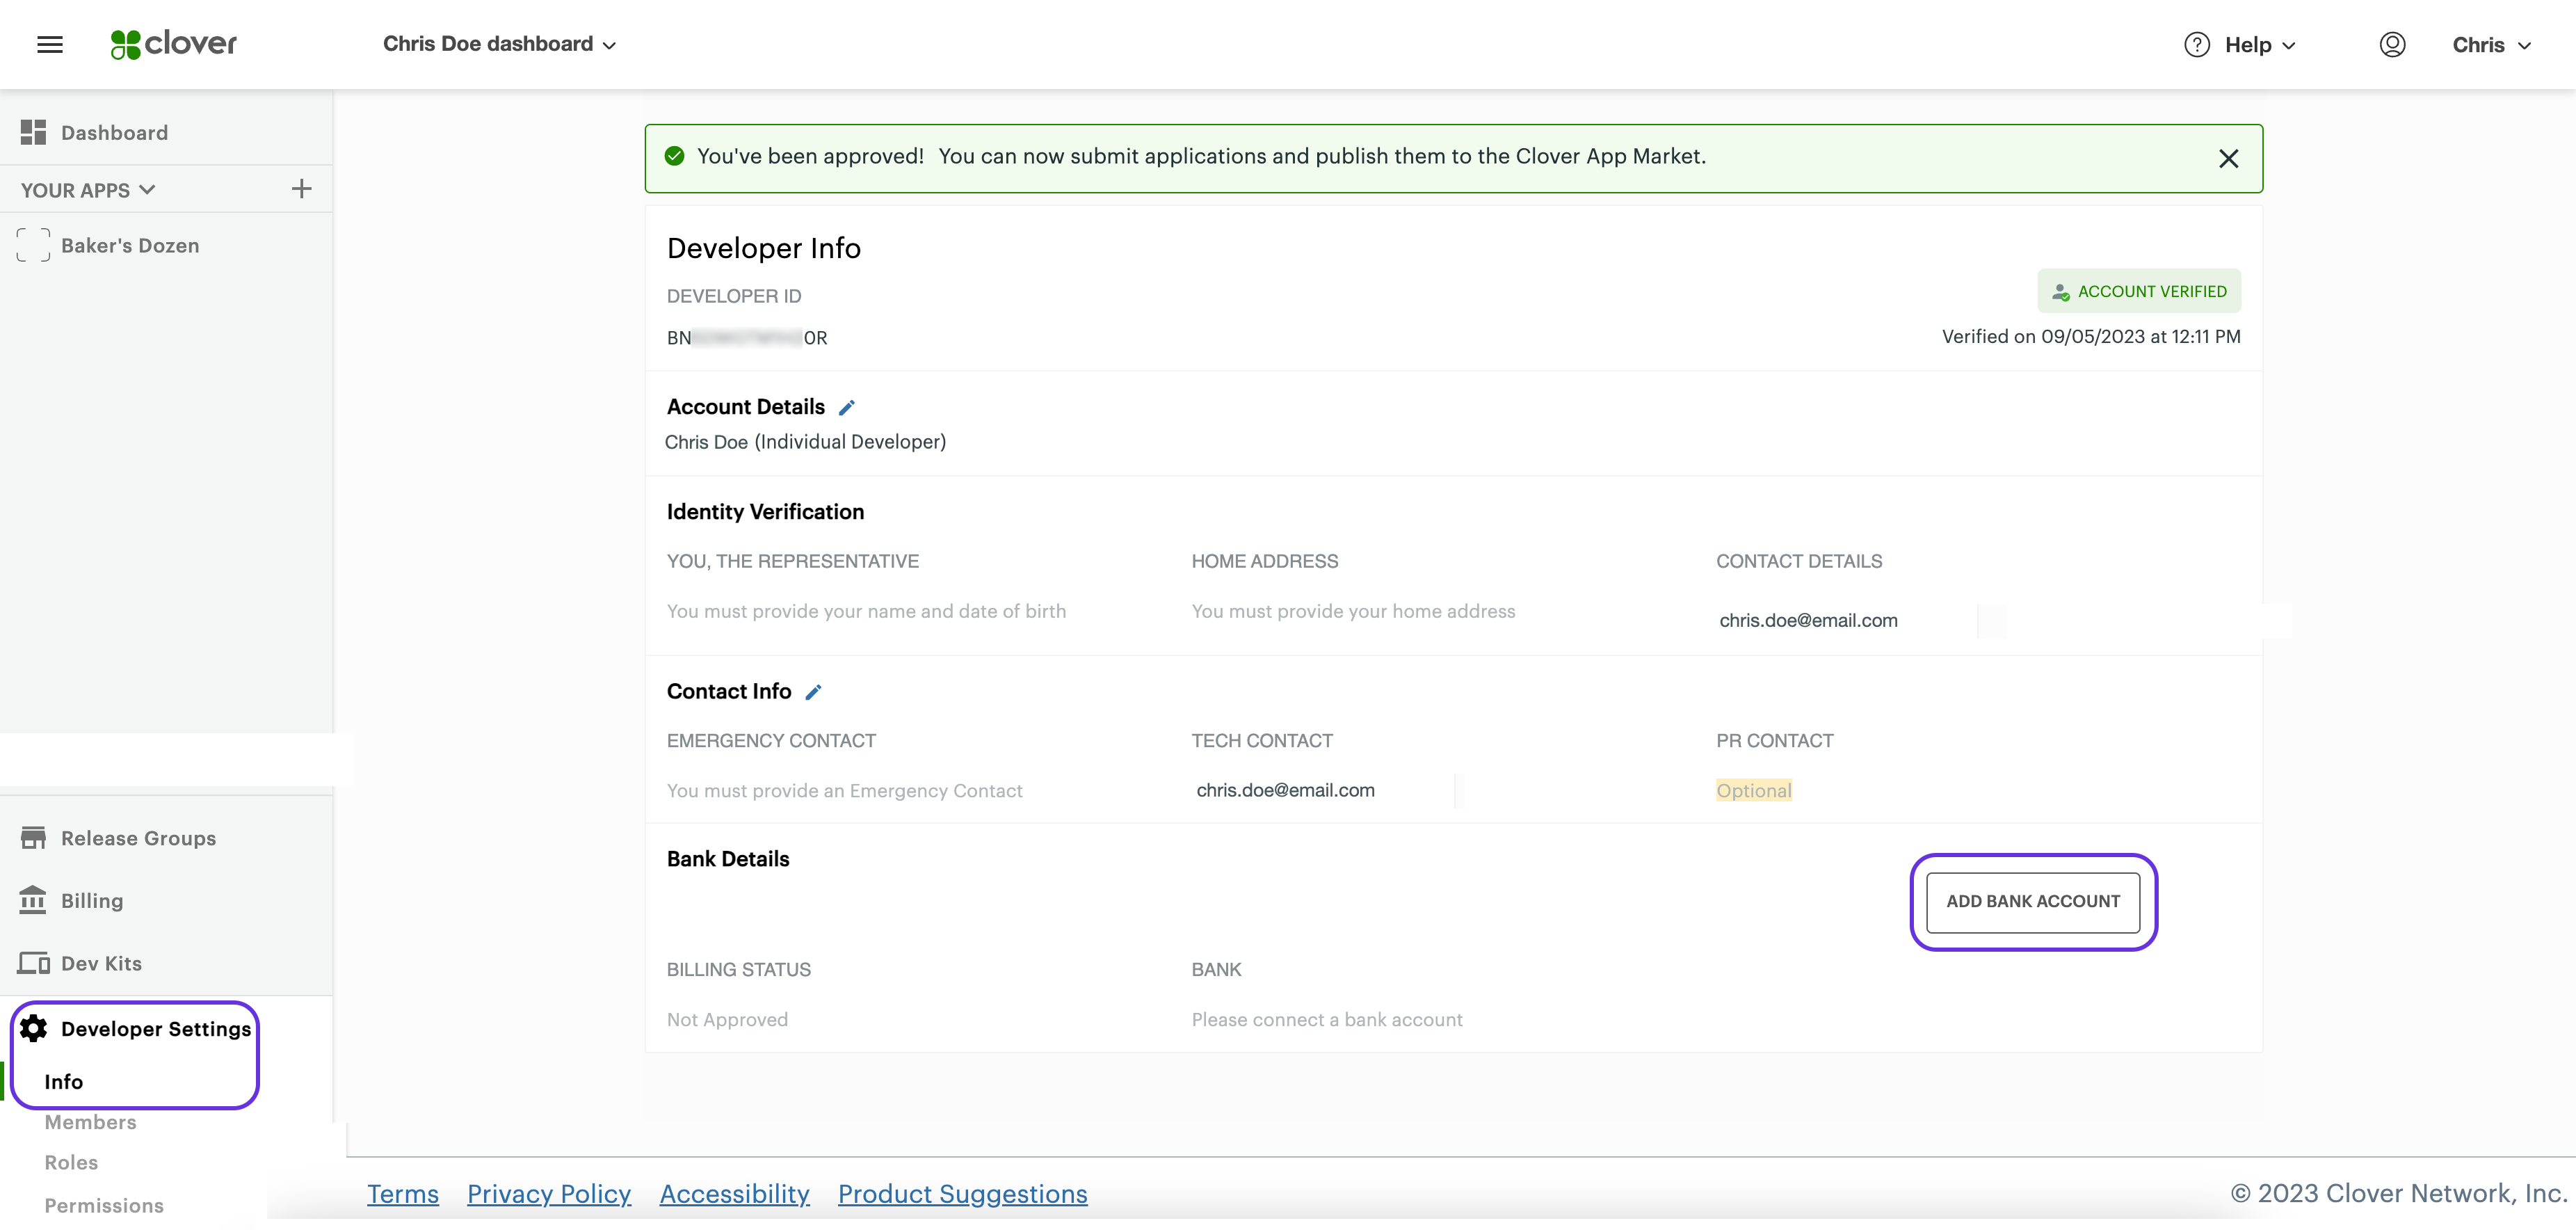
Developer Settings > Info > Developer Info page
- In the Bank Details section, click Add Bank Account. The two-factor authentication (2FA) process starts:
- If you need to complete the 2FA process, a pop-up to set up two-factor authentication appears. See Set up two-factor authentication (2FA).
- If you completed the 2FA process, the Enter the verification code pop-up appears.
- Complete the authentication process. The Step 1: Account Type page appears.
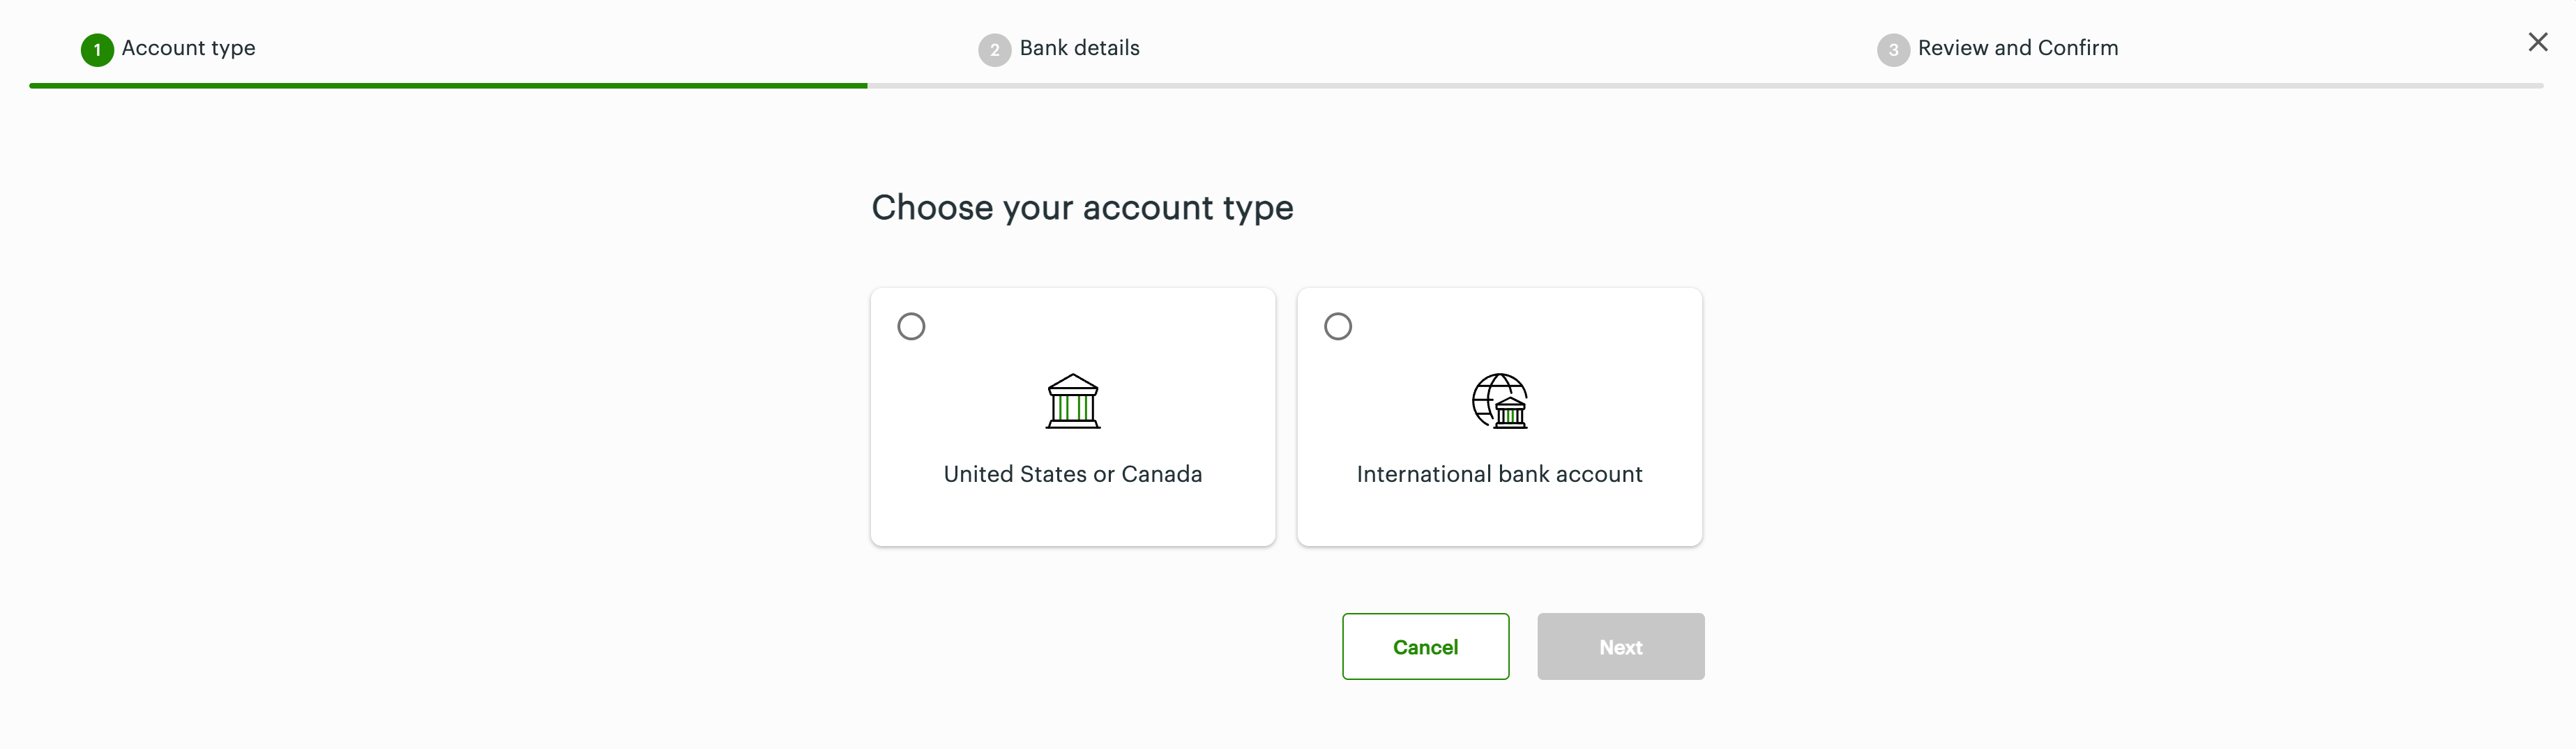
Choose your account type page
- Select an account type: United States or Canada or International bank account, and then select bank identifiers based on the selected country to:
- Add a US or Canada routing number
- Add an International Bank Account Number (IBAN)
- Add a SWIFT/Bank Identifier Code (BIC)
- Add a SORT Code - United Kingdom
IMPORTANTAll bank details information you enter are self-validated and required so add or update the correct bank account information.
Add a US or Canada routing number
After you log in to your production Developer account to add developer bank account information, complete the three steps to add bank account details:
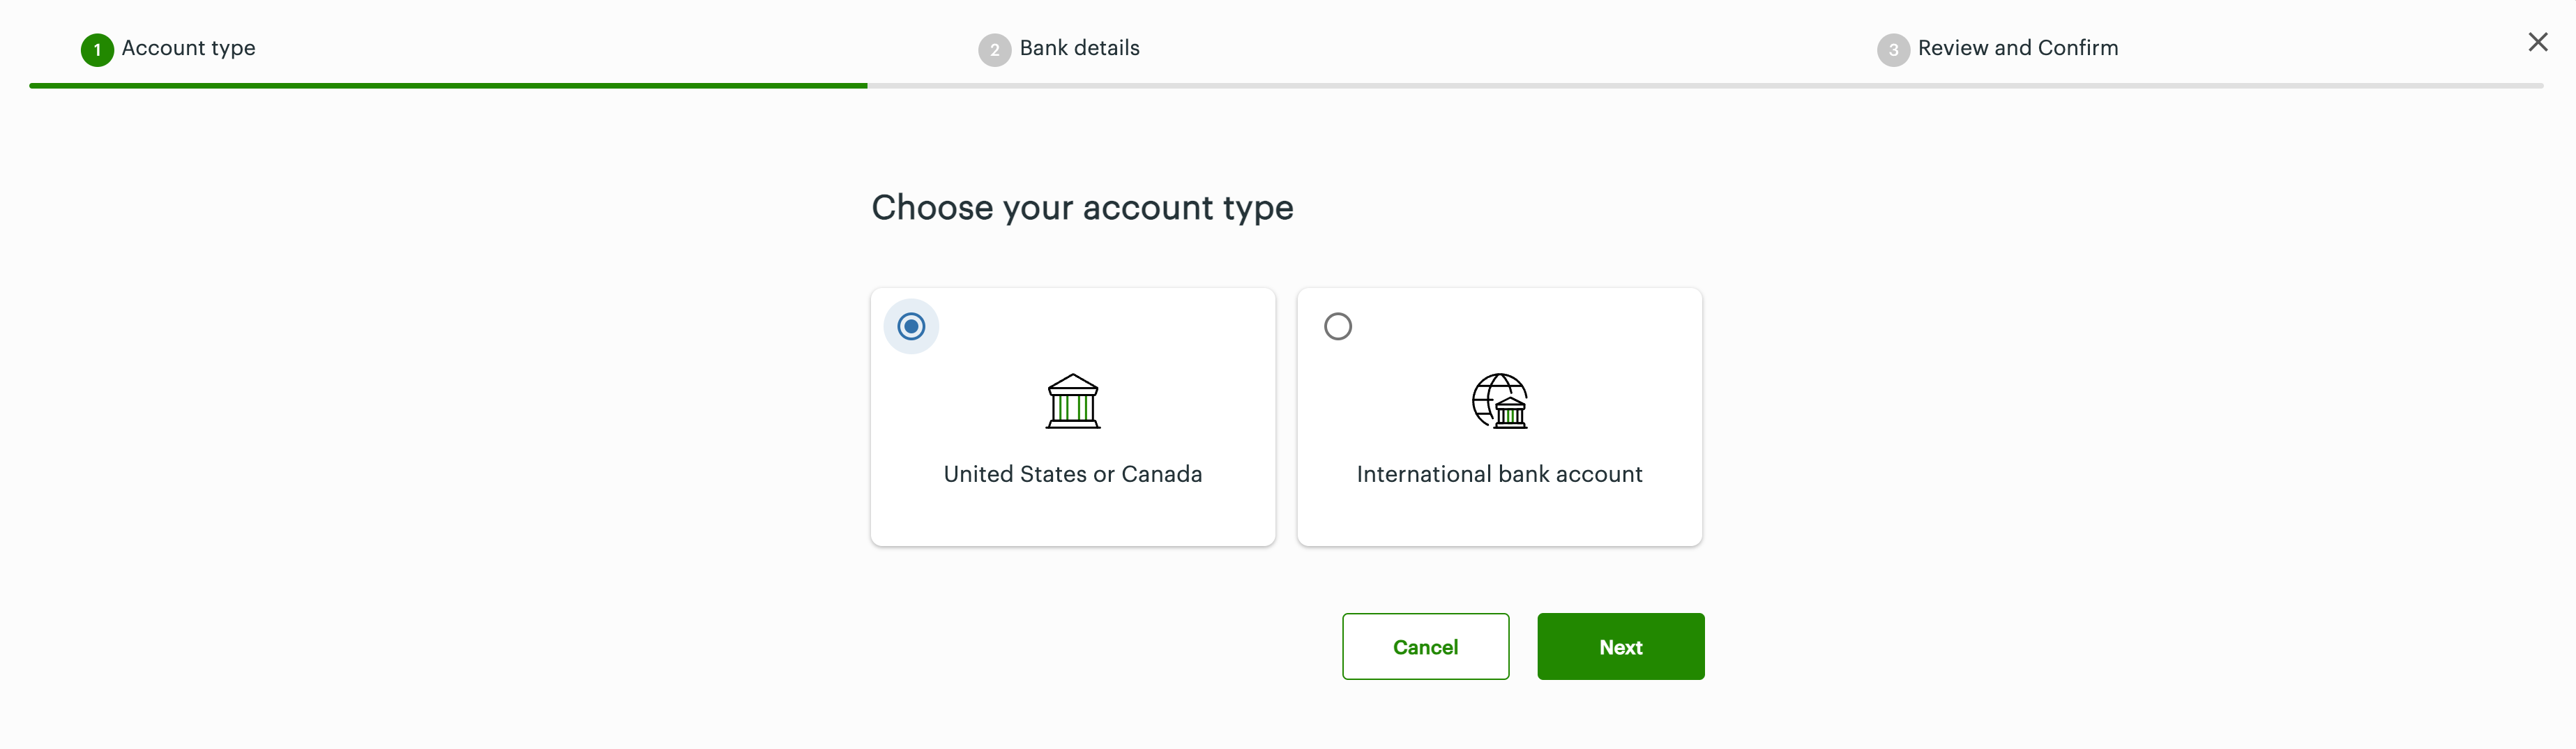
Choose your account type: United States or Canada
Step 1: Account Type—On the Choose your account type page:
- Select the option: United States or Canada.
- Click Next.
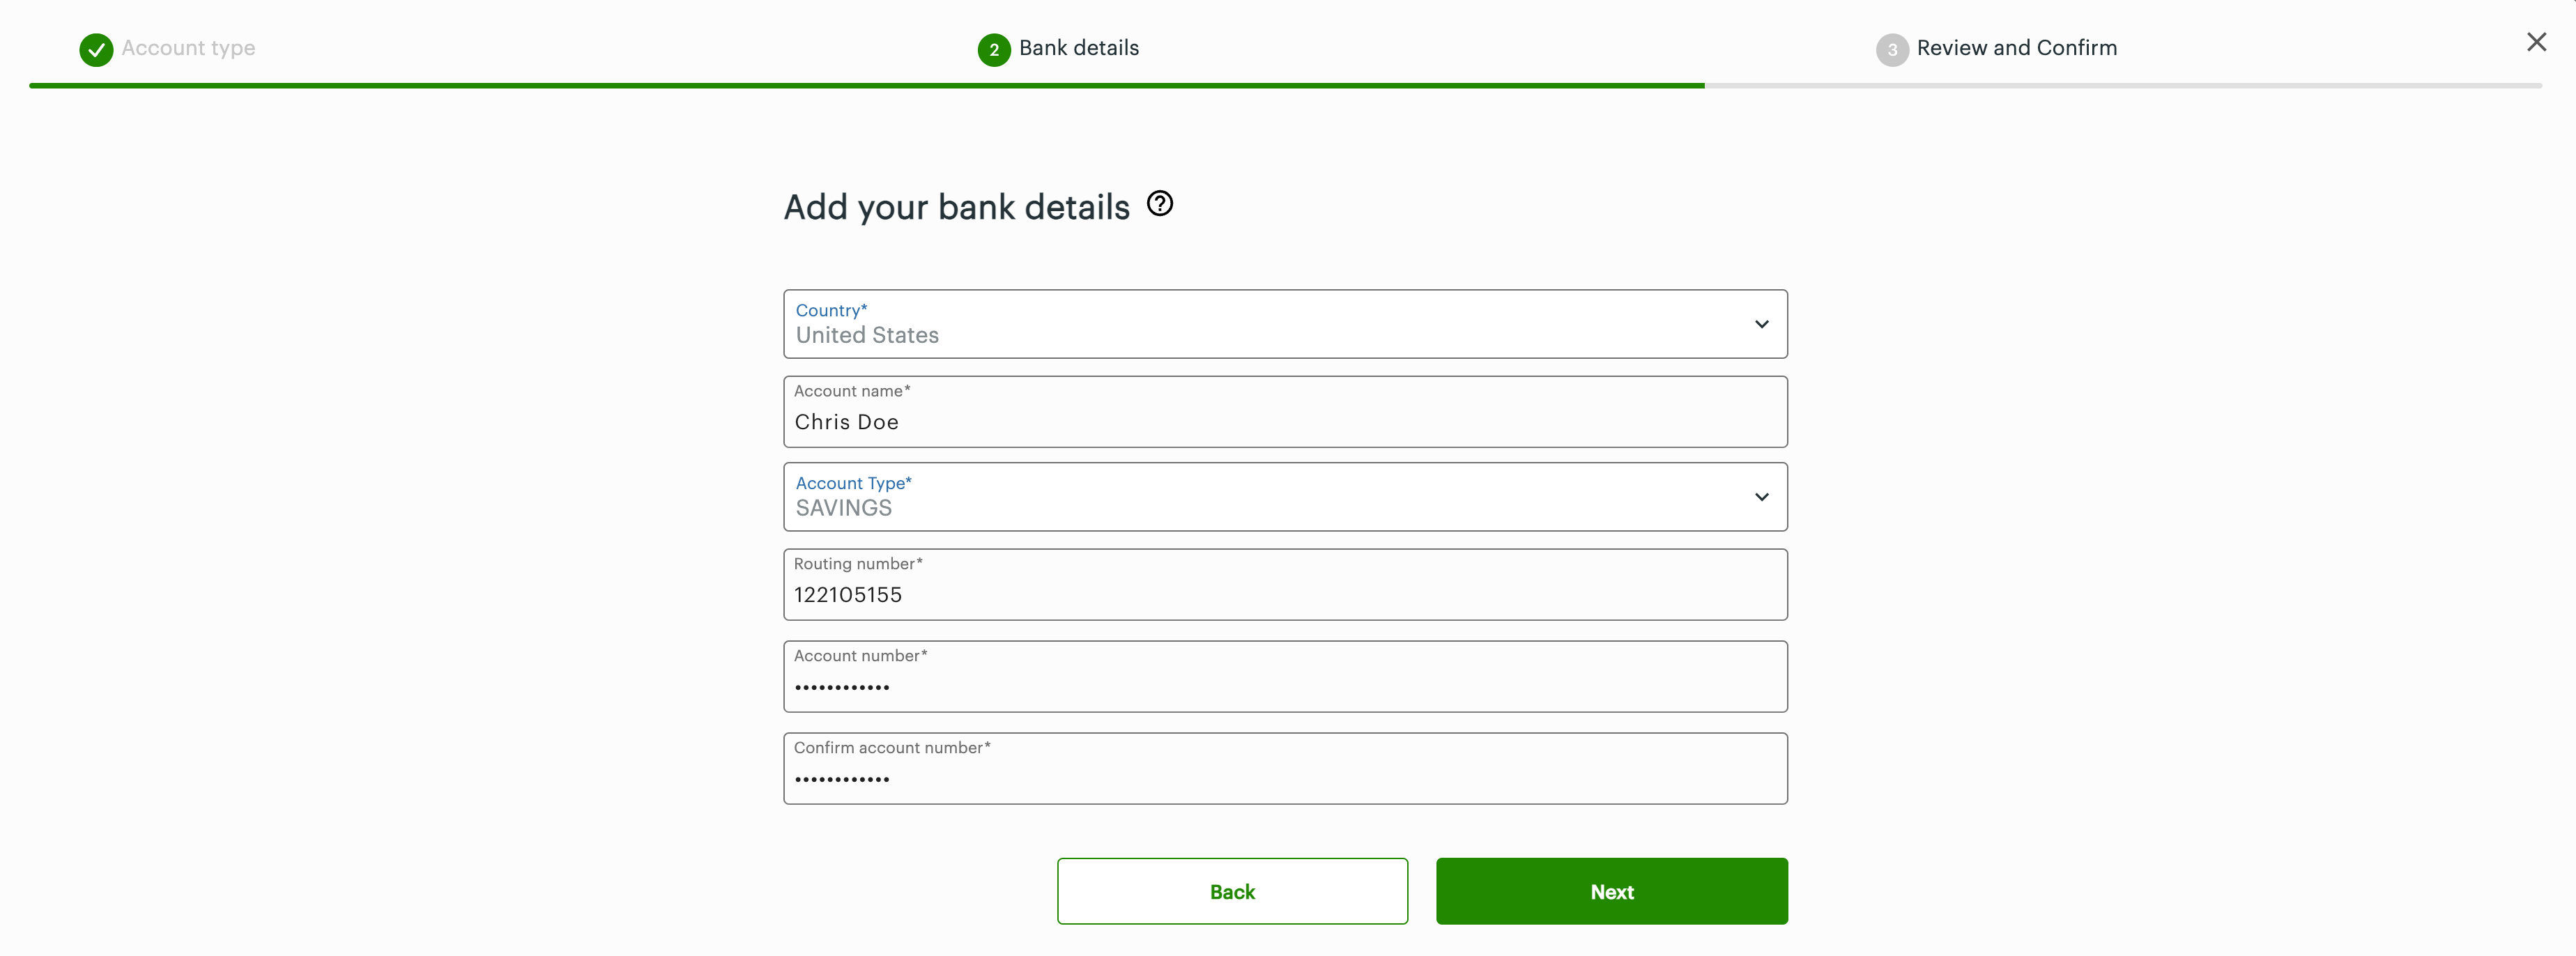
Add your bank details: US or Canada routing number
Step 2: Bank details—On the Add your bank details page:
- Enter bank details in the following fields—Country, Account name, Account type (Savings or Checkings), Routing number, and Account number.
Length: Account number for:- United States (US) bank account is 4- to 12-digit.
- Canada or an International bank account is 4- to 100-digit.
- Click Next.
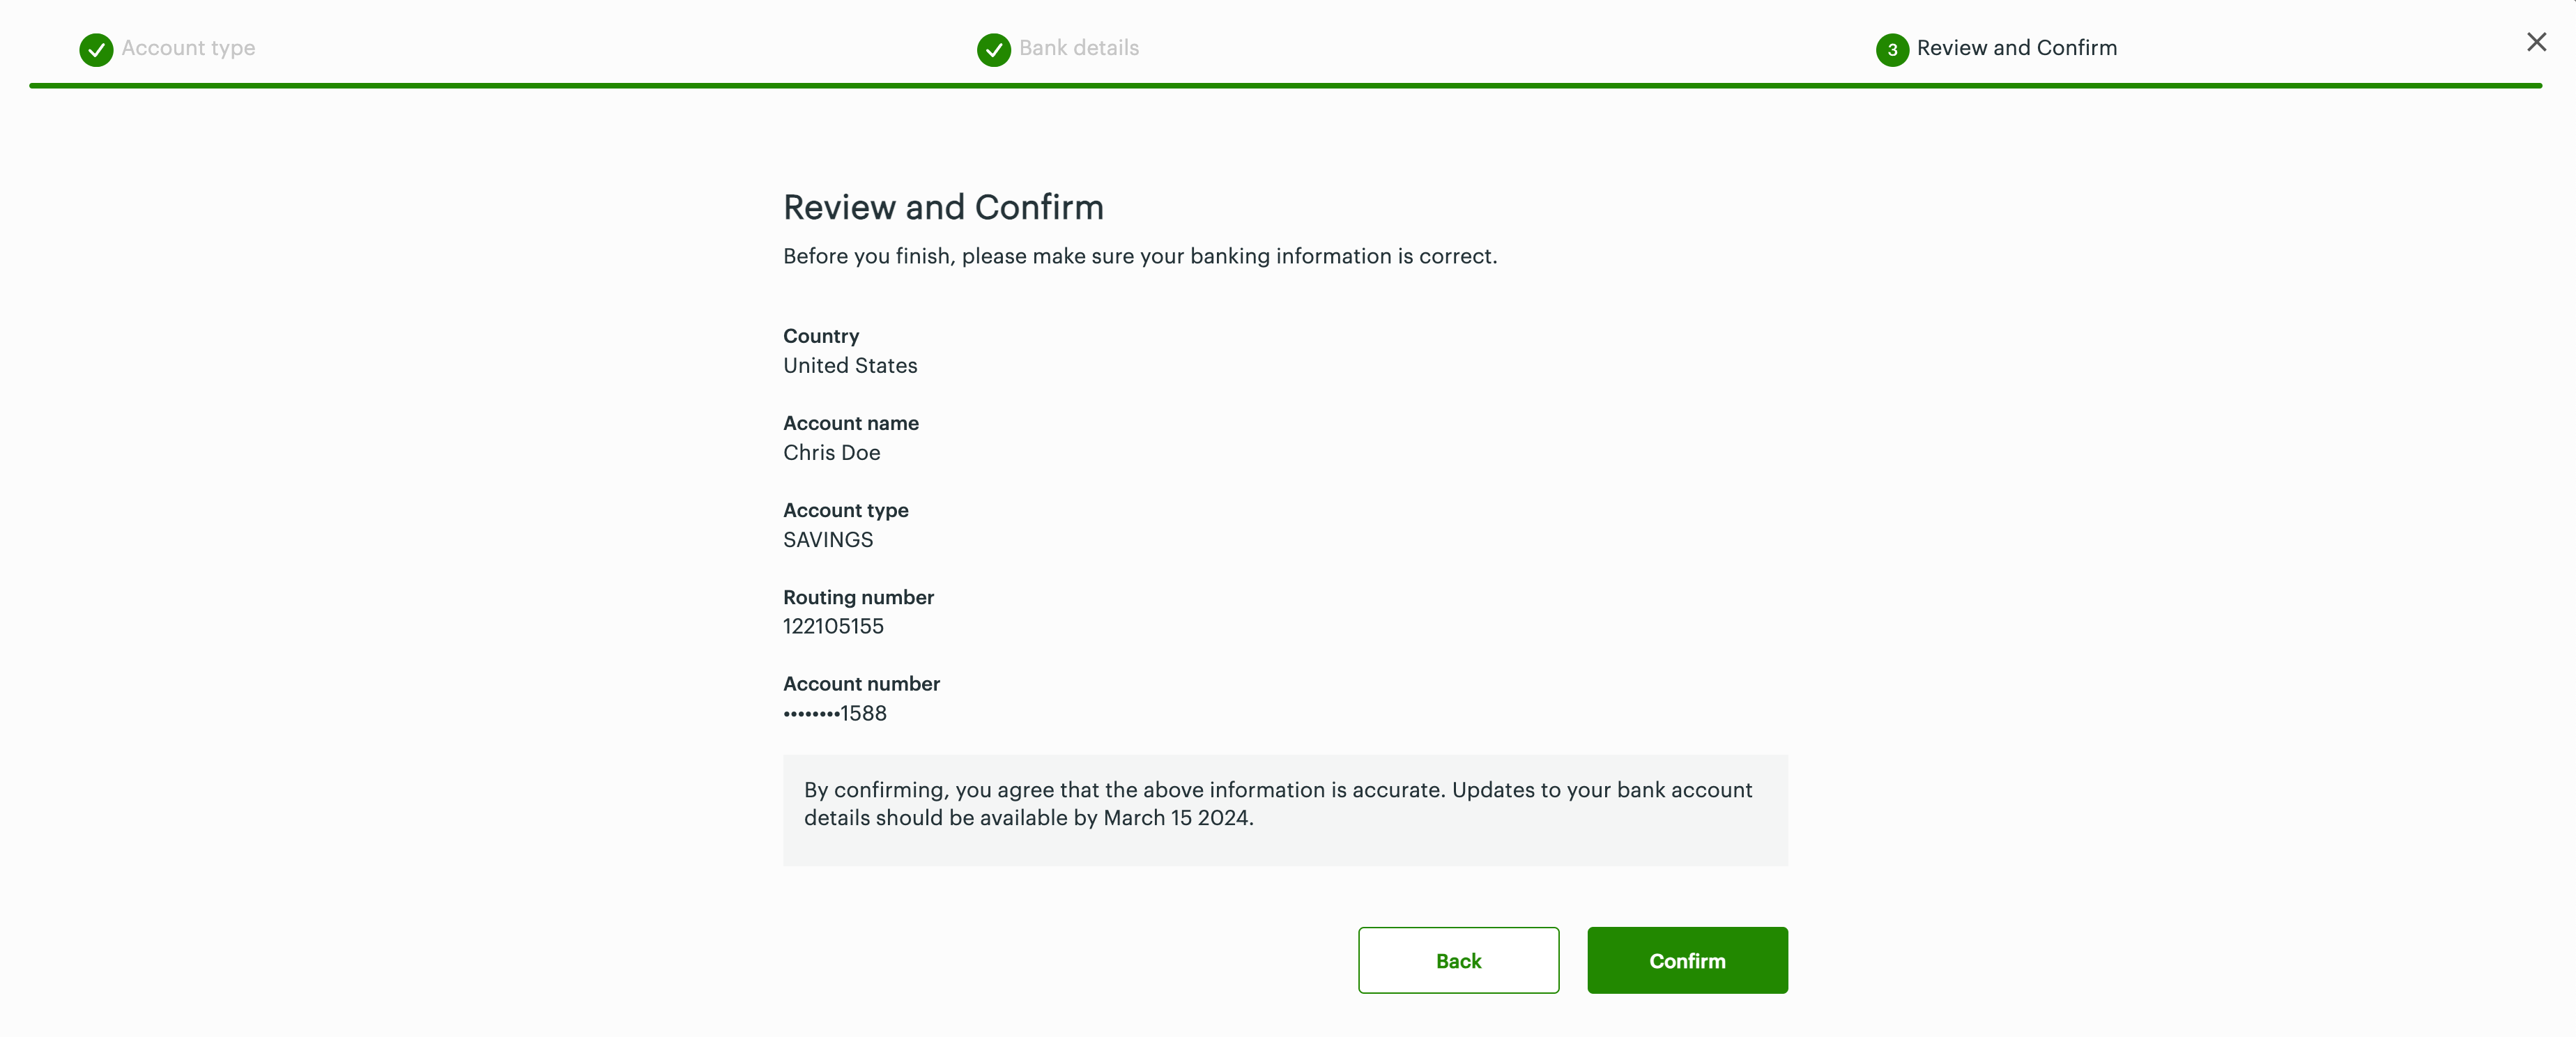
Review and confirm: US and Canada routing number
Step 3: Review and confirm—On the Review and confirm page:
- Review the bank account information.
- If any changes are needed, click Back to go to a previous step.
- If all information is correct, click Confirm. The Developer Account Information page displays a confirmation message with the approximate time by which the new bank account will be updated in your developer account records with Clover.
Add an International Bank Account Number (IBAN)
After you log in to your production Developer account to add developer bank account information, complete the three steps to add bank account details:

Choose your account type: International
Step 1: Account Type—On the Choose your account type page:
- Select the option: International bank account.
- Click Next. The Select the bank identifier page appears.
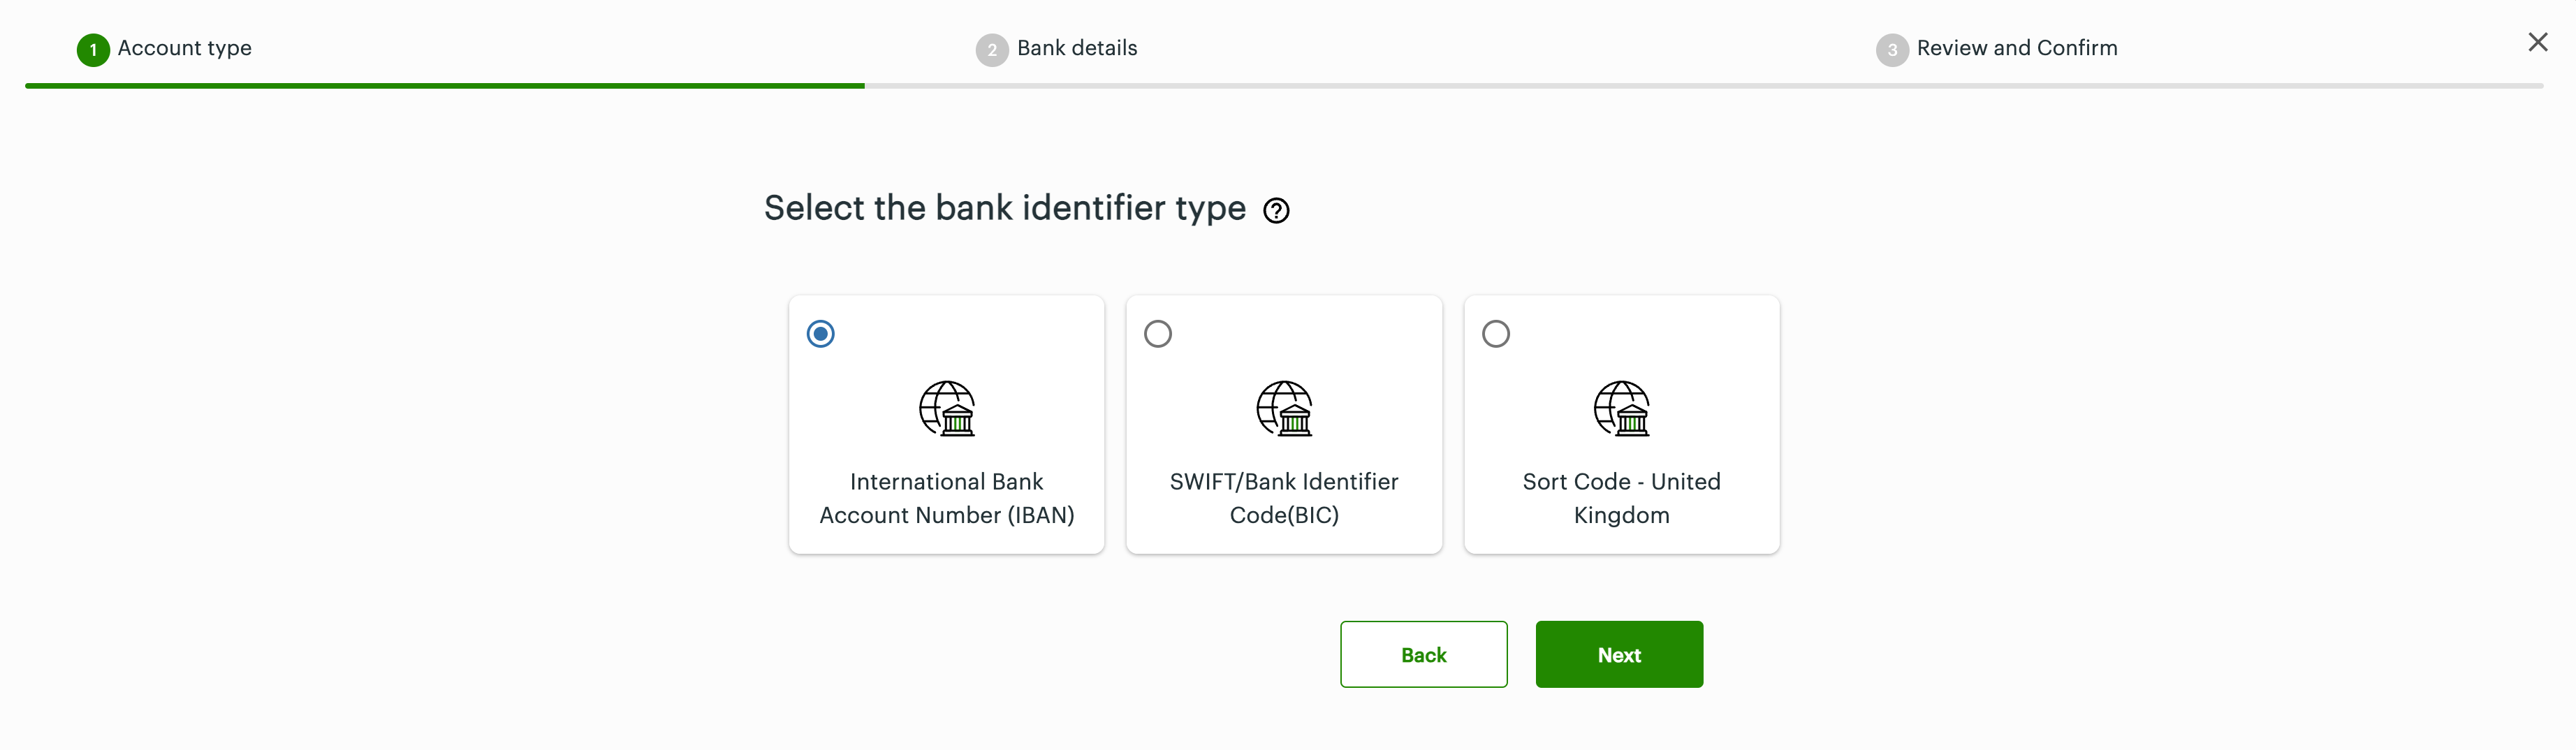
Select the bank identifier type: IBAN
- Select the option: International Bank Account Number (IBAN).
- Click Next.
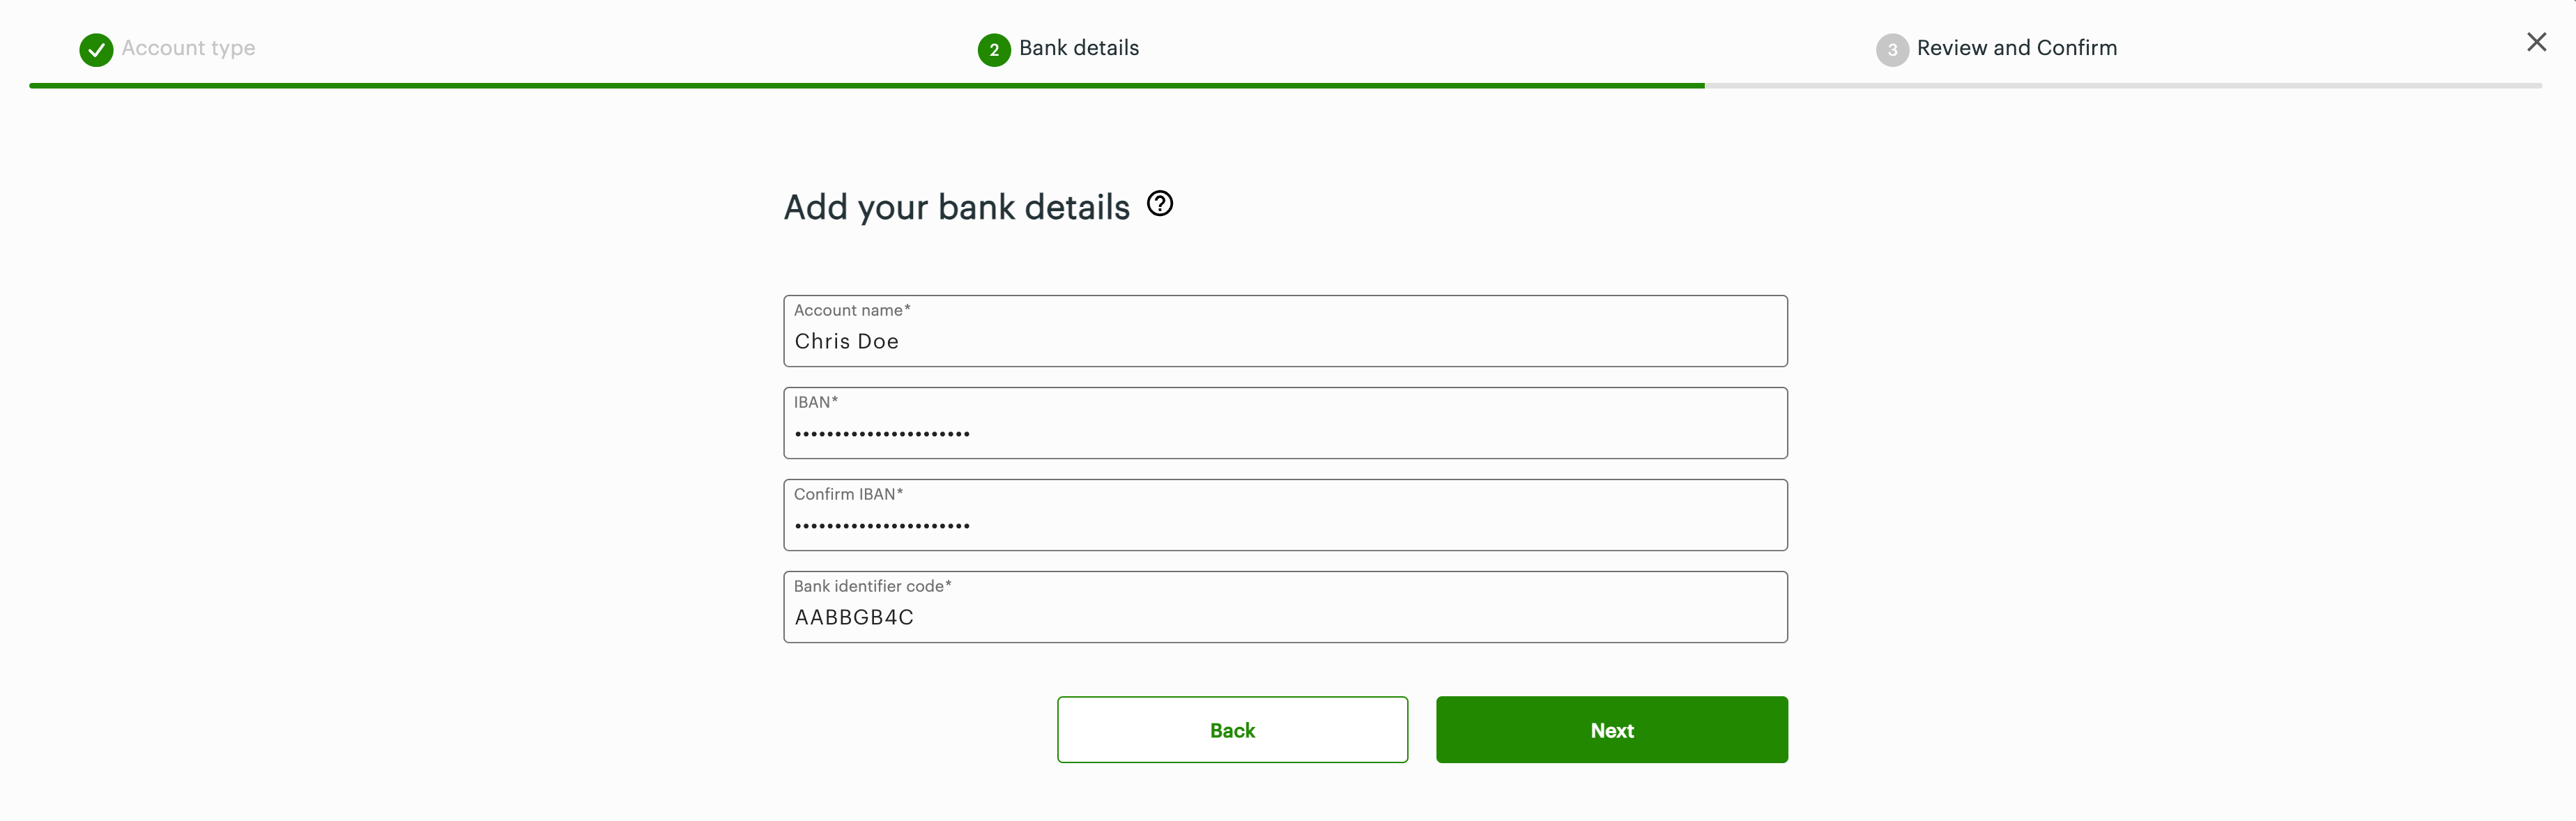
Add your bank details: IBAN
Step 2: Bank details—On the Add your bank details page:
- Enter bank details in the following fields—Account name, IBAN, and the Bank identifier code.
- Click Next.
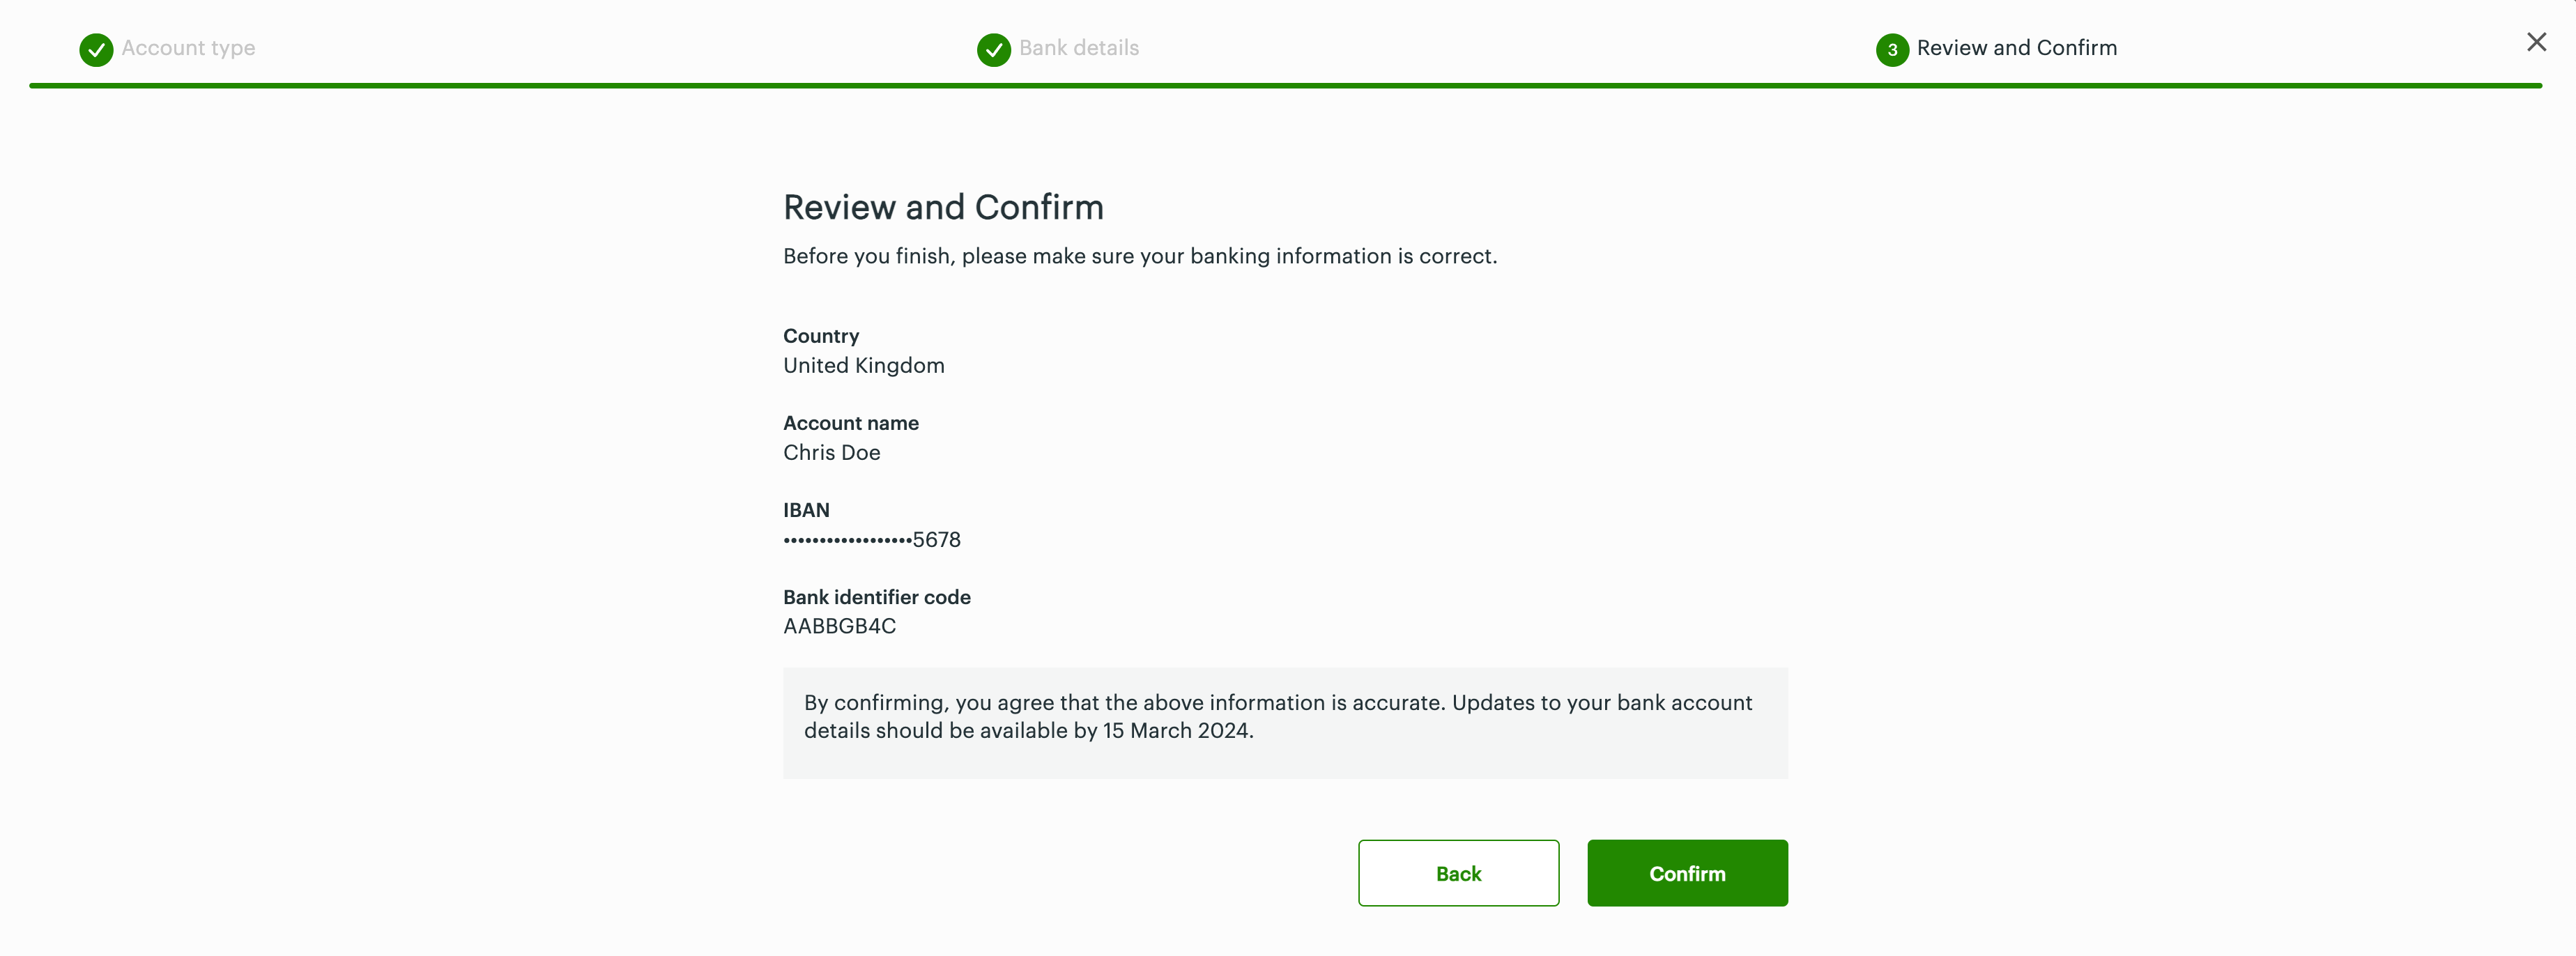
Review and confirm: IBAN
Step 3: Review and confirm—On the Review and confirm page:
- Review the bank account information.
- If any changes are needed, click Back to go to a previous step.
- If all information is correct, click Confirm. The Developer Account Information page displays a confirmation message with the approximate time by which the new bank account will be updated in your developer account records with Clover.
Add a SWIFT/Bank Identifier Code (BIC)
After you log in to your production Developer account to add developer bank account information, complete the three steps to add bank account details:
Choose your account type: International
Step 1: Account Type—On the Choose your account type page:
- Select the option: International bank account.
- Click Next. The Select the bank identifier page appears.
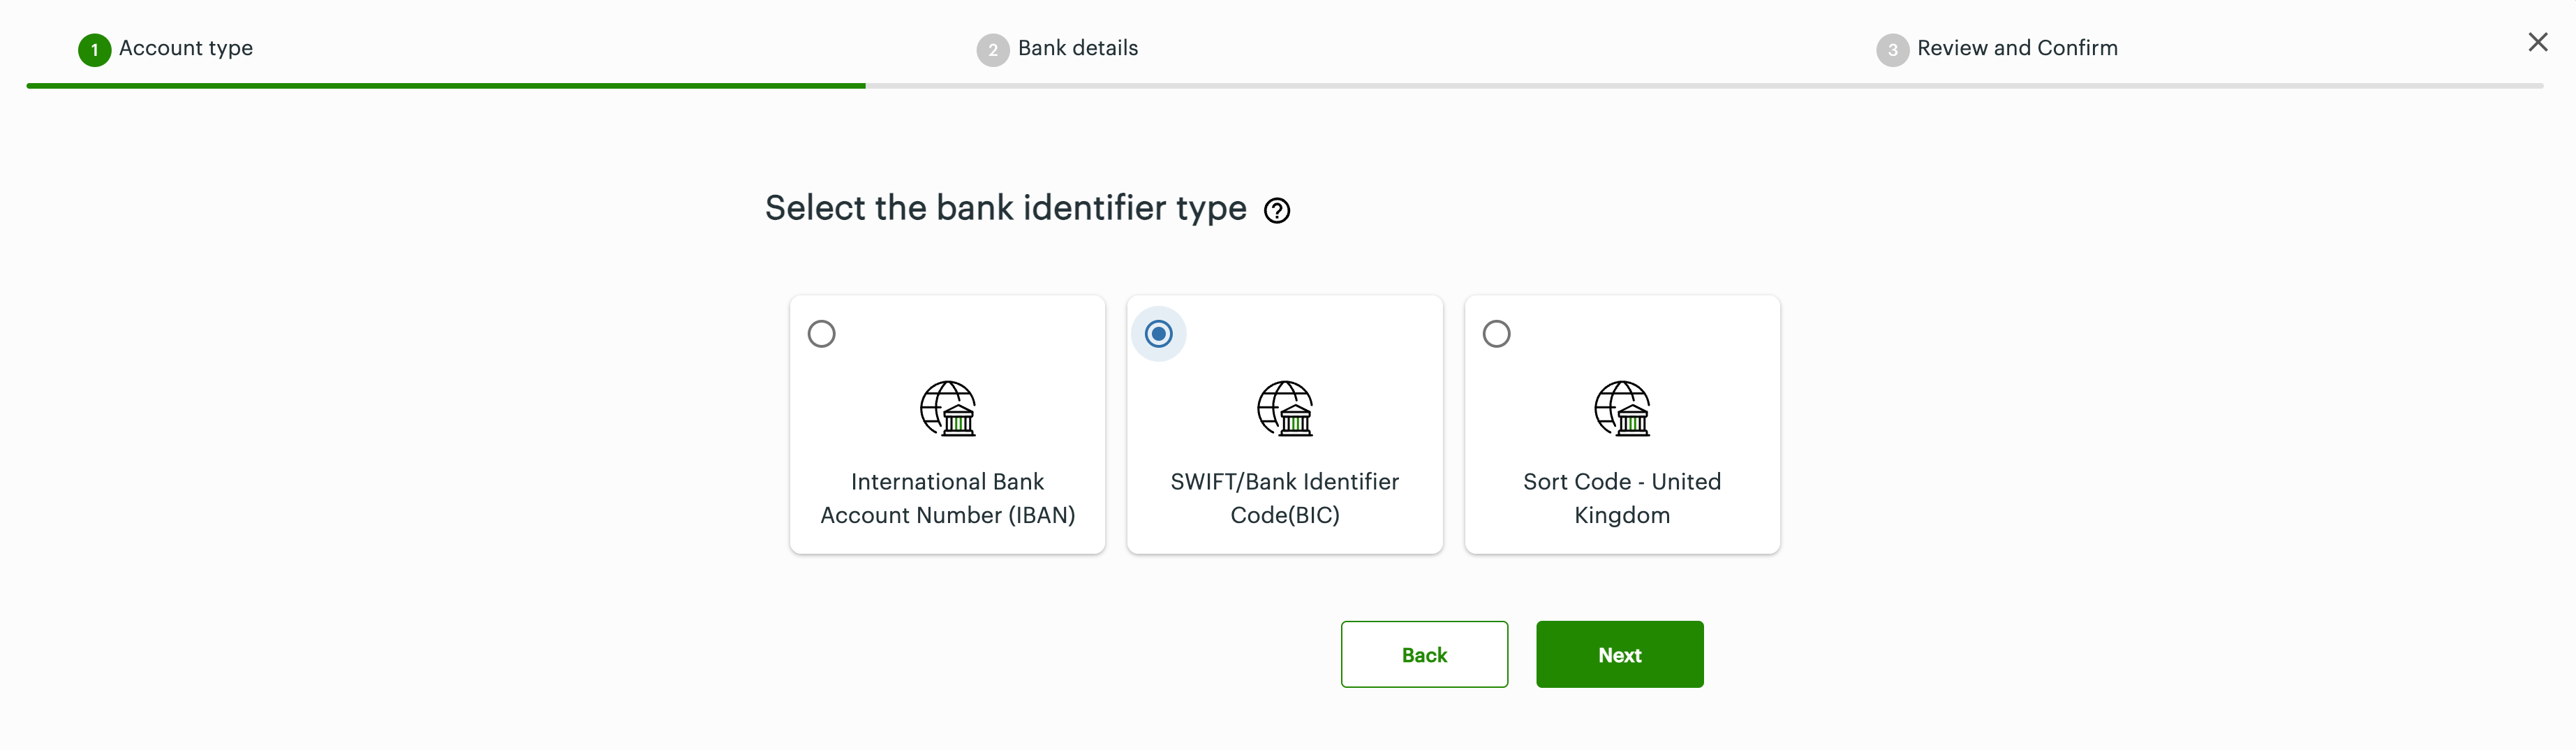
Select the bank identifier type: SWIFT/BIC
- Select the option: SWIFT/Bank Identifier Code (BIC).
- Click Next.

Add your bank details: SWIFT/BIC
Step 2: Bank details—On the Add your bank details page:
- Enter bank details in the following fields—Account name, Account number, and SWIFT or Bank identifier code.
- Click Next.
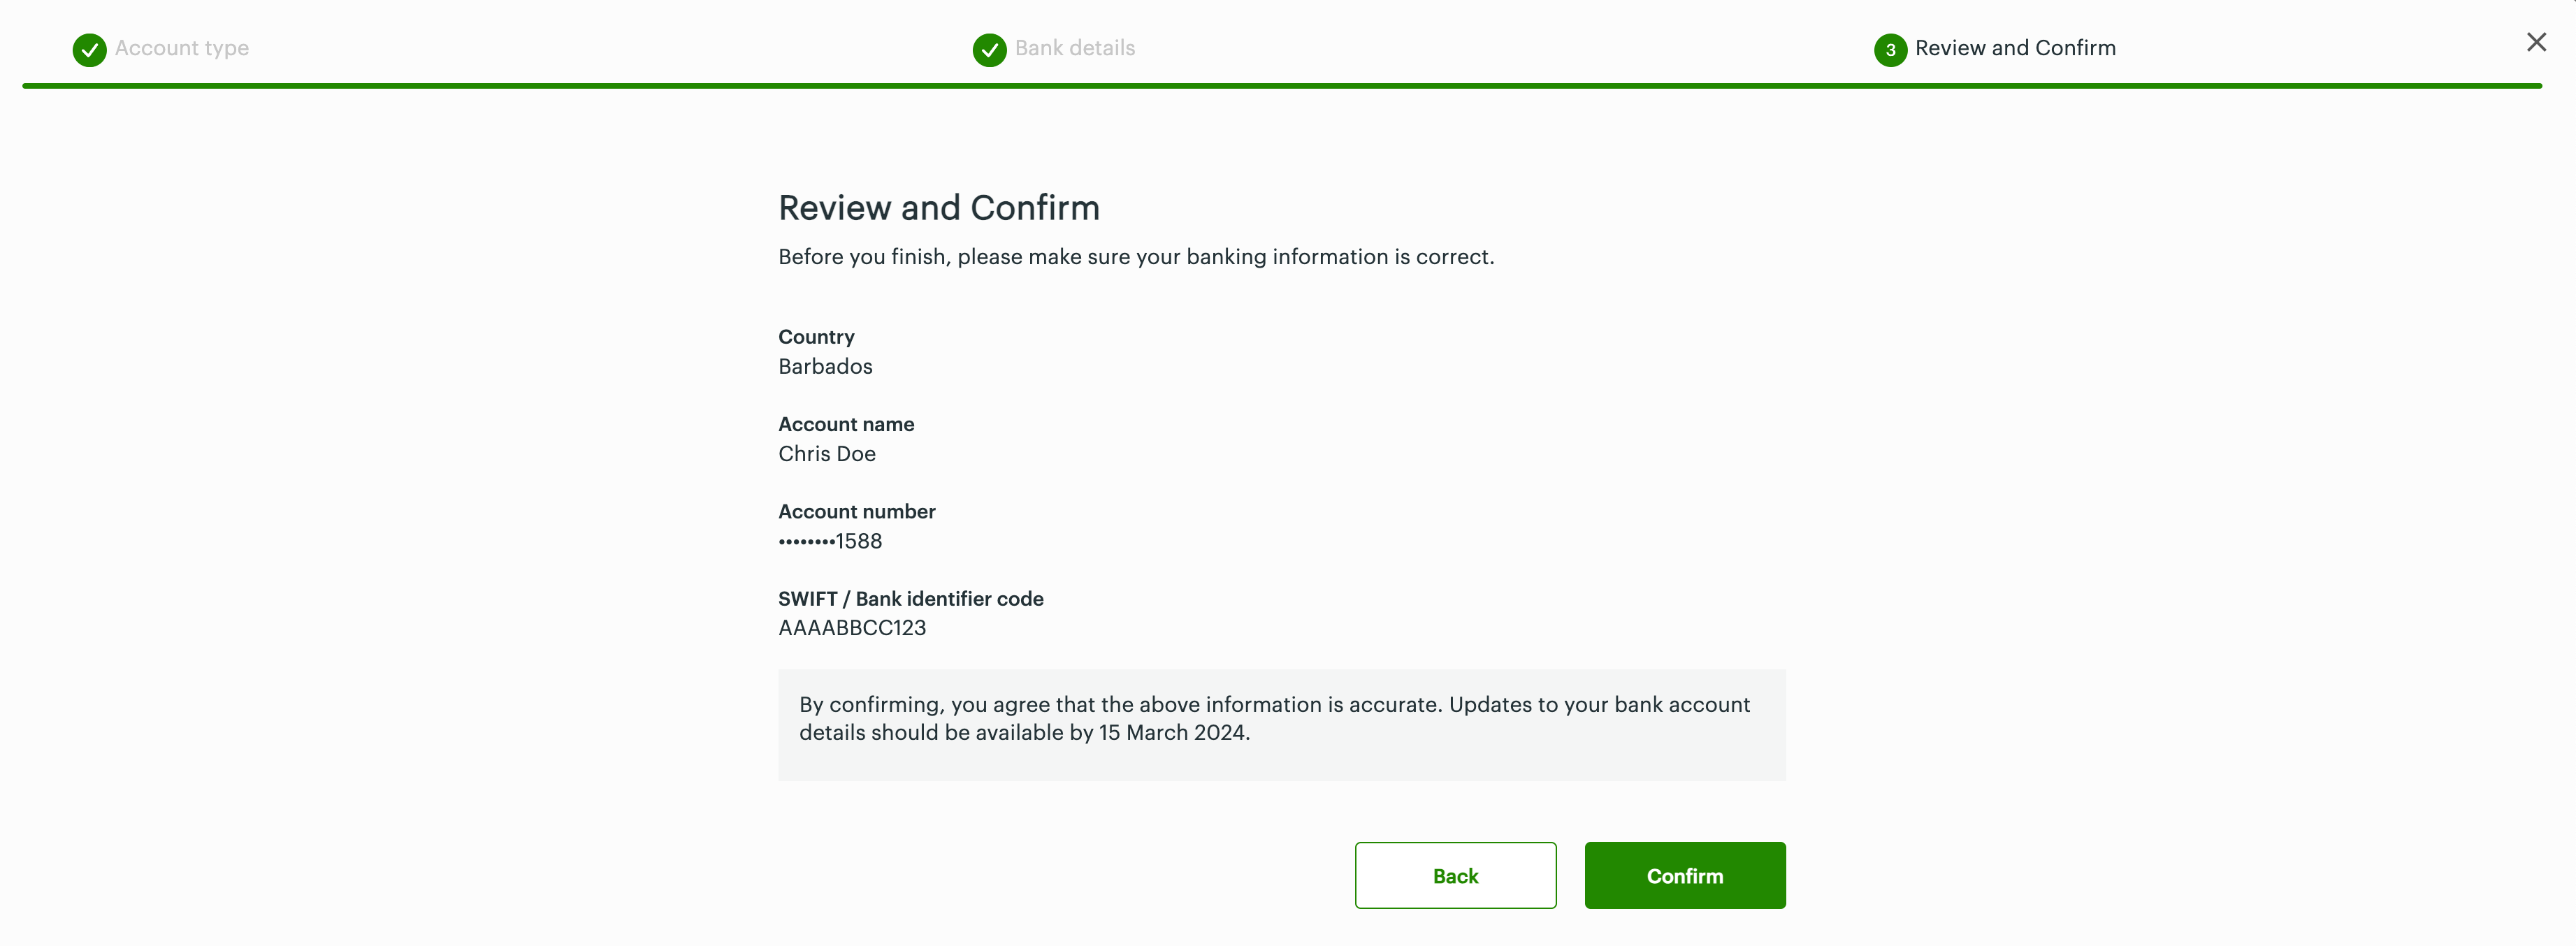
Review and confirm: SWIFT/BIC
Step 3: Review and confirm—On the Review and confirm page:
- Review the bank account information.
- If any changes are needed, click Back to go to a previous step.
- If all information is correct, click Confirm. The Developer Account Information page displays a confirmation message with the approximate time by which the new bank account will be updated in your developer account records with Clover.
Add a SORT Code - United Kingdom
After you log in to your production Developer account to add developer bank account information, complete the three steps to add bank account details:
Choose your account type: International
Step 1: Account Type—On the Choose your account type page:
- Select the option: International bank account.
- Click Next. The Select the bank identifier page appears.
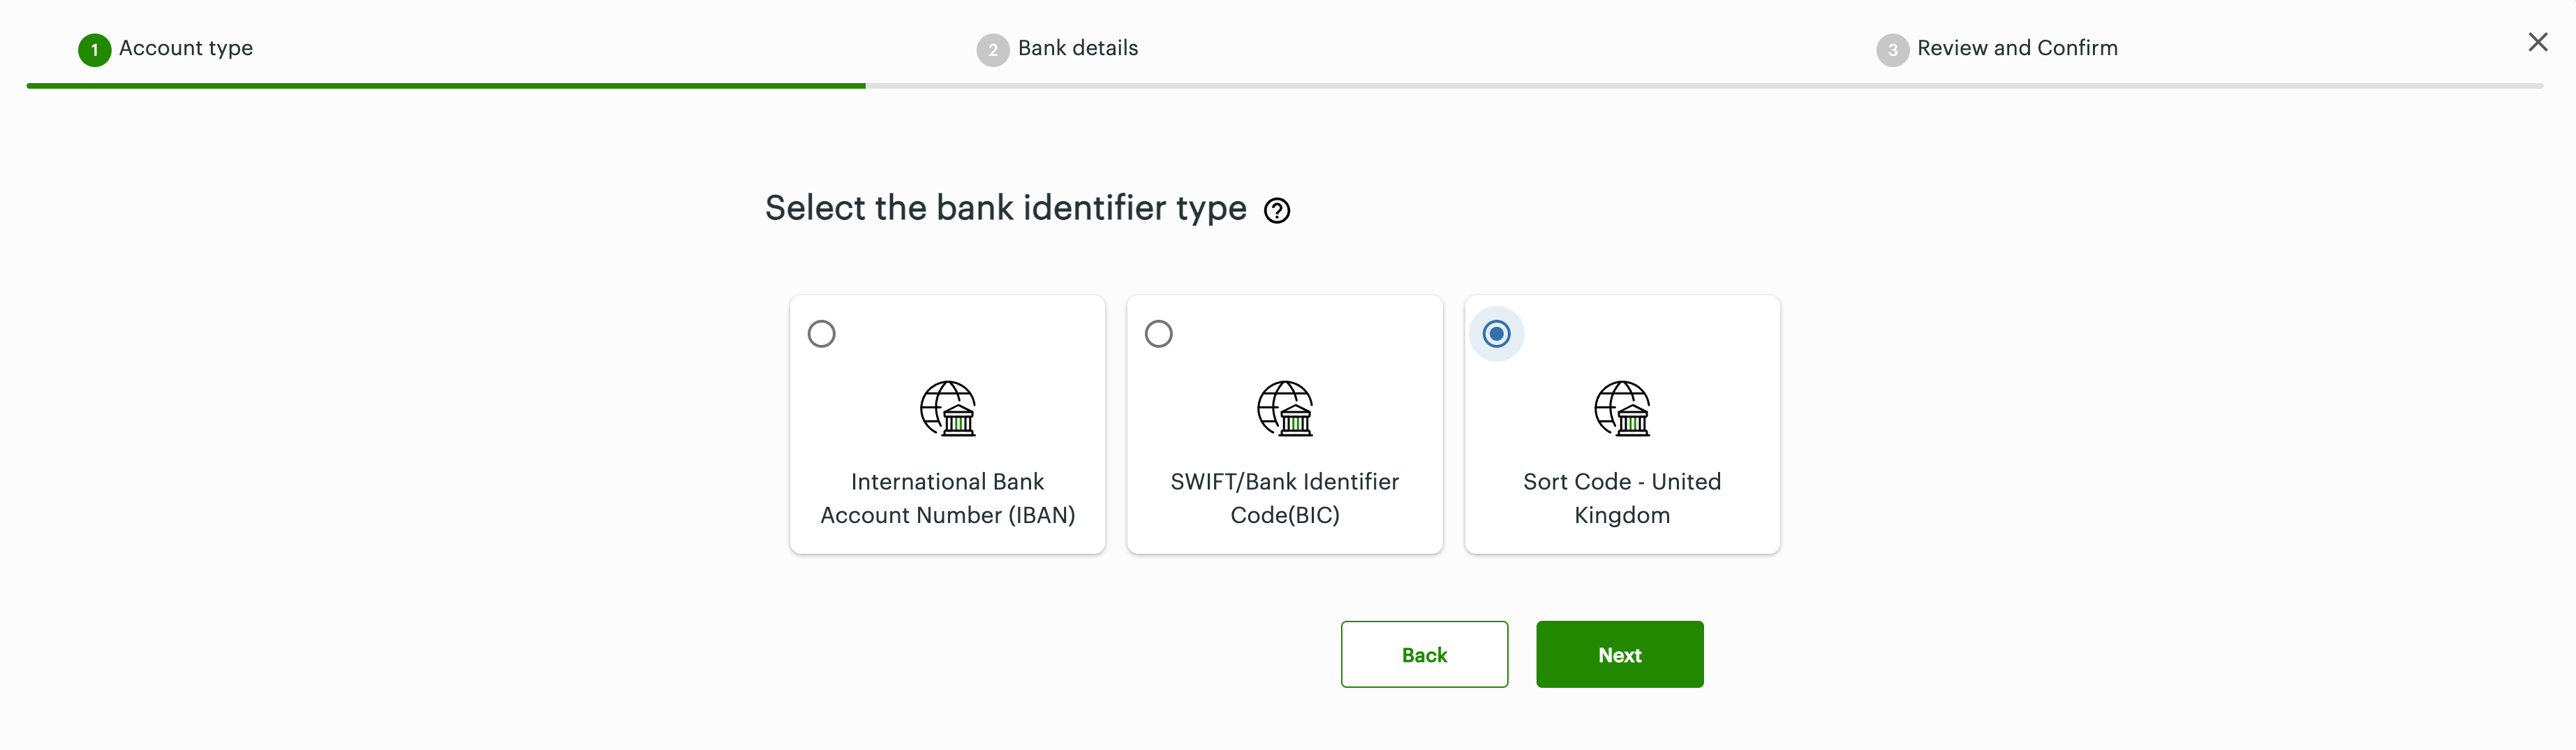
Select the bank identifier type: Sort code - United Kingdom
- Select the option: Sort Code - United Kingdom.
- Click Next.
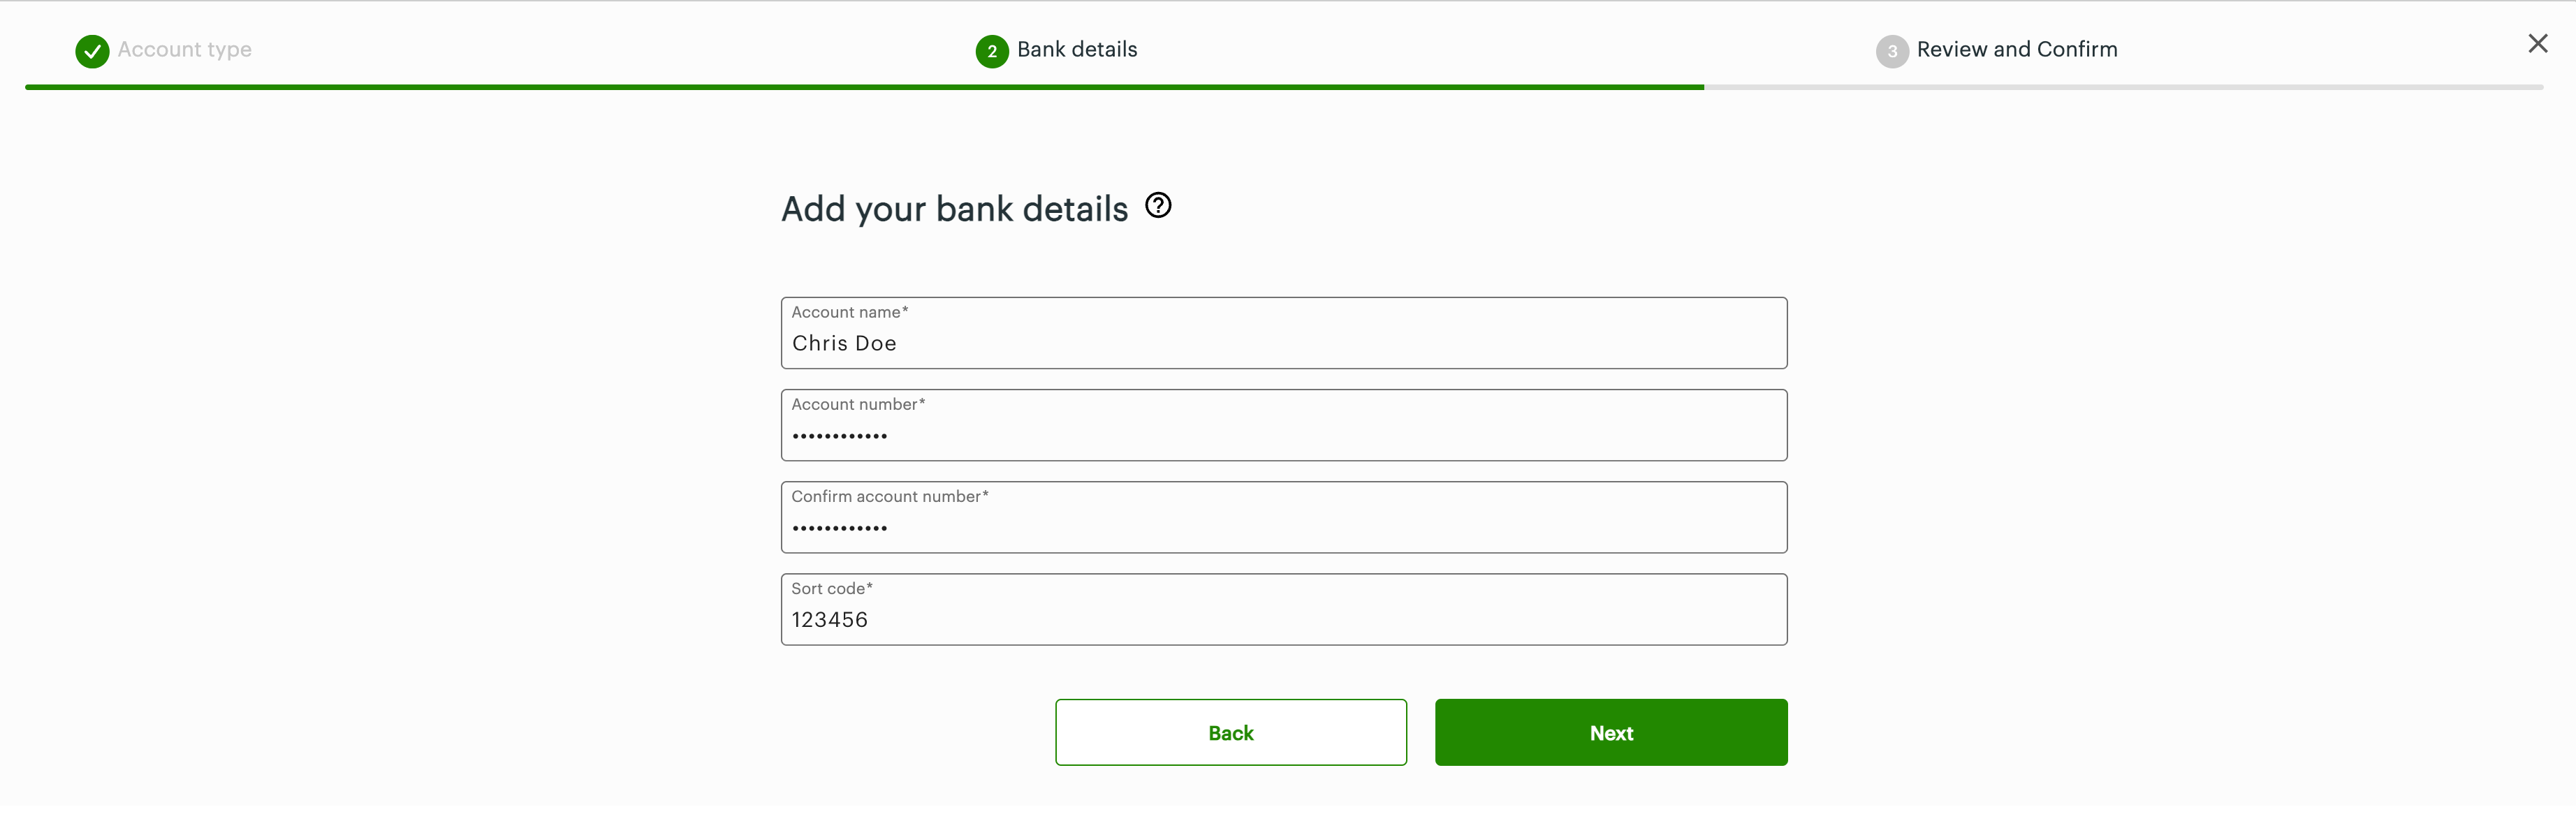
Add your bank details: Sort code - UK
Step 2: Bank details—On the Add your bank details page:
- Enter bank details in the following fields—Account name, Account number, and Sort code.
- Click Next.
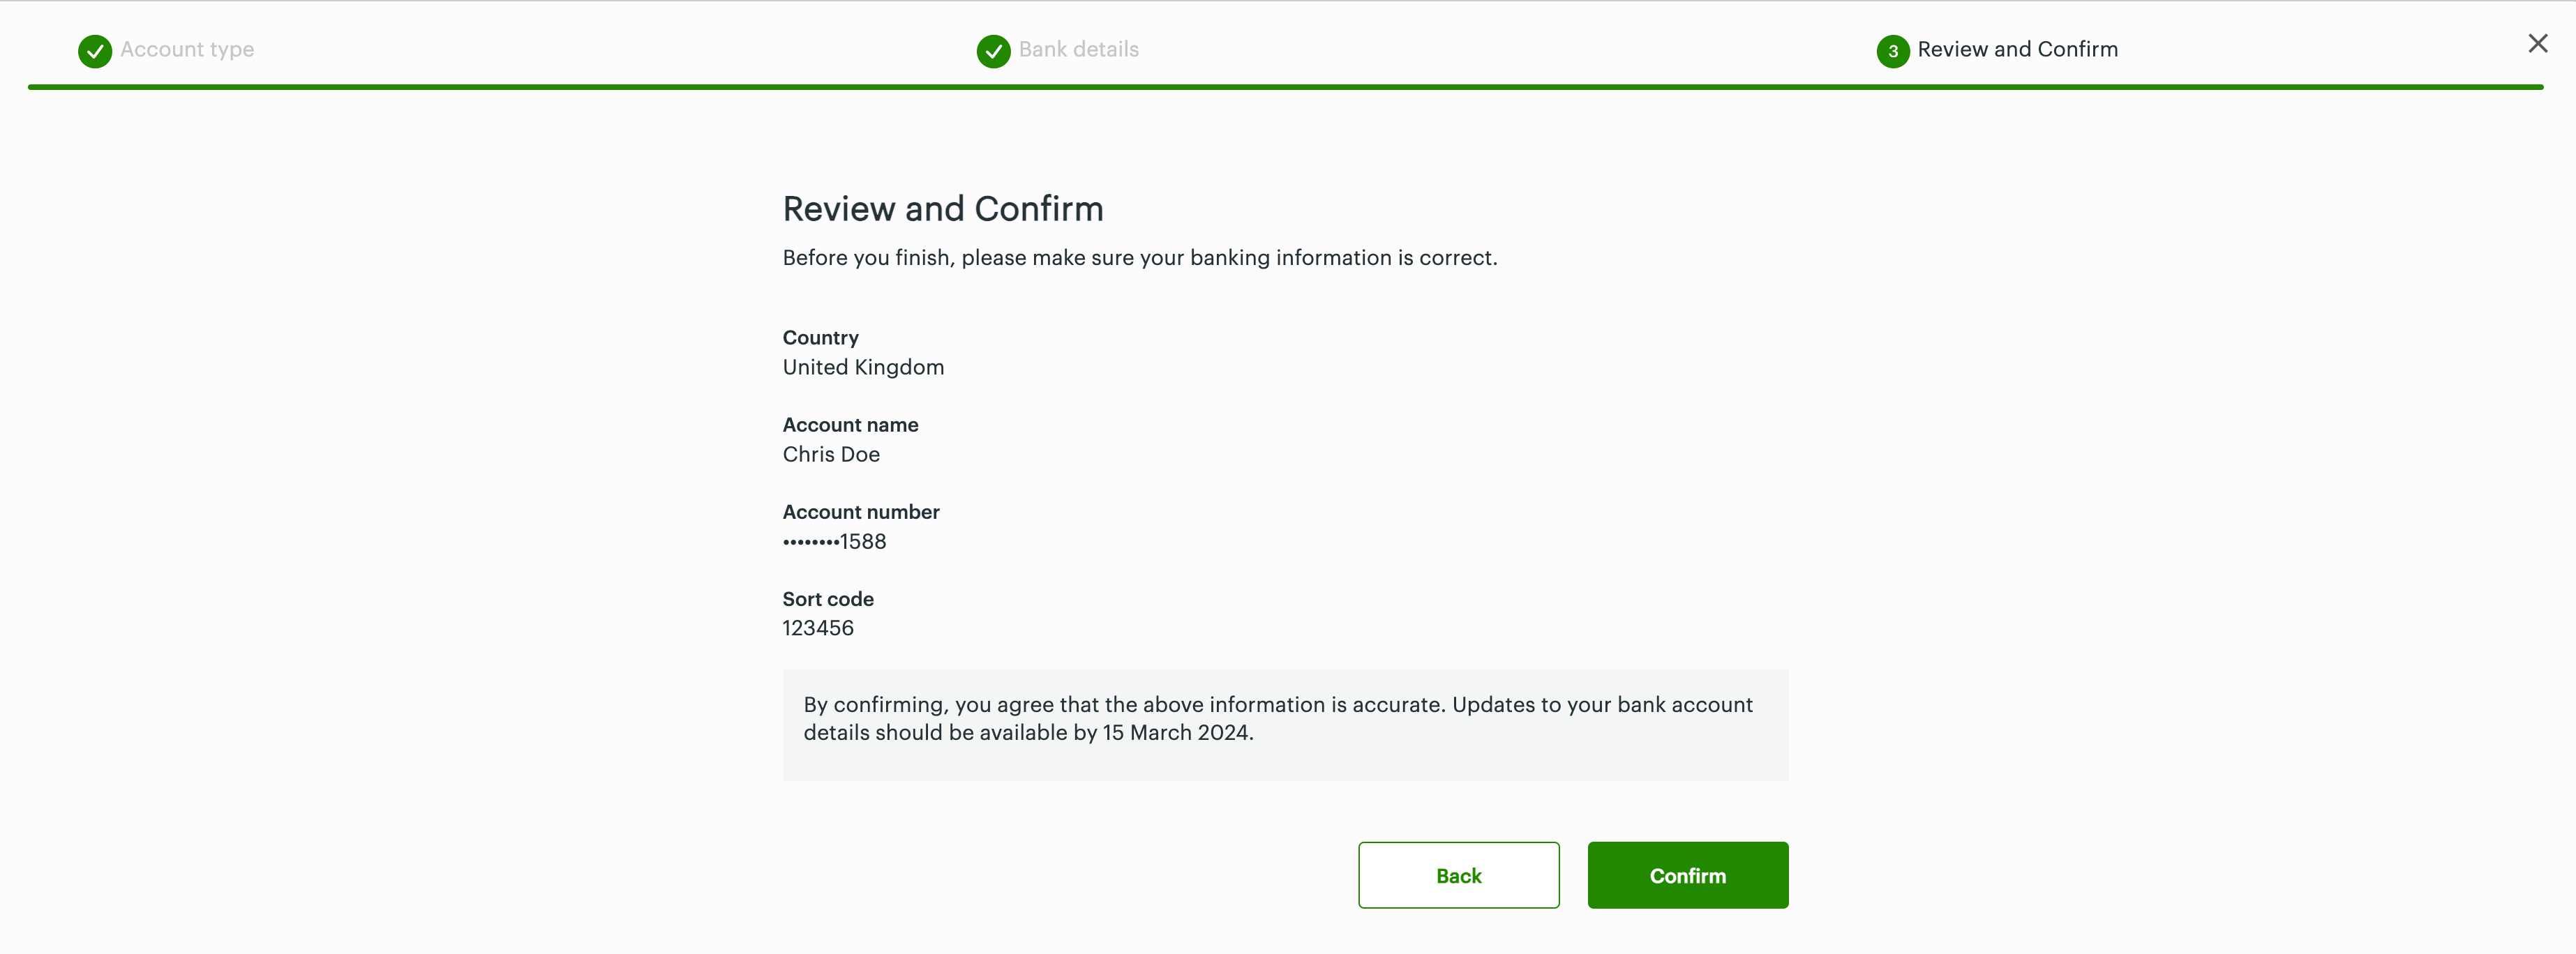
Review and confirm: Sort code - UK
Step 3: Review and confirm—On the Review and confirm page:
- Review the bank account information.
- If any changes are needed, click Back to go to a previous step.
- If all information is correct, click Confirm. The Developer Account Information page displays a confirmation message with the approximate time by which the new bank account will be updated in your developer account records with Clover.
After you add the bank account, you can set up a monthly subscription and metered pricing tiers for your paid app. For more information, see Set up pricing tiers.
Related topics
Updated 15 days ago