Generate OAuth API token with the legacy OAuth flow
Prerequisites and steps for generating an access_token using the legacy v1/OAuth flow
Before you begin
All Ecommerce API endpoints require an OAuth-generated access_token with specific permissions. In this context, note the following:
- Existing (legacy) applications—Apps created before October 2023 use the legacy OAuth flow to generate an
auth_token. For your apps to complete the Clover OAuth flow, you need to migrate to expiring authentication tokens using the v2/OAuth flow. See Migrate legacy OAuth API tokens to v2/OAuth expiring tokens. - New applications—Apps created after October 2023 use the v2/OAuth flow to generate expiring authentication tokens, which include an
access_tokenandrefresh_tokenpair. For both new and existing apps, you can roll out the v2/OAuth flow all at once or as gradual rollouts. See Generate expiring (access and refresh) token with the v2/OAuth flow.
Use the instructions in this topic for the legacy OAuth flow in existing apps. See the OAuth terminology section to understand the key terms.
Prerequisites
Before you can get an OAuth API token, you need to complete the following:
- Create a global developer account.
- Manage test merchant accounts and information.
- Do one of the following:
- Start your ecommerce integration with a test app. In the App Settings, select the Enable online payments checkbox for Ecommerce and then select Ecommerce Settings.
- Generate Ecommerce API tokens (public and private keys) for your test merchant.
Note: Test API tokens generated from the sandbox Merchant Dashboard are intended for development and testing only. You need the merchantId and test API token to test interactions with Clover Ecommerce API and your ecommerce integrations.
- Configure settings and permissions that your app requires to access Clover merchant data.
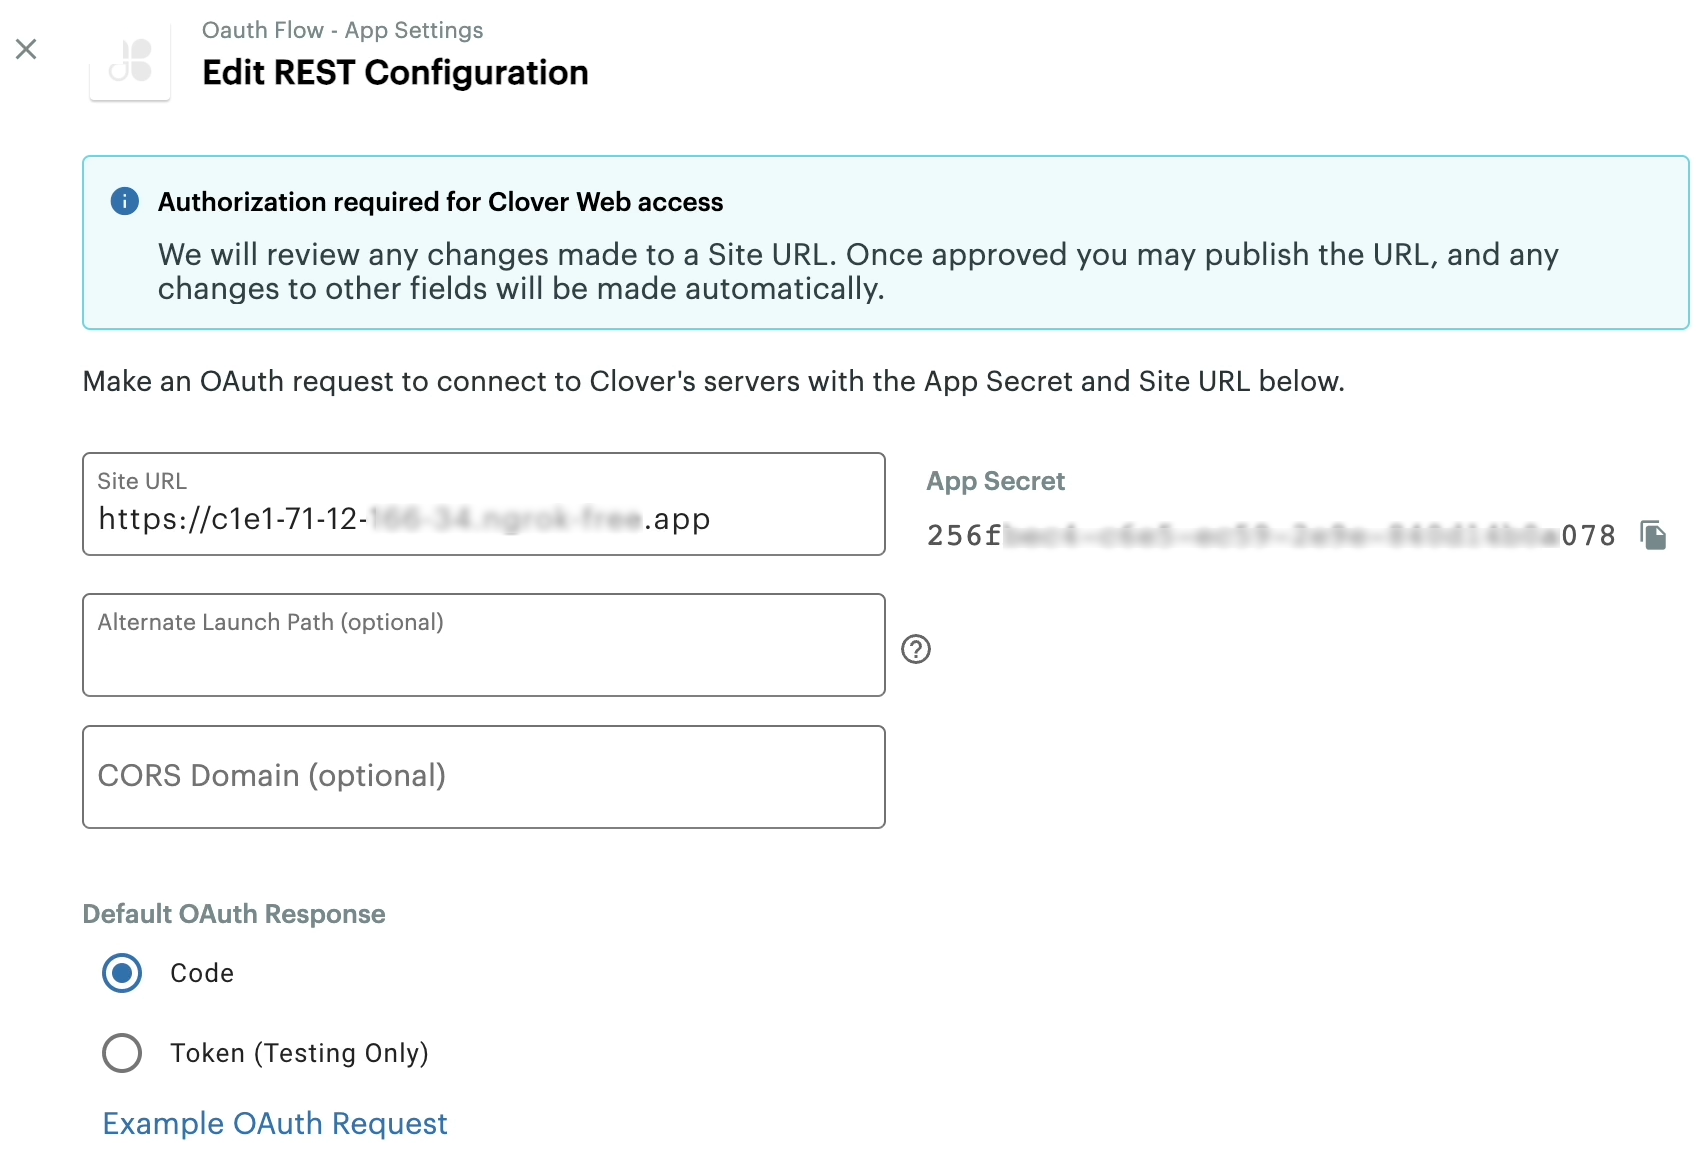
App Settings on the Developer Dashboard: Edit REST Configuration page
Steps
- Log in to the Global Developer Dashboard.
- Navigate to the Merchant Dashboard for a test merchant.
- From the left navigation menu, click More Tools, and then select your app on the Clover App Market.
- Click Connect to install your app for the test merchant.
From here:
- Request merchant authorization—When an unauthorized merchant selects and installs your app from the Clover App Market, the Clover server redirects the merchant to log in to their merchant account using the following URL format:
`https://sandbox.dev.clover.com/oauth/authorize?client_id={APP_ID}&redirect_uri={CLIENT_REDIRECT_URL}` - Receive an authorization code—After authorization, the Clover server redirects the merchant to your app using the Site URL from App Settings > REST Configuration. The redirect URL format includes a set of parameters and an authorization code in the URL:
`https://www.example.com/oauth_callback?merchant_id={MERCHANT_ID}&client_id={APP_ID}&employee_id={EMPLOYEE_ID}&code={AUTHORIZATION_CODE}`
Test app install information URL: client_id and code
- Send a GET request using Postman to the following URL using:
App IDas theclient_id,App Secretfrom the App Settings page as theclient_secret, and- Authorization code as the
code
https://apisandbox.dev.clover.com/oauth/token?client_id={appId}&client_secret={APP_SECRET}&code={AUTHORIZATION_CODEhttps://apisandbox.dev.clover.com/oauth/token?client_id=RKxxxxxxxxS9C&client_secret=d46dxxxx-xxxx-xxxx-xxxx-xxxxxxxx1b77&code=1ccdxxxx-xxxx-xxxx-xxxx-xxxxxxxea1bIn response, the Clover server displays an API access token.
{
   "access_token":"{API_TOKEN}"
}{
"access_token": "ce7exxxx-xxxx-xxxx-xxxx-xxxxxxxx4b24"
}Use this API access_token to generate an Ecommerce API key that you need to tokenize a card. See Generate an Ecommerce API key (PAKMS key).
Related topics
Updated 15 days ago