Create a custom tender app
Before you begin
Review Advanced information to build with Android.
Setup for this tutorial
- JVM 1.8.0
- Gradle 2.3
- Android Studio 1.3.2
Required permissions
The following permissions are required to initialize a custom tender:
- MERCHANT_R (to get/read tenders)
- MERCHANT_W (to create/write tenders)
Initialize a custom tender for a merchant
For this part of this tutorial, use the TenderConnector to initialize a custom tender for our merchant.
- Add the SDK as a dependency in your
build.gradlefile.Example:compile 'com.clover.sdk:clover-android-sdk:latest.release' - Add the necessary Android permission to your
AndroidManifest.xmlfile.Example:uses-permission android:name="android.permission.GET_ACCOUNTS". - Required. Run the app once before you can use a custom tender. This is because the initialization code needs to be executed to register the tender with the merchant. We recommend running the custom tender app immediately after it is installed.
Initialize your custom tender
The following code demonstrates how to initialize a custom tender for a merchant. This is a streamlined example. Production-ready code must handle error scenarios and properly inform the user with appropriate messages.
private void createTenderType(final Context context) {
    new AsyncTask<Void, Void, Exception>() {

        private TenderConnector tenderConnector;

        @Override
        protected void onPreExecute() {
            super.onPreExecute();
            tenderConnector = new TenderConnector(context, CloverAccount.getAccount(context), null);
            tenderConnector.connect();
        }

        @Override
        protected Exception doInBackground(Void... params) {
            try {
                tenderConnector.checkAndCreateTender(getString(R.string.tender_name), getPackageName(), true, false); // initialization
            } catch (Exception exception) {
                Log.e(TAG, exception.getMessage(), exception.getCause());
                return exception;
            }
            return null;
        }

        @Override
        protected void onPostExecute(Exception exception) {
            tenderConnector.disconnect();
            tenderConnector = null;
        }
    }.execute();
}
IMPORTANT
Required. Add
setResult(RESULT_CANCELED)inonCreateto create a default exit result.

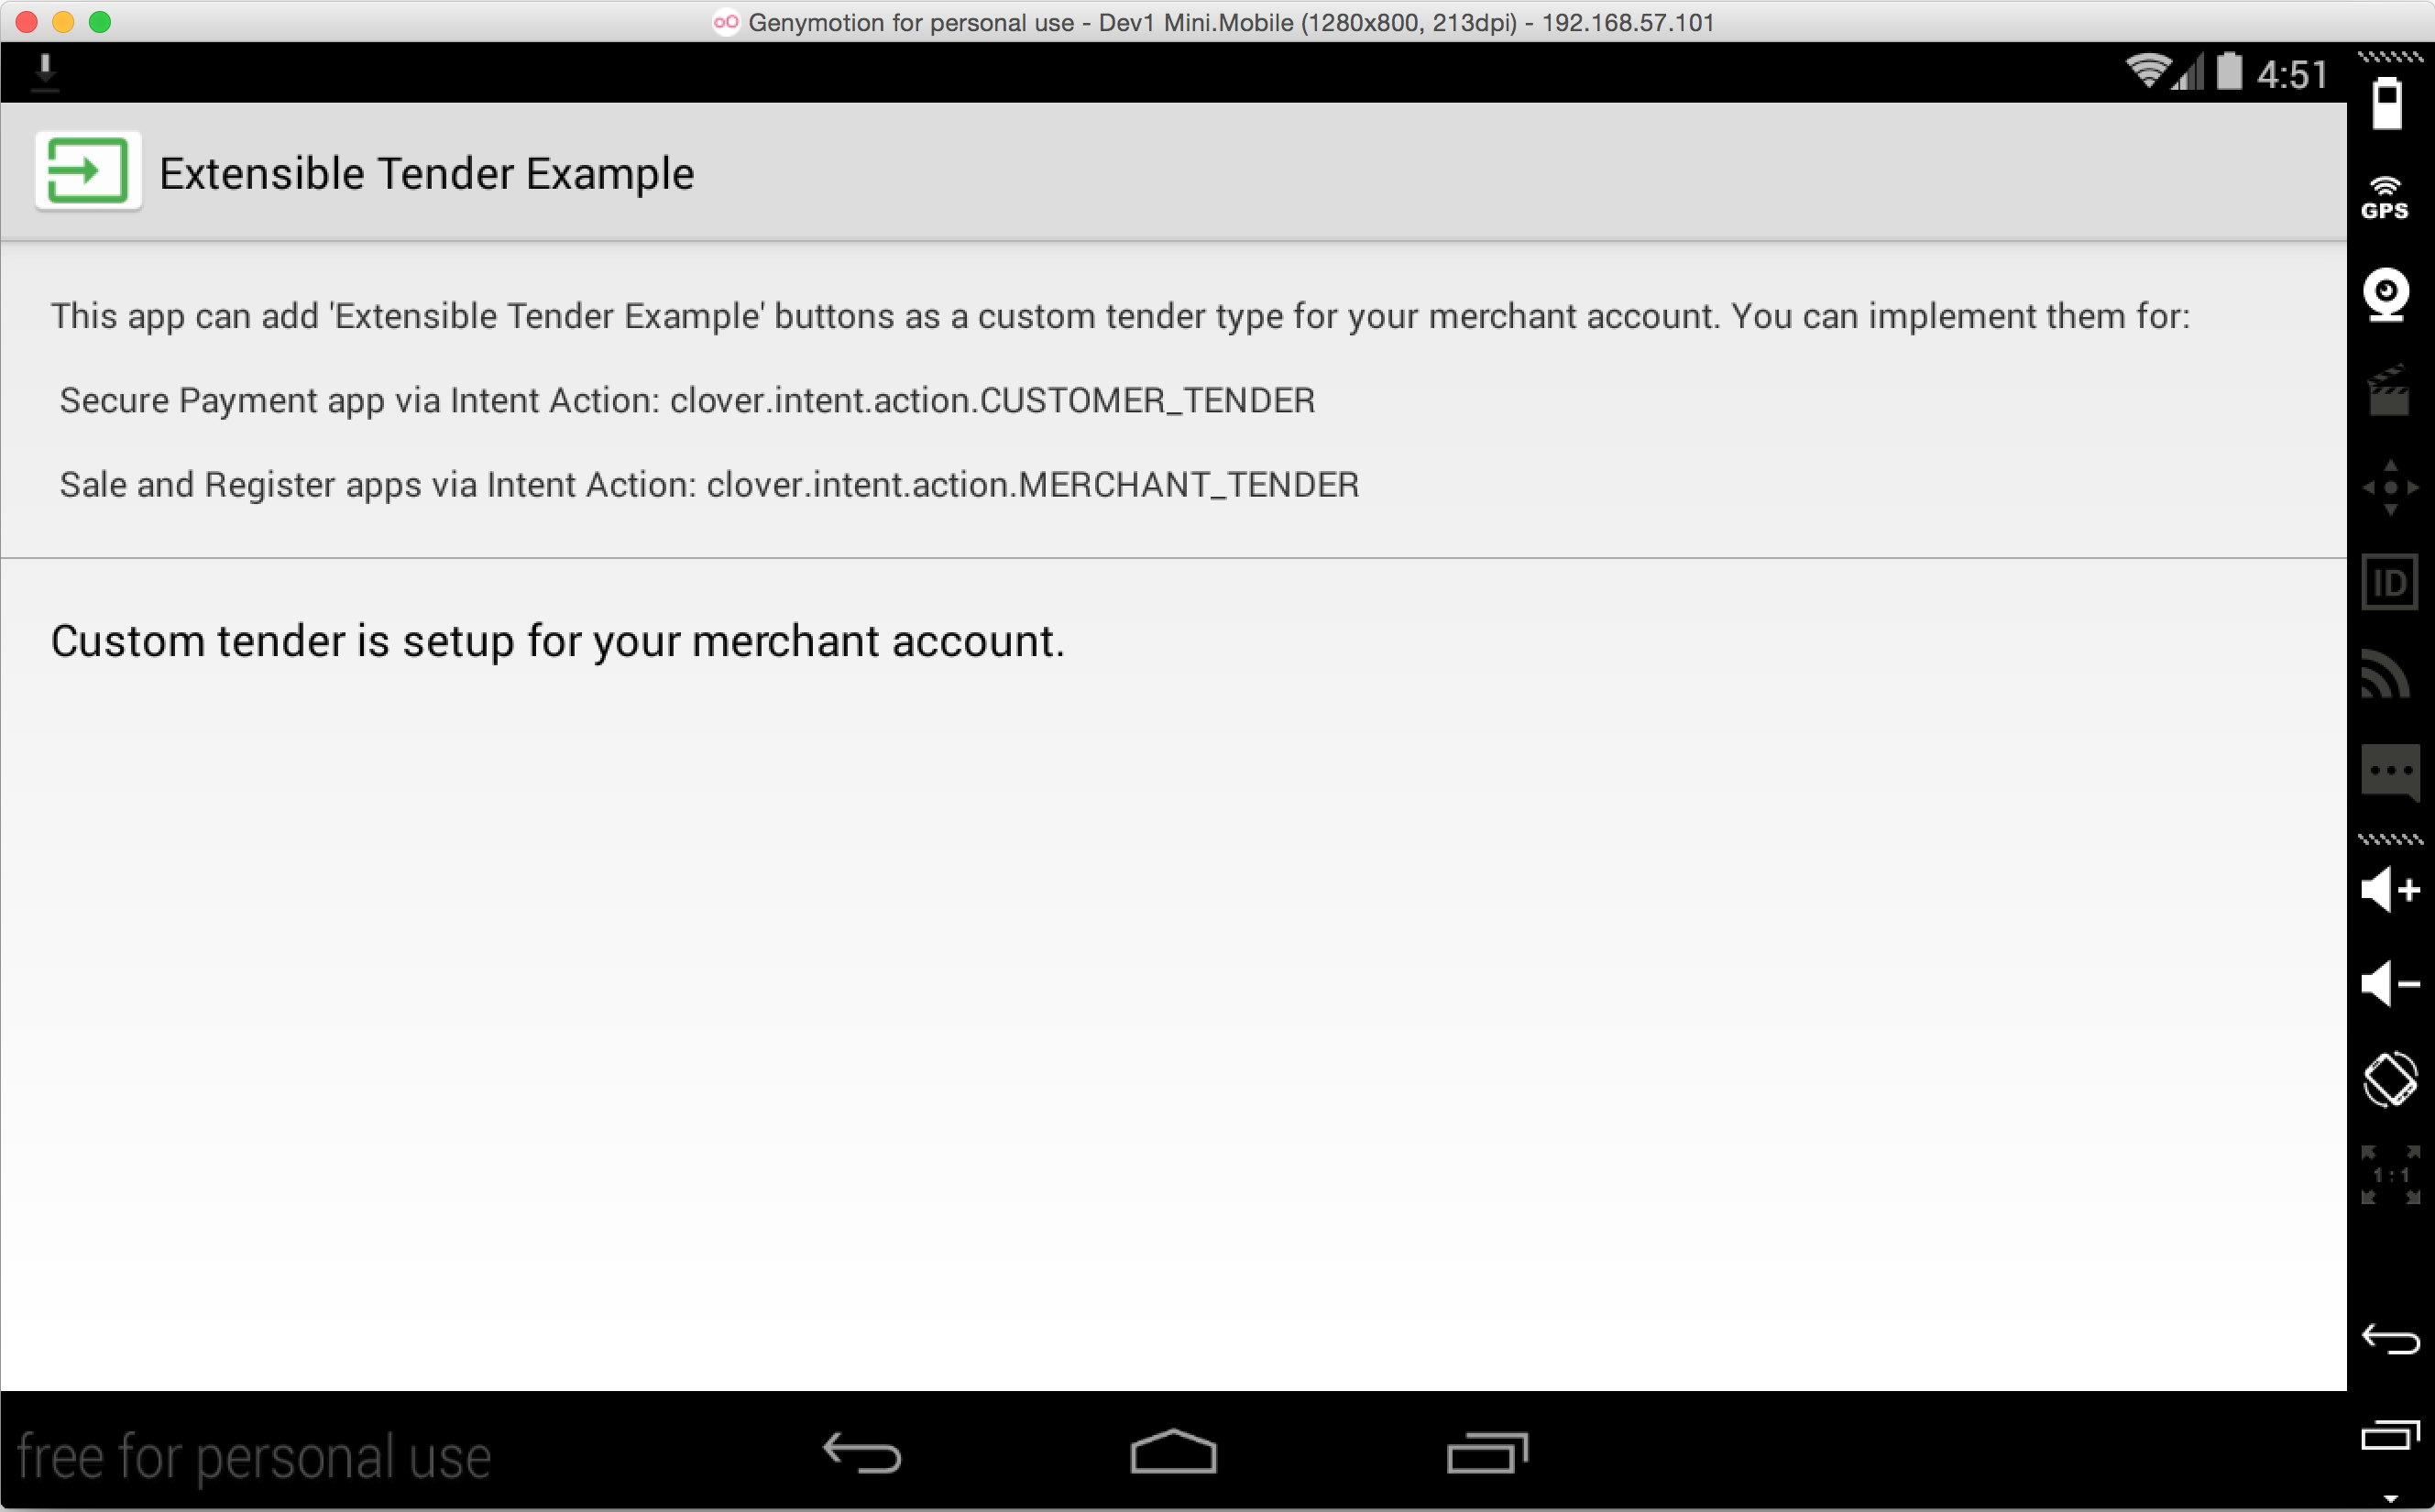
Custom Tender Initialized screen of Extensible Tender Example
Link into the Register, Sale, and Secure Payment apps
You can implement one of two payment experiences, depending on your specific use case:
- For a merchant-facing payment, such as when the merchant scans a QR code or enters a customer's phone number for a digital wallet redemption, follow the steps in the Merchant-facing setup section.
- For a customer-facing experience that launches from within the Secure Payment app on a Clover Mobile or Clover Mini (in a one-device use case) or a tethered Clover Mini (in a two-device use case), see the Customer-facing setup section.
TIP
In some cases, it may allow the merchant to use either method, such as when using a customer phone number. You must develop your user experiences and user interface accordingly.
Merchant-facing setup
- Follow the example to set up an activity for a merchant-facing custom tender:
public class MerchantFacingTenderActivity extends Activity {

    @Override
    protected void onCreate(Bundle savedInstanceState) {
        super.onCreate(savedInstanceState);

        setContentView(R.layout.activity_tender);

        setResult(RESULT_CANCELED);

        /**
         * @see Intents.ACTION_MERCHANT_TENDER
         */
        final long amount = getIntent().getLongExtra(Intents.EXTRA_AMOUNT, 0);
        final Currency currency = (Currency) getIntent().getSerializableExtra(Intents.EXTRA_CURRENCY);
        final long taxAmount = getIntent().getLongExtra(Intents.EXTRA_TAX_AMOUNT, 0);
        final ArrayList taxableAmounts = getIntent().getParcelableArrayListExtra(Intents.EXTRA_TAXABLE_AMOUNTS);
        final ServiceChargeAmount serviceCharge = getIntent().getParcelableExtra(Intents.EXTRA_SERVICE_CHARGE_AMOUNT);

        final String orderId = getIntent().getStringExtra(Intents.EXTRA_ORDER_ID);
        final String merchantId = getIntent().getStringExtra(Intents.EXTRA_MERCHANT_ID);

        final Tender tender = getIntent().getParcelableExtra(Intents.EXTRA_TENDER);

        // Merchant Facing specific fields
        final Order order = getIntent().getParcelableExtra(Intents.EXTRA_ORDER);
        final String note = getIntent().getStringExtra(Intents.EXTRA_NOTE);

        setupViews(amount, currency, orderId, merchantId);
    }

    public void setupViews(final long amount, Currency currency, String orderId, String merchantId) {
        TextView amountText = (TextView) findViewById(R.id.text_amount);
        amountText.setText(Utils.longToAmountString(currency, amount));

        TextView orderIdText = (TextView) findViewById(R.id.text_orderid);
        orderIdText.setText(orderId);
        TextView merchantIdText = (TextView) findViewById(R.id.text_merchantid);
        merchantIdText.setText(merchantId);

        Button approveButton = (Button) findViewById(R.id.acceptButton);
        approveButton.setOnClickListener(new View.OnClickListener() {
            @Override
            public void onClick(View v) {
                Intent data = new Intent();
                data.putExtra(Intents.EXTRA_AMOUNT, amount);
                data.putExtra(Intents.EXTRA_CLIENT_ID, Utils.nextRandomId());
                data.putExtra(Intents.EXTRA_NOTE, "Transaction Id: " + Utils.nextRandomId());

                setResult(RESULT_OK, data);
                finish();
            }
        });

        Button declineButton = (Button) findViewById(R.id.declineButton);
        declineButton.setOnClickListener(new View.OnClickListener() {
            @Override
            public void onClick(View v) {
                Intent data = new Intent();
                data.putExtra(Intents.EXTRA_DECLINE_REASON, "You pressed the decline button");

                setResult(RESULT_CANCELED, data);
                finish();
            }
        });
    }
}
- Declare a
MERCHANT_TENDERintent filter in theAndroidManifest.xmlfile for Android to resolve any intents to your activity. - Set
exportedtotrue.
<activity
    android:name=".MerchantFacingTenderActivity"
    android:exported="true"
    android:label="@string/title_activity_test_tender">

    <meta-data
        android:name="clover.intent.meta.MERCHANT_TENDER_IMAGE"
        android:resource="@mipmap/thirdparty_gray_example" />

    <intent-filter>
        <action android:name="clover.intent.action.MERCHANT_TENDER" />
        <category android:name="android.intent.category.DEFAULT" />
    </intent-filter>
    </activity>
- Optional. To use a logo in the Sale app instead of the name of your custom tender, declare
MERCHANT_TENDER_IMAGEmetadata for the same Activity the intent filter was declared for and referencing your logo asset. The logo must be solid gray (#666666) in accordance with the design requirements.

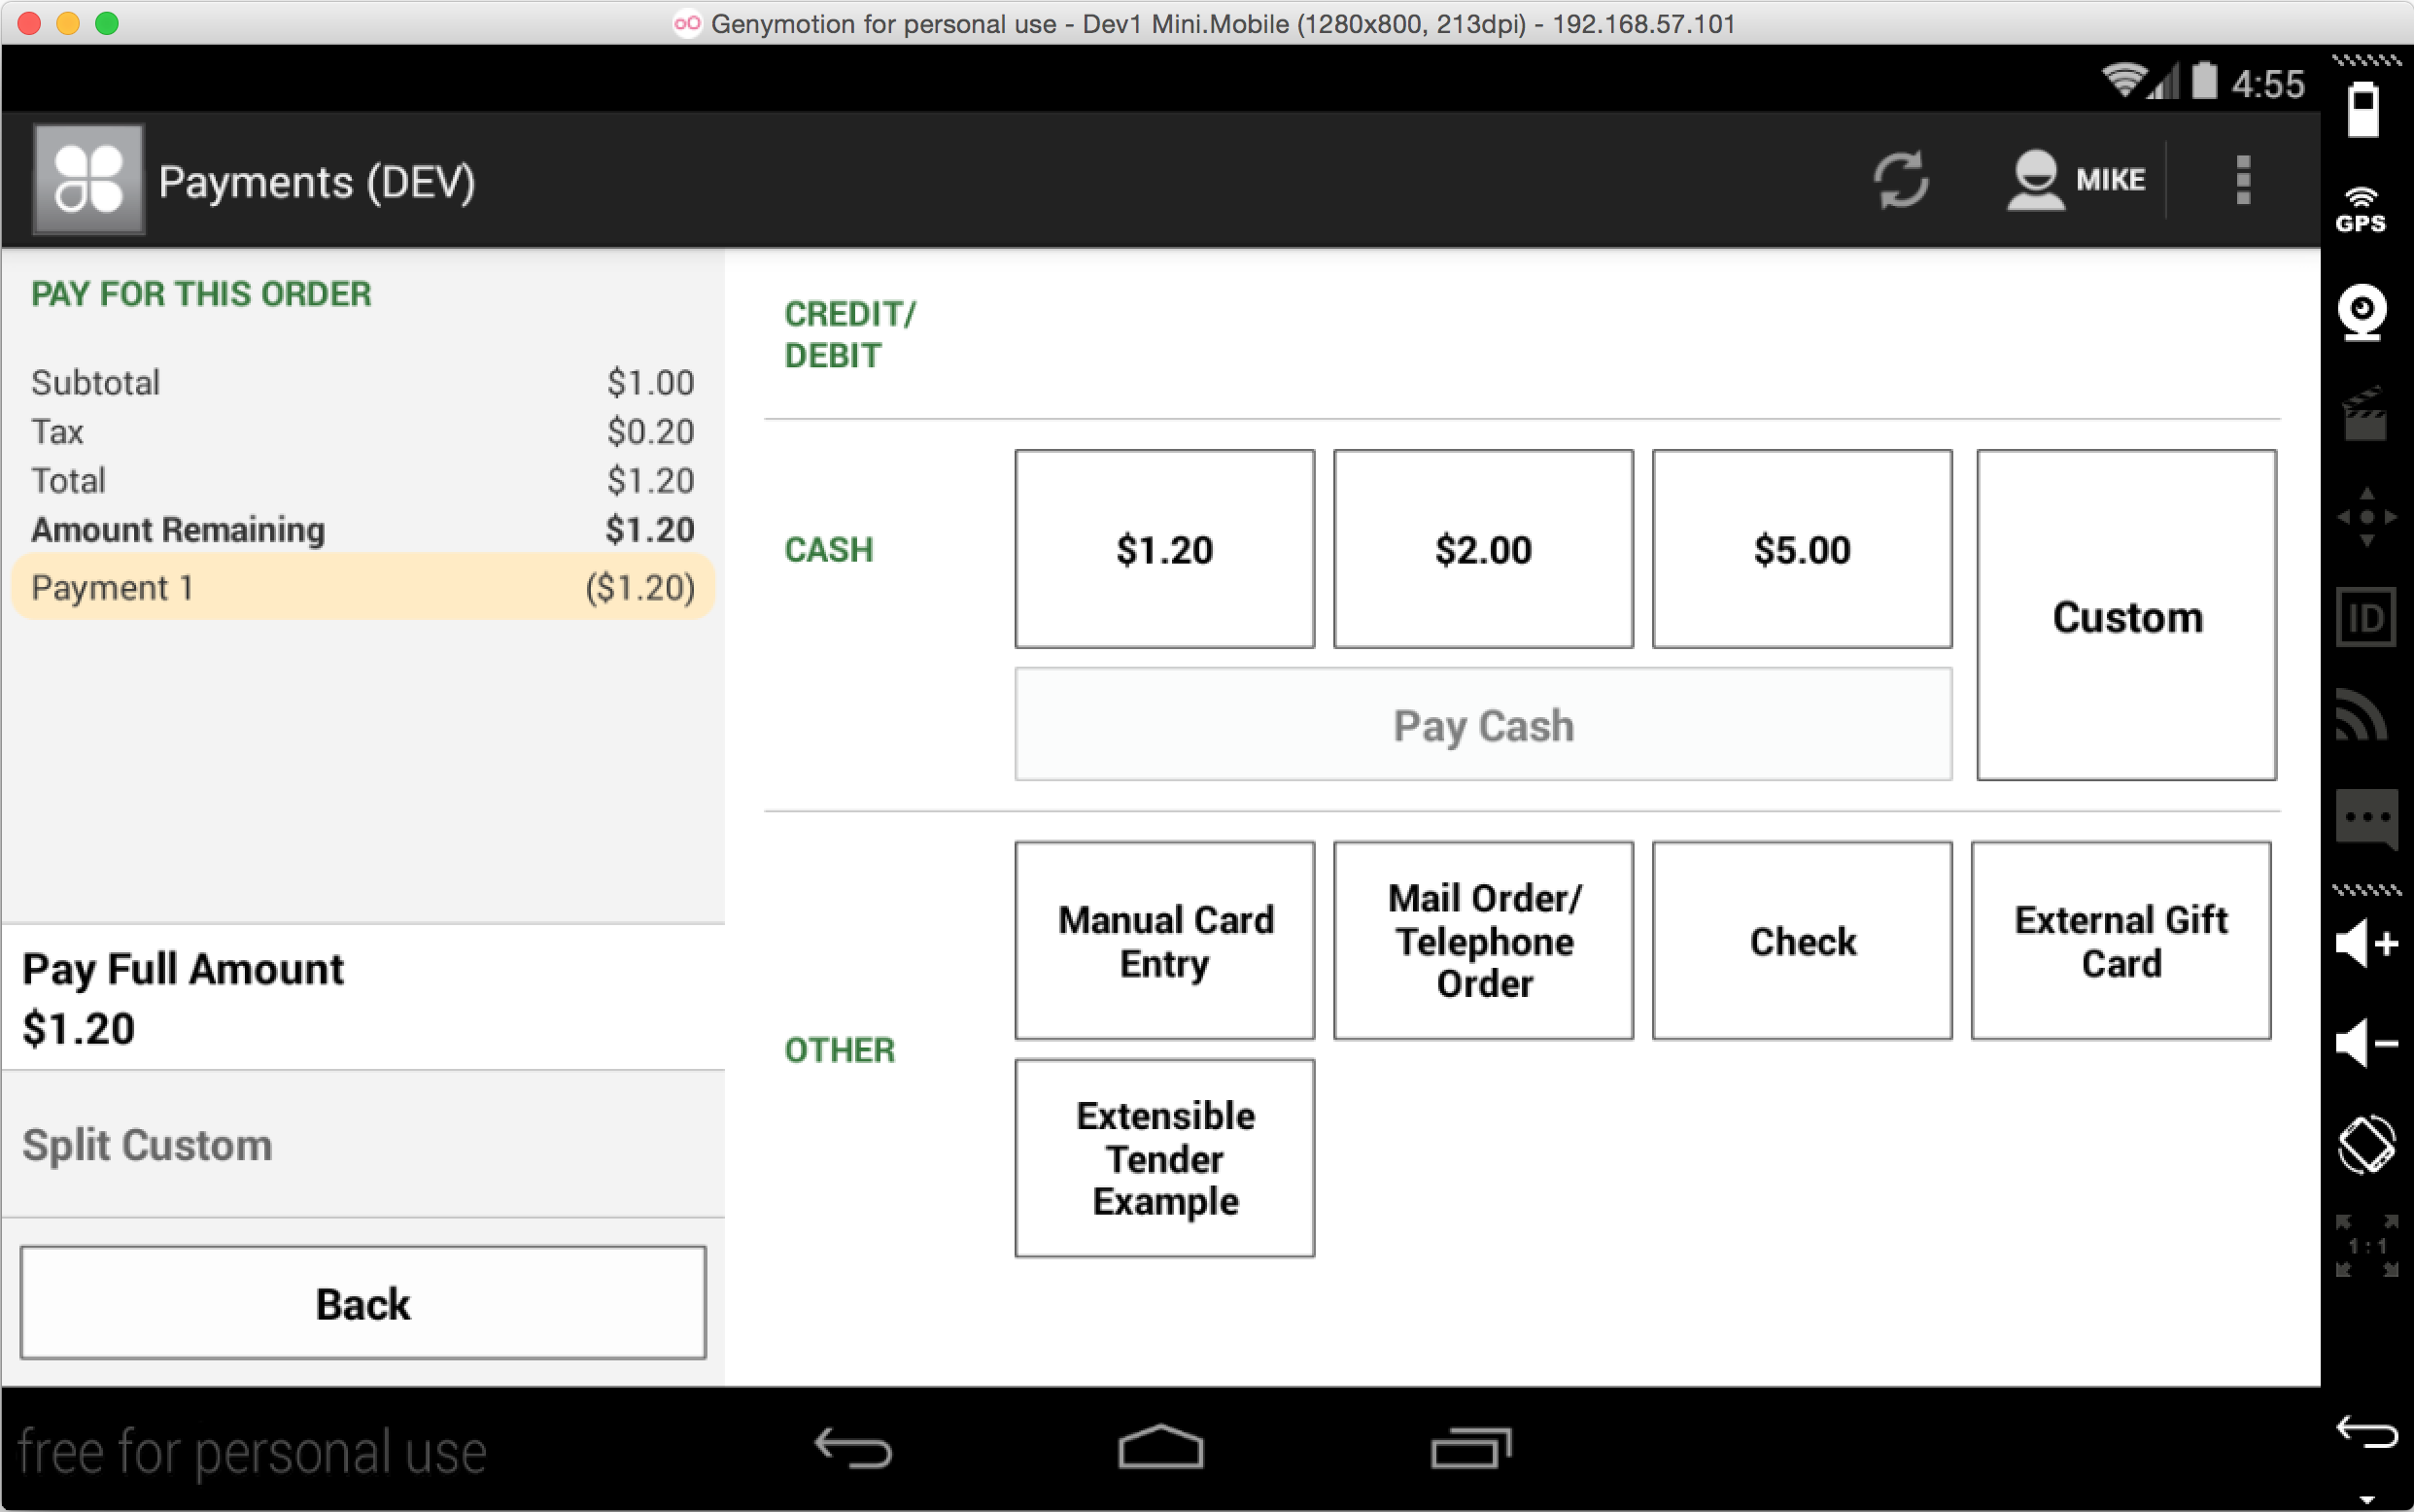
Custom Tender: Merchant-facing button in the Register app

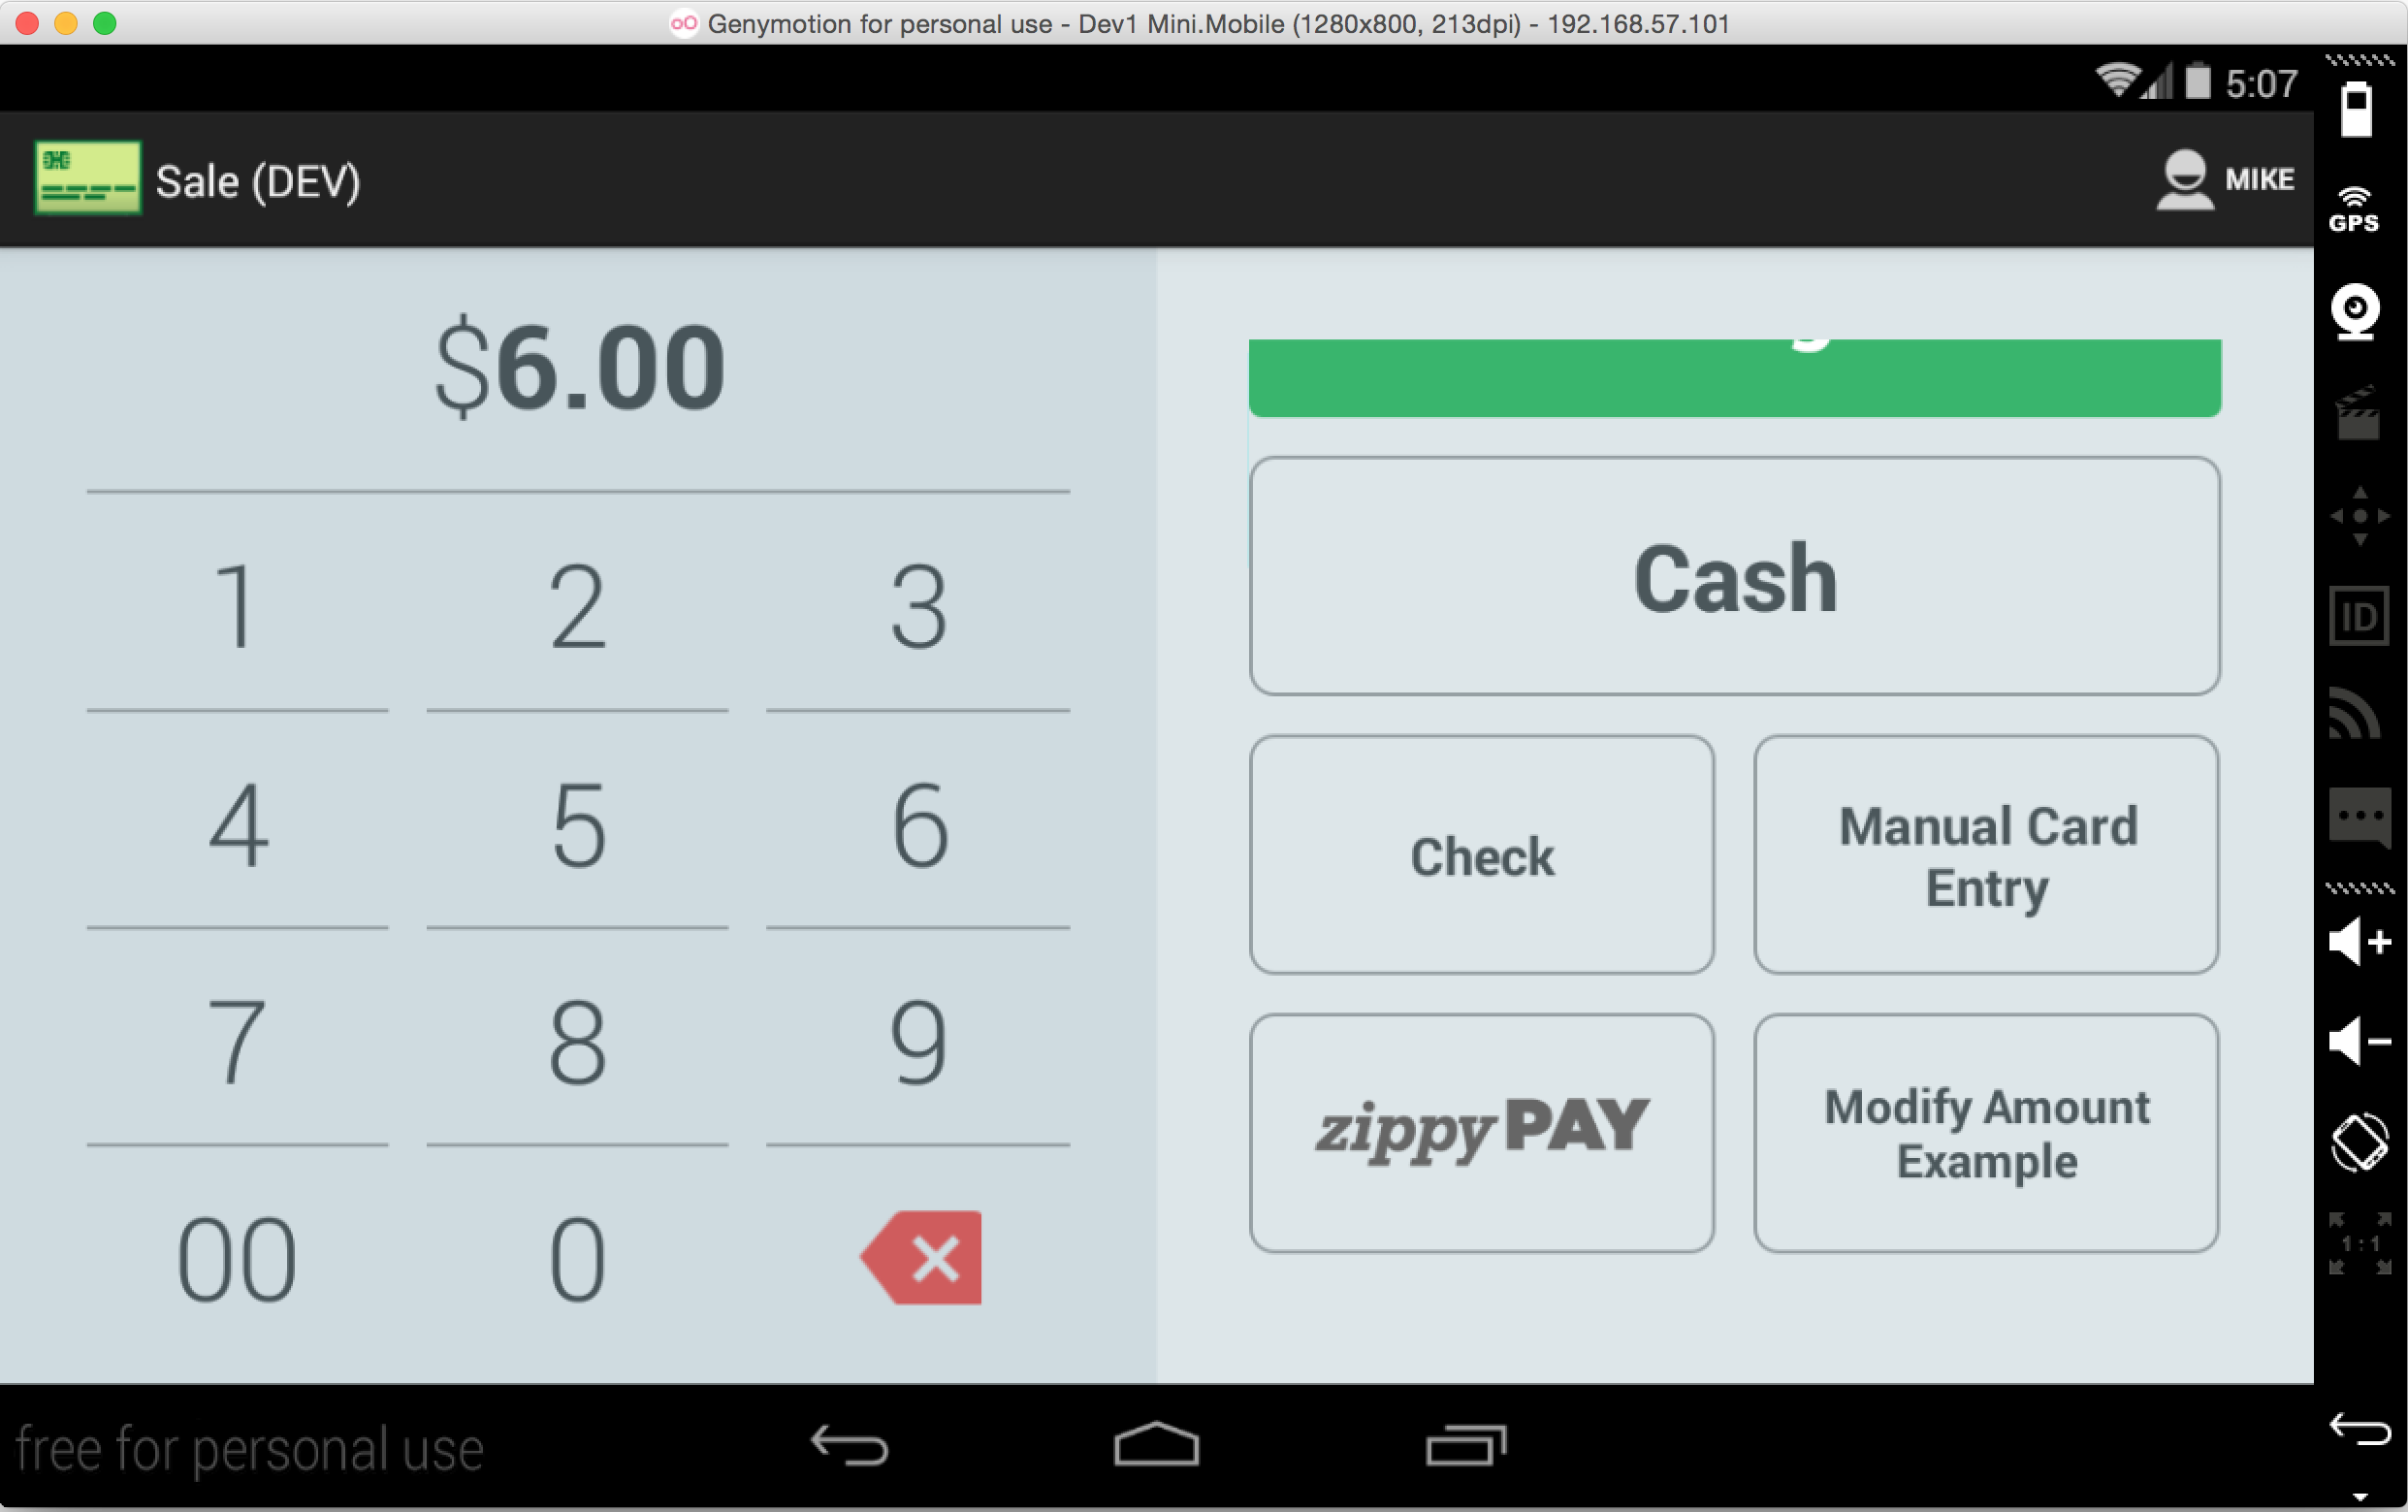
Custom Tender: Merchant-facing button in the Sale app
Customer-facing setup
Example to set up an activity for a customer-facing custom tender. Customer-facing user experiences must always be full-screen to prevent the customer from navigating away from your app.
public class CustomerFacingTenderActivity extends Activity {

    @Override
    protected void onCreate(Bundle savedInstanceState) {
        super.onCreate(savedInstanceState);

        setContentView(R.layout.activity_tender);

        setResult(RESULT_CANCELED);

        // Necessary for Customer Facing user experiences
        setSystemUiVisibility();

        /**
         * @see Intents.ACTION_CUSTOMER_TENDER
         */
        final long amount = getIntent().getLongExtra(Intents.EXTRA_AMOUNT, 0);
        final Currency currency = (Currency) getIntent().getSerializableExtra(Intents.EXTRA_CURRENCY);
        final long taxAmount = getIntent().getLongExtra(Intents.EXTRA_TAX_AMOUNT, 0);
        final ArrayList taxableAmounts = getIntent().getParcelableArrayListExtra(Intents.EXTRA_TAXABLE_AMOUNTS);
        final ServiceChargeAmount serviceCharge = getIntent().getParcelableExtra(Intents.EXTRA_SERVICE_CHARGE_AMOUNT);

        final String orderId = getIntent().getStringExtra(Intents.EXTRA_ORDER_ID);
        final String employeeId = getIntent().getStringExtra(Intents.EXTRA_EMPLOYEE_ID);
        final String merchantId = getIntent().getStringExtra(Intents.EXTRA_MERCHANT_ID);

        final Tender tender = getIntent().getParcelableExtra(Intents.EXTRA_TENDER);

        // Customer Facing specific fields
        final long tipAmount = getIntent().getLongExtra(Intents.EXTRA_TIP_AMOUNT, 0);

        setupViews(amount, currency, orderId, merchantId);
    }

    public void setSystemUiVisibility() {
        getWindow().getDecorView().setSystemUiVisibility(
                View.SYSTEM_UI_FLAG_LAYOUT_STABLE
                        | View.SYSTEM_UI_FLAG_LAYOUT_HIDE_NAVIGATION
                        | View.SYSTEM_UI_FLAG_LAYOUT_FULLSCREEN
                        | View.SYSTEM_UI_FLAG_HIDE_NAVIGATION
                        | View.SYSTEM_UI_FLAG_LOW_PROFILE
                        | View.SYSTEM_UI_FLAG_FULLSCREEN
                        | View.SYSTEM_UI_FLAG_IMMERSIVE_STICKY);
    }

    public void setupViews(final long amount, Currency currency, String orderId, String merchantId) {
        TextView amountText = (TextView) findViewById(R.id.text_amount);
        amountText.setText(Utils.longToAmountString(currency, amount));

        TextView orderIdText = (TextView) findViewById(R.id.text_orderid);
        orderIdText.setText(orderId);
        TextView merchantIdText = (TextView) findViewById(R.id.text_merchantid);
        merchantIdText.setText(merchantId);

        Button approveButton = (Button) findViewById(R.id.acceptButton);
        approveButton.setOnClickListener(new View.OnClickListener() {
            @Override
            public void onClick(View v) {
                Intent data = new Intent();
                data.putExtra(Intents.EXTRA_AMOUNT, amount);
                data.putExtra(Intents.EXTRA_CLIENT_ID, Utils.nextRandomId());
                data.putExtra(Intents.EXTRA_NOTE, "Transaction Id: " + Utils.nextRandomId());

                setResult(RESULT_OK, data);
                finish();
            }
        });

        Button declineButton = (Button) findViewById(R.id.declineButton);
        declineButton.setOnClickListener(new View.OnClickListener() {
            @Override
            public void onClick(View v) {
                Intent data = new Intent();
                data.putExtra(Intents.EXTRA_DECLINE_REASON, "You pressed the decline button");

                setResult(RESULT_CANCELED, data);
                finish();
            }
        });
    }
}
- Add the required flags:
View.SYSTEM_UI_FLAG_LAYOUT_STABLEView.SYSTEM_UI_FLAG_LAYOUT_HIDE_NAVIGATIONView.SYSTEM_UI_FLAG_LAYOUT_FULLSCREENView.SYSTEM_UI_FLAG_HIDE_NAVIGATIONView.SYSTEM_UI_FLAG_LOW_PROFILEView.SYSTEM_UI_FLAG_FULLSCREENView.SYSTEM_UI_FLAG_IMMERSIVE_STICKY
- Declare a CUSTOMER_TENDER intent-filter in the
AndroidManifest.xmlfile in order for Android to resolve any intents to your activity. - Set
exportedtotrue.
<activity
    android:name=".CustomerFacingTenderActivity"
    android:exported="true"
    android:label="@string/title_activity_test_tender"
    android:theme="@android:style/Theme.Holo.Light.NoActionBar.Fullscreen">

    <meta-data
        android:name="clover.intent.meta.CUSTOMER_TENDER_IMAGE"
        android:resource="@mipmap/thirdparty_white_example" />

    <intent-filter>
        <action android:name="clover.intent.action.CUSTOMER_TENDER" />
        <category android:name="android.intent.category.DEFAULT" />
    </intent-filter>
</activity>
- Optional. To use a logo instead of the name of your custom tender, declare
CUSTOMER_TENDER_IMAGEmetadata for the same activity the intent filter was declared for and reference your logo asset. It must be solid white (#FFFFFF) in accordance with the design requirements. - Required. Apply a full-screen Android theme (
Theme.Holo.Light.NoActionBar.Fullscreenin this example) to a customer-facing experience so that the user interface appears smoothly before the system callsonCreate(Bundle savedInstanceState).

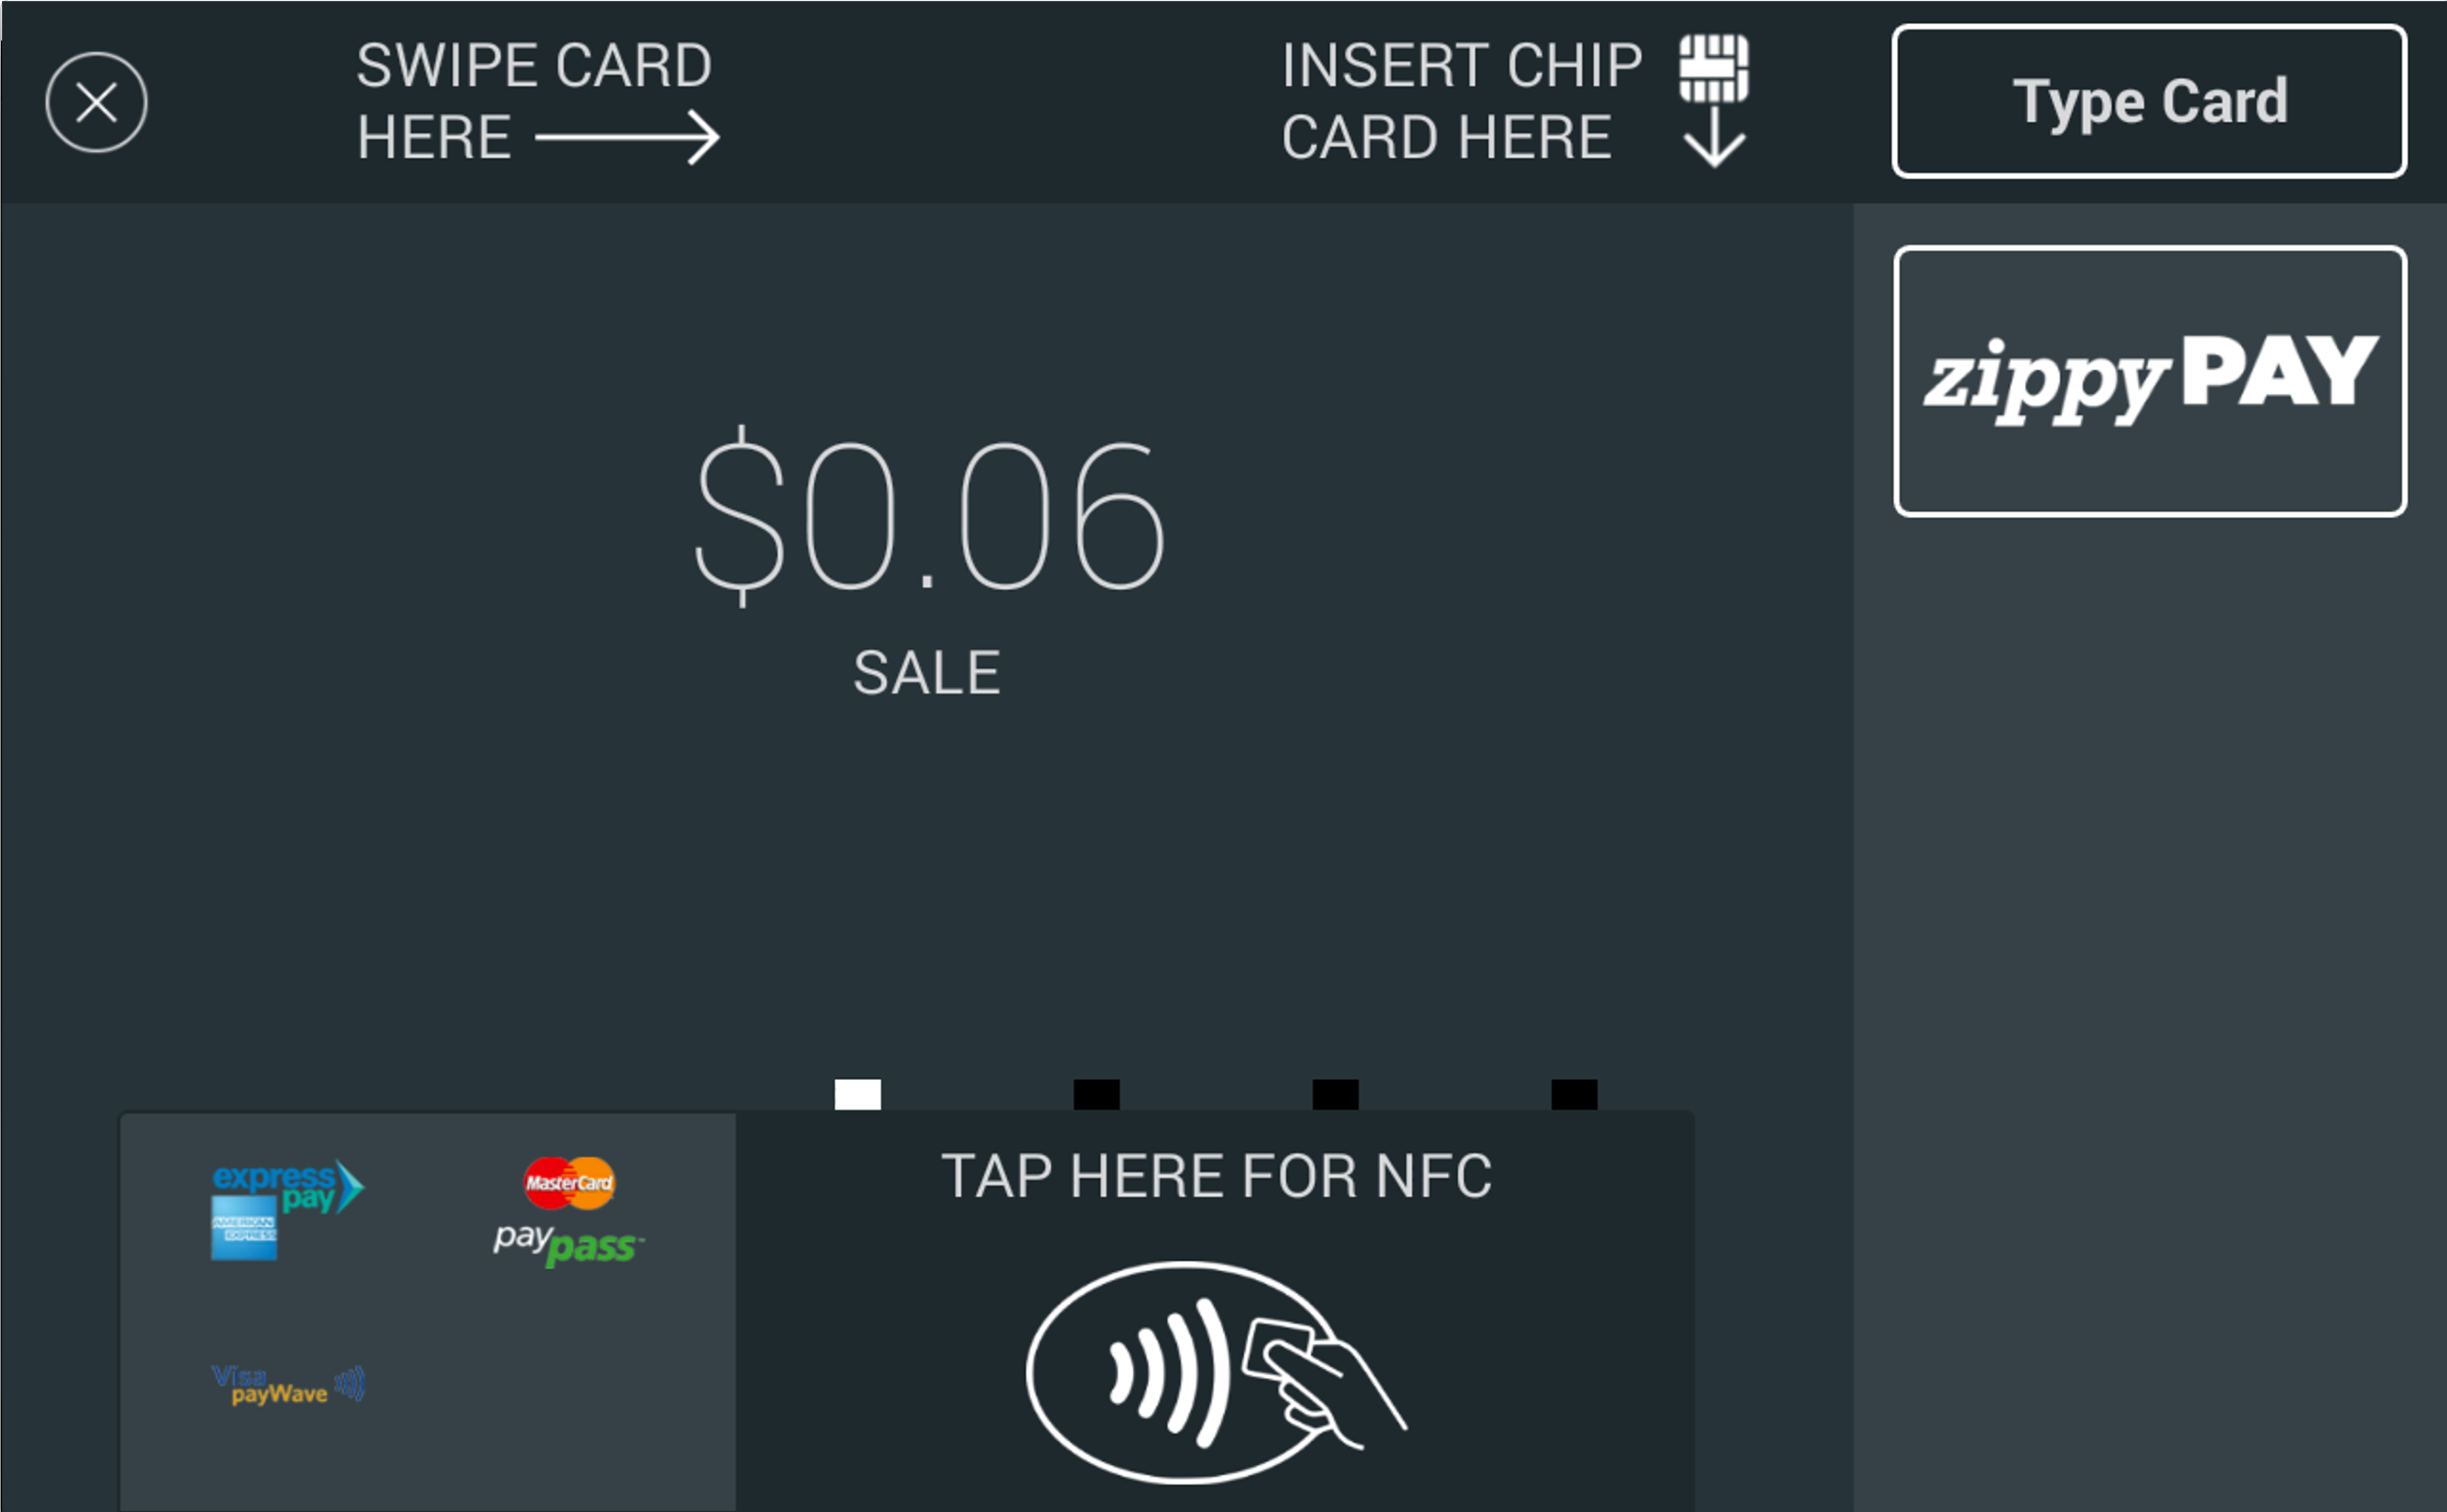
Custom Tender: Customer Facing button in Secure Payments
Partial payment with custom tender
A merchant can initiate partial payments using a custom tender, depending on their Clover hardware and plan setup:
- Partial payments allowed—Merchants using Clover hardware, such as a Station device with the Register and Register Lite plan that includes the Register or Payments app, can accept partial payments using a custom tender.
- Partial payments not allowed—Merchants on a Payments Plus plan, such as those using a Clover Mini that includes the Sales app, can only process full payments using a custom tender.
Handle refunds on partial payments
You need to account for all refunds on partial payments made by custom tenders. Note that the merchant can issue a LineItem-level refund using Custom tenders.
- Make sure your custom tender's Refund Activity can handle refund intents:
<intent-filter>
<action android:name="clover.intent.action.REFUND" />
<category android:name="android.intent.category.DEFAULT" />
- From your Refund Activity, capture some Extras from the Refund Intent:
getIntent().getLongExtra(Intents.EXTRA_AMOUNT, 0);
final String orderId = getIntent().getStringExtra(Intents.EXTRA_ORDER_ID);
final String paymentId = getIntent().getStringExtra(Intents.EXTRA_PAYMENT_ID);
final ArrayList lineItemIds = getIntent().getStringArrayListExtra(Intents.EXTRA_LINE_ITEM_IDS);
- If the Refund POSTs successfully on your end, tell Clover everything went as planned:
Intent data = new Intent();
data.putExtra(Intents.EXTRA_ORDER_ID, orderId);
data.putExtra(Intents.EXTRA_PAYMENT_ID, paymentId);
data.putExtra(Intents.EXTRA_LINE_ITEM_IDS, lineItemIds);
data.putExtra(Intents.EXTRA_AMOUNT, amount);
data.putExtra(Intents.EXTRA_CLIENT_ID, "Your_external_payment_ID");
setResult(RESULT_OK, data);
finish();Else:
setResult(RESULT_CANCELED, data);
finish();
IMPORTANT
When a
lineItem-level, custom tender Refund Intent is used, theEXTRA_AMOUNTis the sum of thelineItems.amountsthat were selected. As such, theEXTRA_AMOUNTcan be greater than the amount that was paid using the custom tender.For orders on which the refund
EXTRA_AMOUNTis less than or equal to the custom tender payment, the flow works as intended but you need to add logic to verify this.To handle refund cases where the custom tender was applied as a partial payment, pass the appropriate
EXTRA_AMOUNTback to Clover before callingfinish().
Related topics
Updated 11 months ago
