Create new app
On the Global Developer Dashboard, you can access both the sandbox and production environments. Use the Clover sandbox environment to build and test your apps for Clover merchants. When you are ready to launch your private app or publish your public app in the Clover App Market get your production developer account and associated app approved.
Gen 1 devices, including Clover Station (C010), Mobile (C020/C021), Mini (C030/C031), and Flex (C041/C042), are approaching End-of-App-Update (EOAU) on May 15, 2026.
Action required: Review your apps for device compatibility before the deadline, and plan device upgrades.
Learn more: Device lifecycle and support.
1. Start initial app setup
- Log in to the Global Developer Dashboard.
- Click the Sandbox toggle icon to go to either the sandbox or the production environment.
- Click Create new app. The Create App window appears.
- Complete the three-step process as follows:
Step 1: Name and country
- In the App Name field, enter a name for your app.
- Select one or more countries where you want to make your app available for Clover merchants.
- Review the Supported Languages section and select the checkboxes for supporting languages, if available.
- In the Select default locale section, select the default language for your app.
Note: If only one country is selected, then the country's supported language and default locale are automatically selected, and you cannot change them. - Click Next.
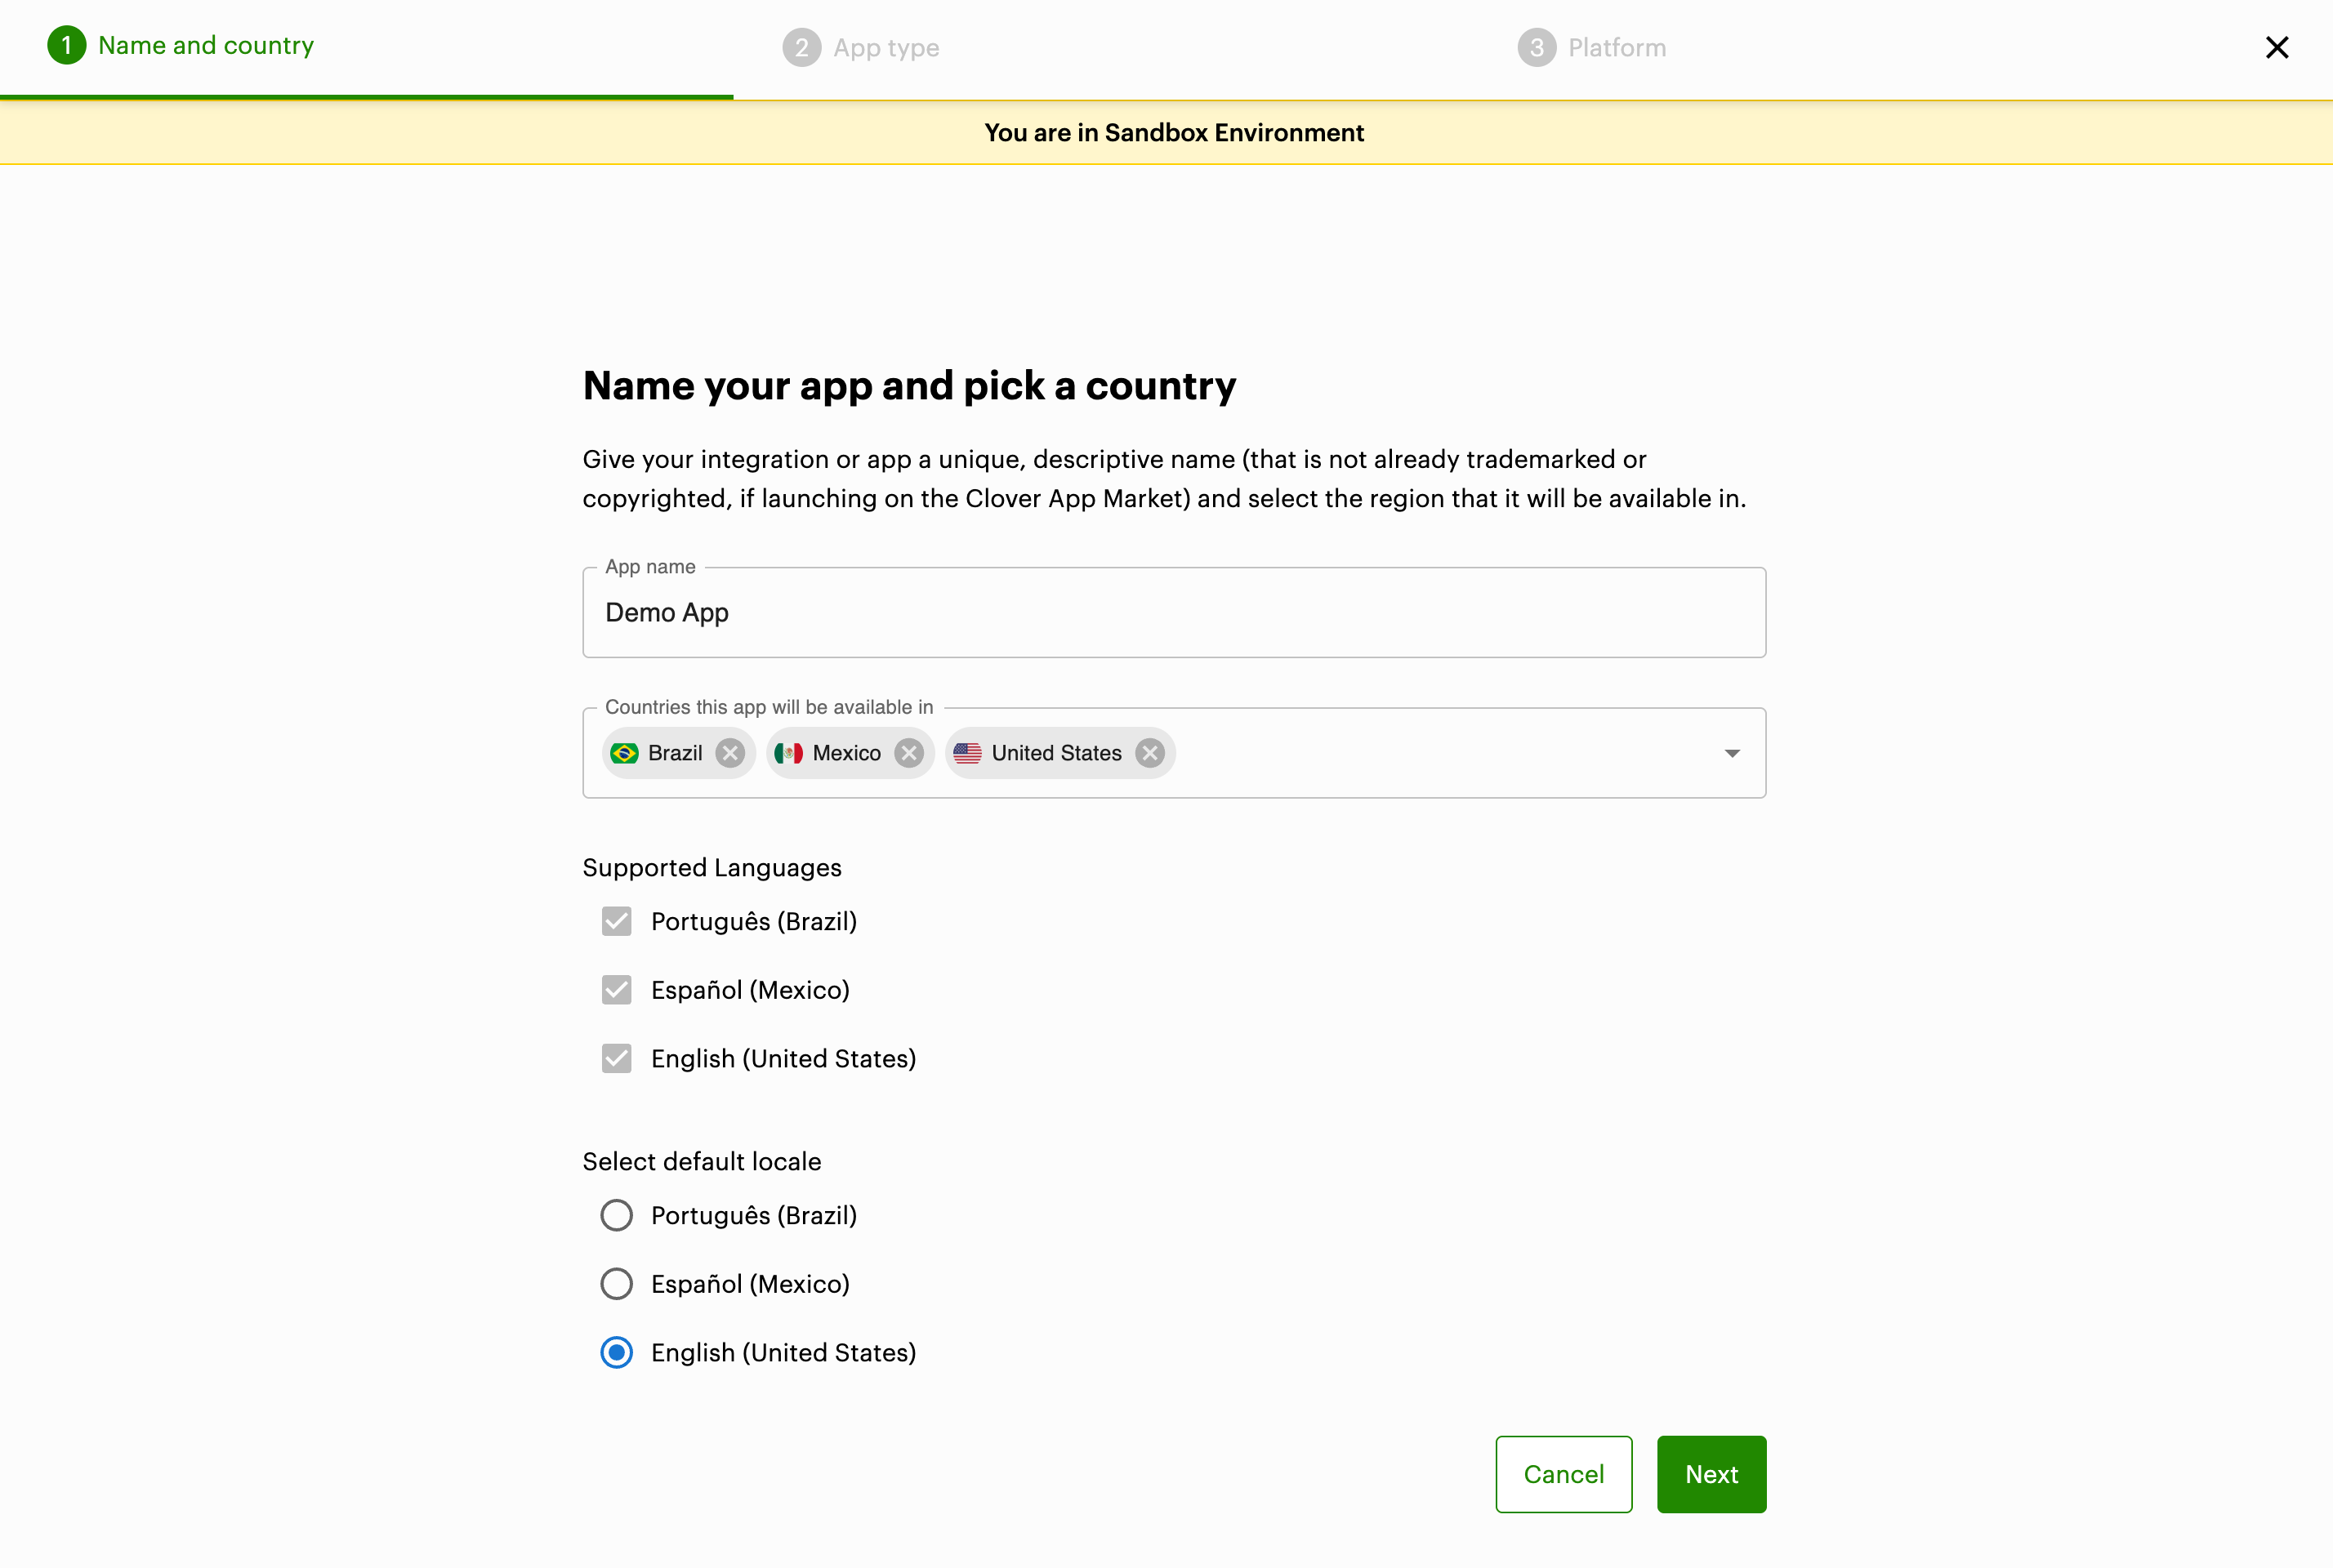
Global Developer Dashboard: Step 1 to create an app
Step 2: App type
- Select the type of app:
- App market app—Public apps that Clover merchants can access through the Clover App Market. This option is available only in the production environment.
- Payment app —App that uses Clover for payment transactions.
- Private app—App that is customized for specific business needs and not published in the Clover App Market.
- Click Next.
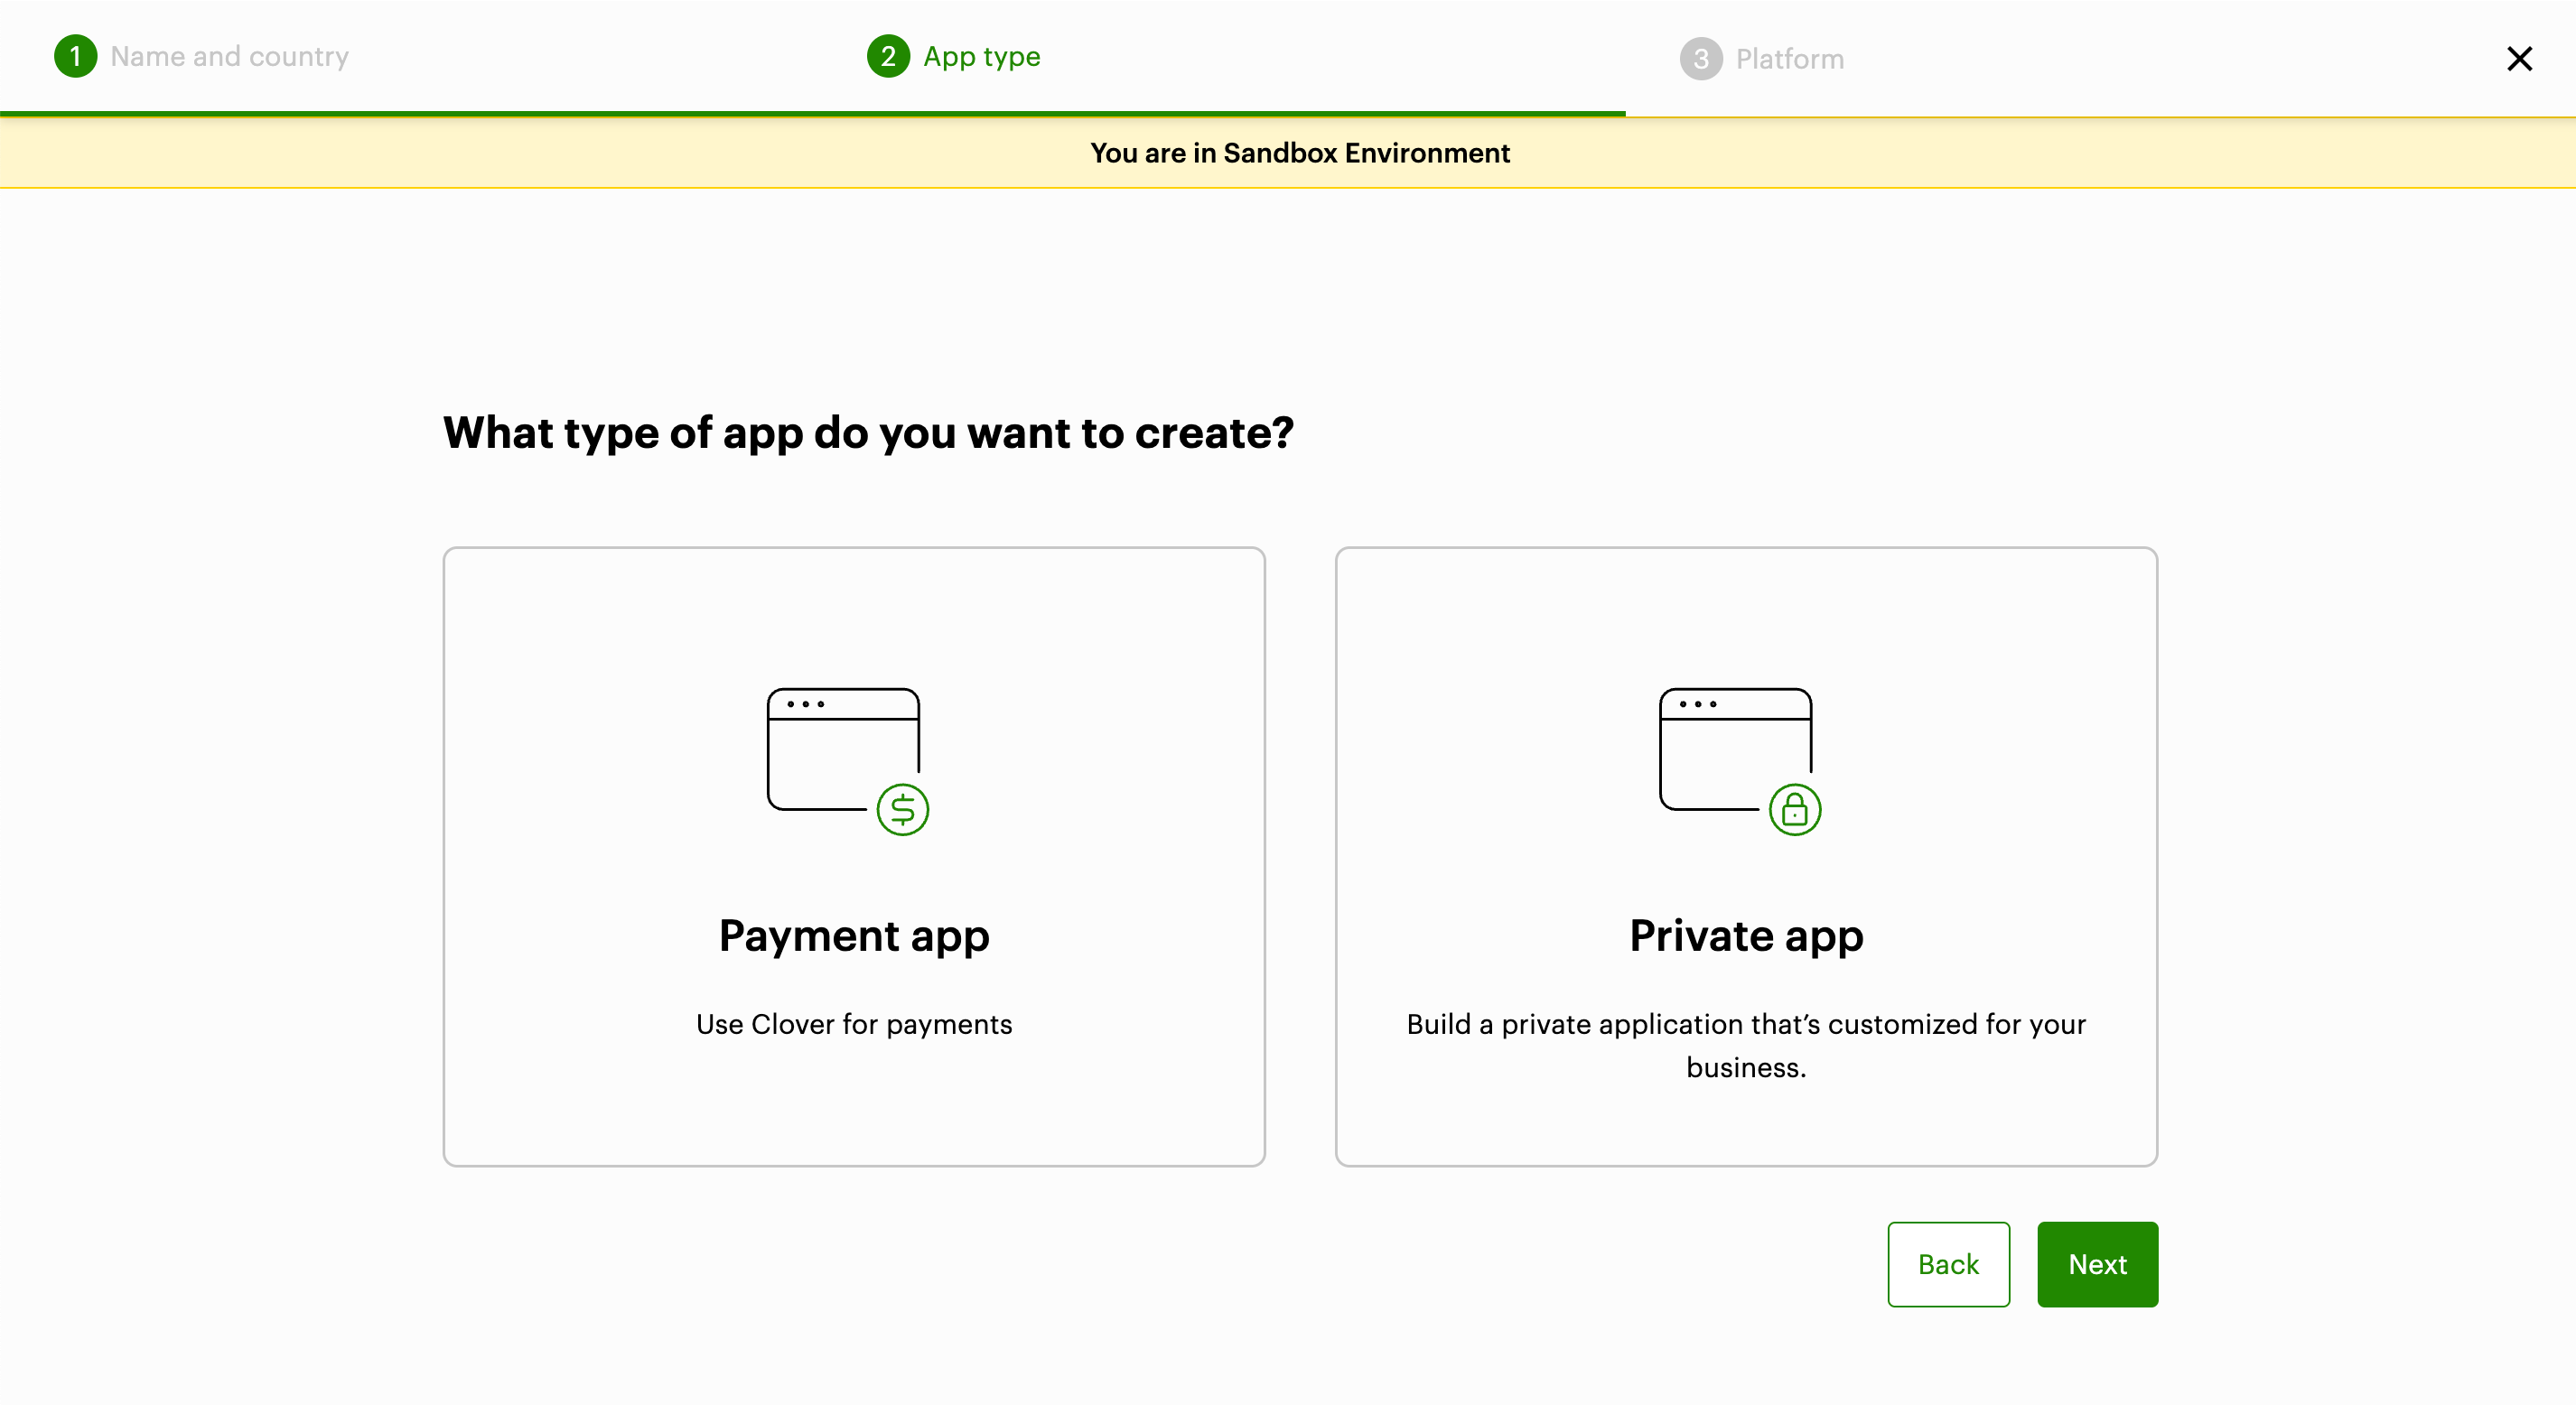
Global Developer Dashboard: Step 2 to create an app
Step 3: Platform
- Select the devices to determine your app type, such as Android app or Web app. You can select multiple options for your app.
- Click Create app. The App name - App Settings page displays fields based on the app type and platform you selected. You can continue adding new app information.

Global Developer Dashboard: Step 3 to create an app
2. Complete new app information
On the App name - App Settings page, you can add and manage settings for your app, along with other relevant information.
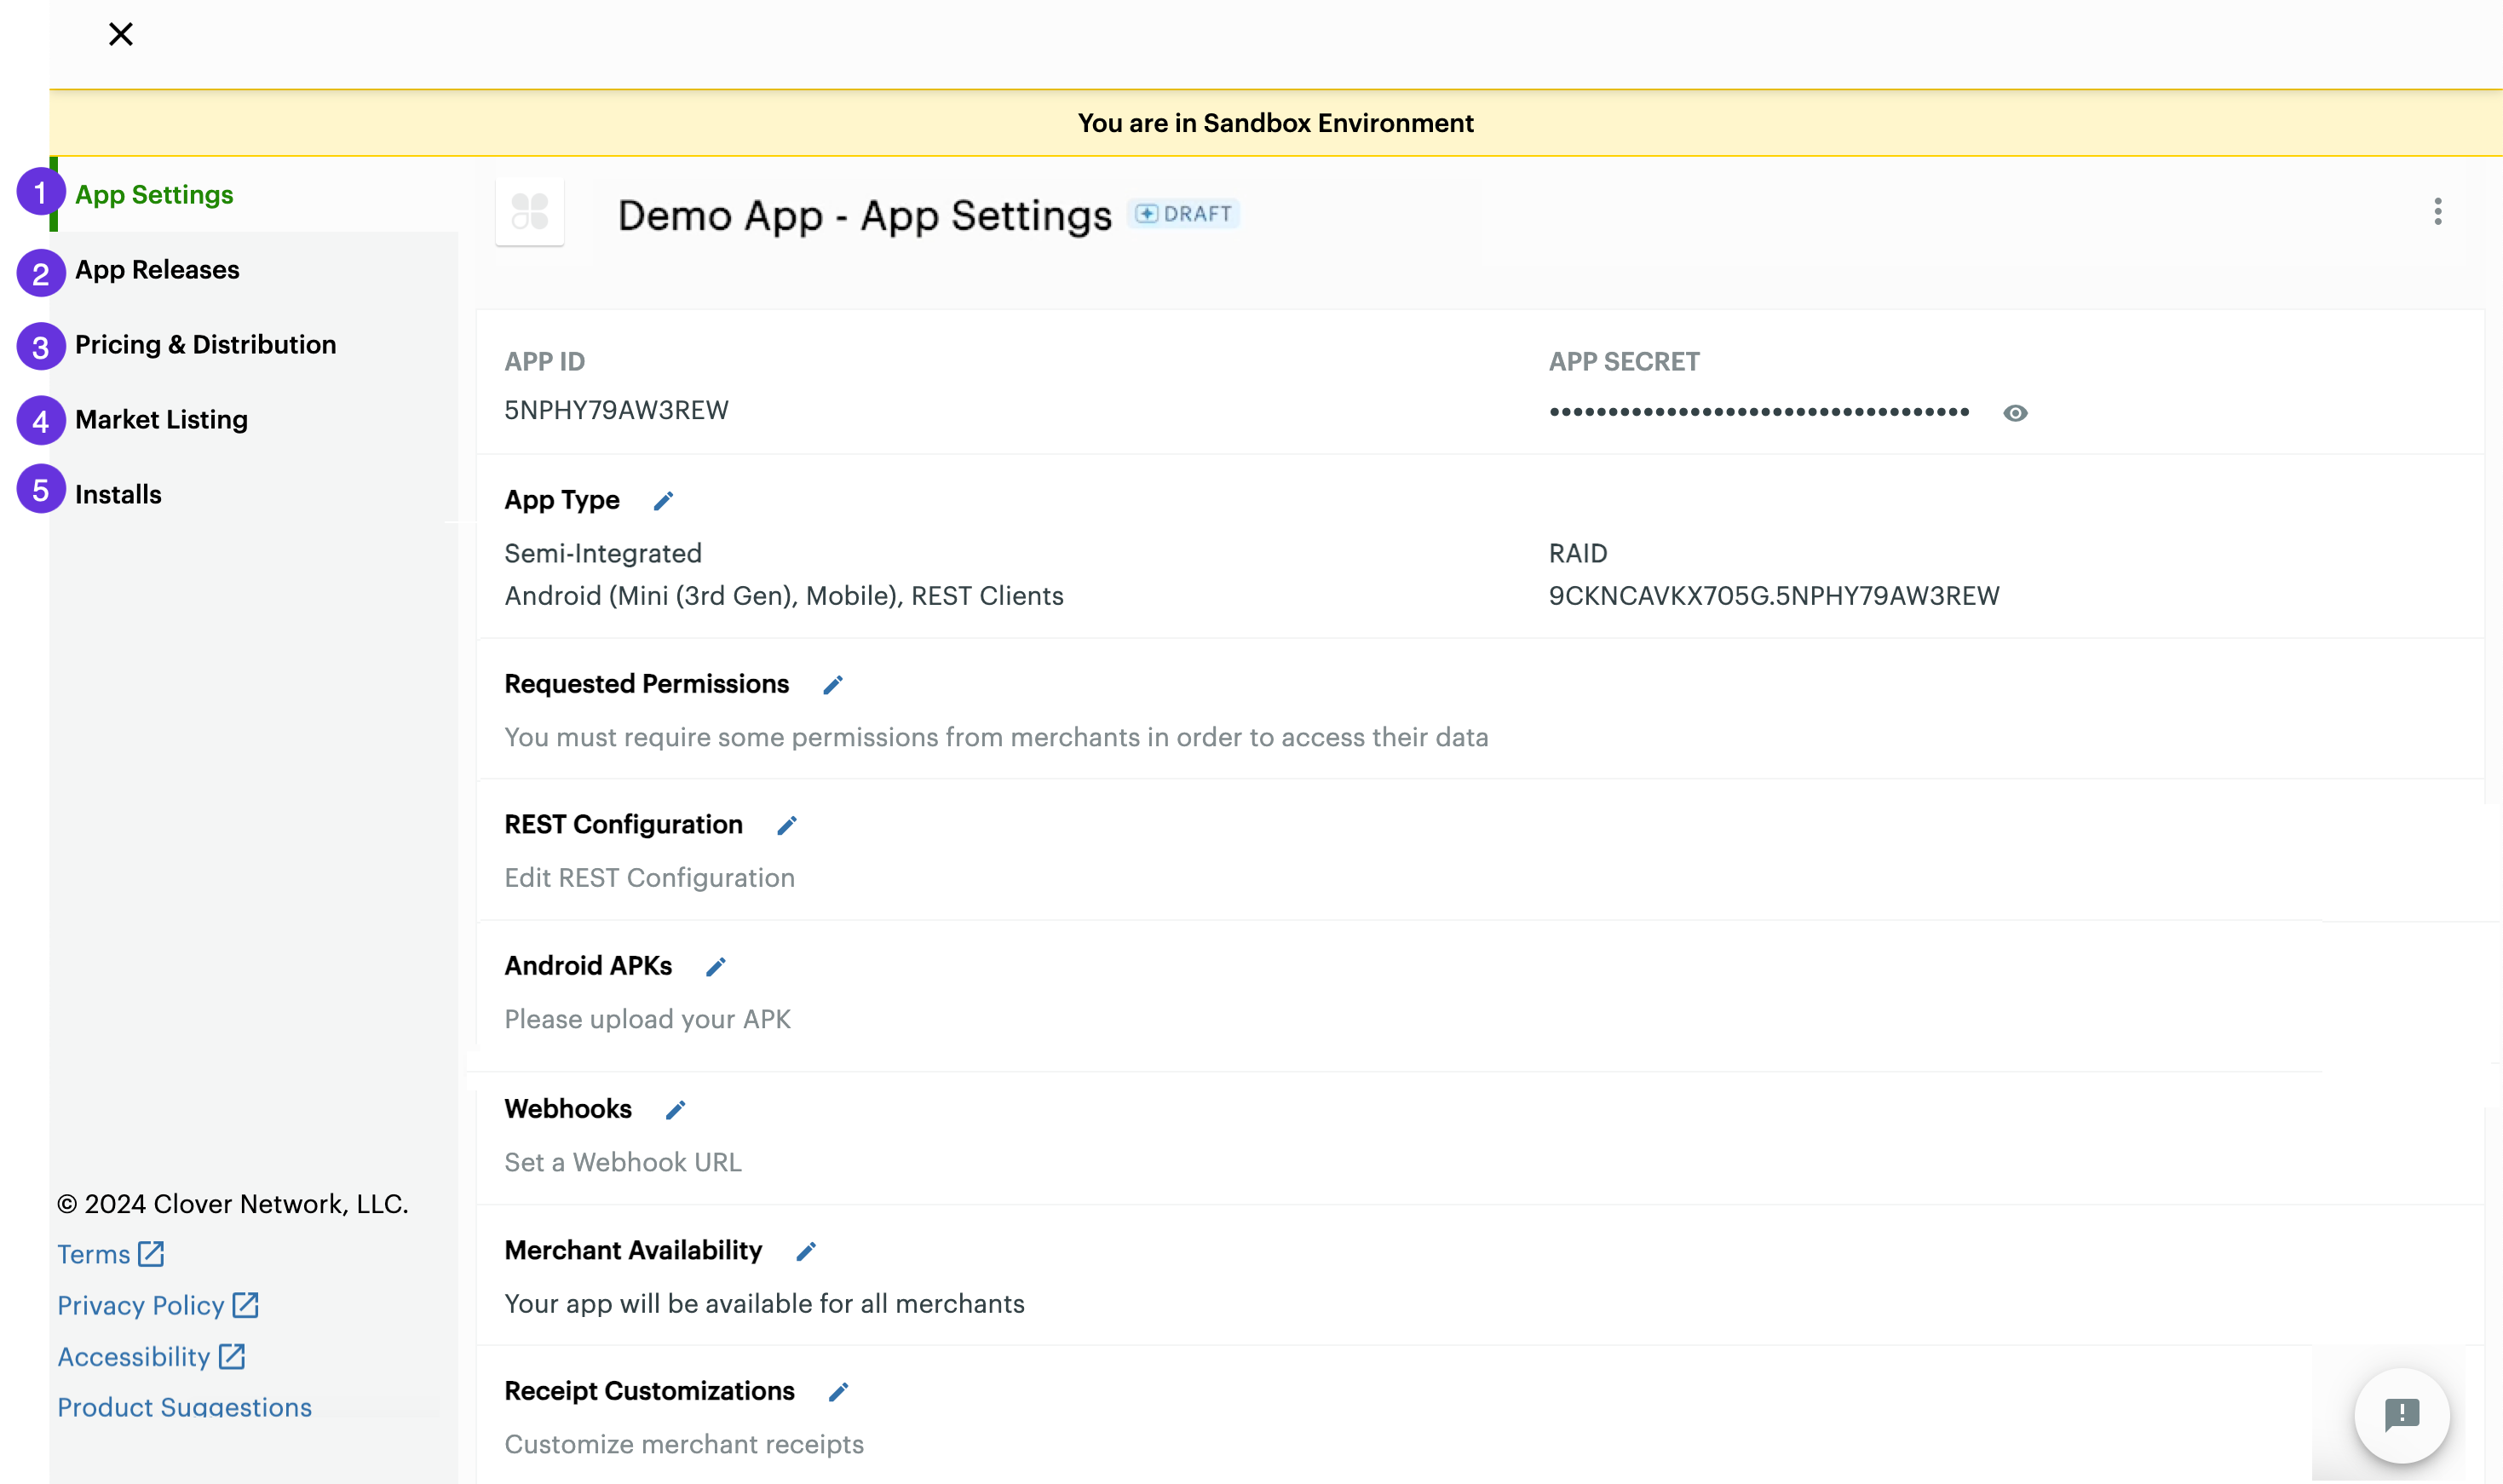
Create new app—App Settings page
- Complete information in each of the sections as follows:
| S.No. | Section | Description |
|---|---|---|
| App Settings | When you create a new app, Clover automatically sets a unique App ID and App Secret to identify your app in the Clover platform. You need these values to make authorized and authenticated requests to Clover merchant data. In the App Settings page, fields appear based on the app type and platform you selected during the initial setup. For example, for a semi-integration app, the RAID field displays the remote application identifier. You can complete the following settings on the page: - Requested Permissions: Select the permissions for customers, employees, merchants, inventory, orders, payments, and eCommerce integrations. Your app requires these permissions to make REST API calls, for example, Read permissions for GET requests and Write permissions for POST/PUT/DELETE requests. You can also select the Enable online payments checkbox for Ecommerce and then select the Ecommerce Settings. | |
| App Releases | Upload and manage APK versions for your Android apps. | |
| Pricing & Distribution | Set up pricing tiers for your apps. You can then use the REST API endpoint or the Android AppsConnector method to send metered events to Clover. You need to submit your banking information to start adding paid subscription tiers and metered pricing for your approved app. | |
| Market Listing | Enter market listing information that displays with your published app on the Clover App Market. | |
| Installs | View the metrics for billable merchants who have installed or uninstalled your app. The metrics are available for published apps in the Clover App Market with more than 100 installs. This information helps gain deeper insights into your app's adoption by merchants. |
-
Click the Close X icon at the top left of any page to return to the Global Developer Dashboard. The app name displays on the Global Developer Dashboard in the My Apps section.
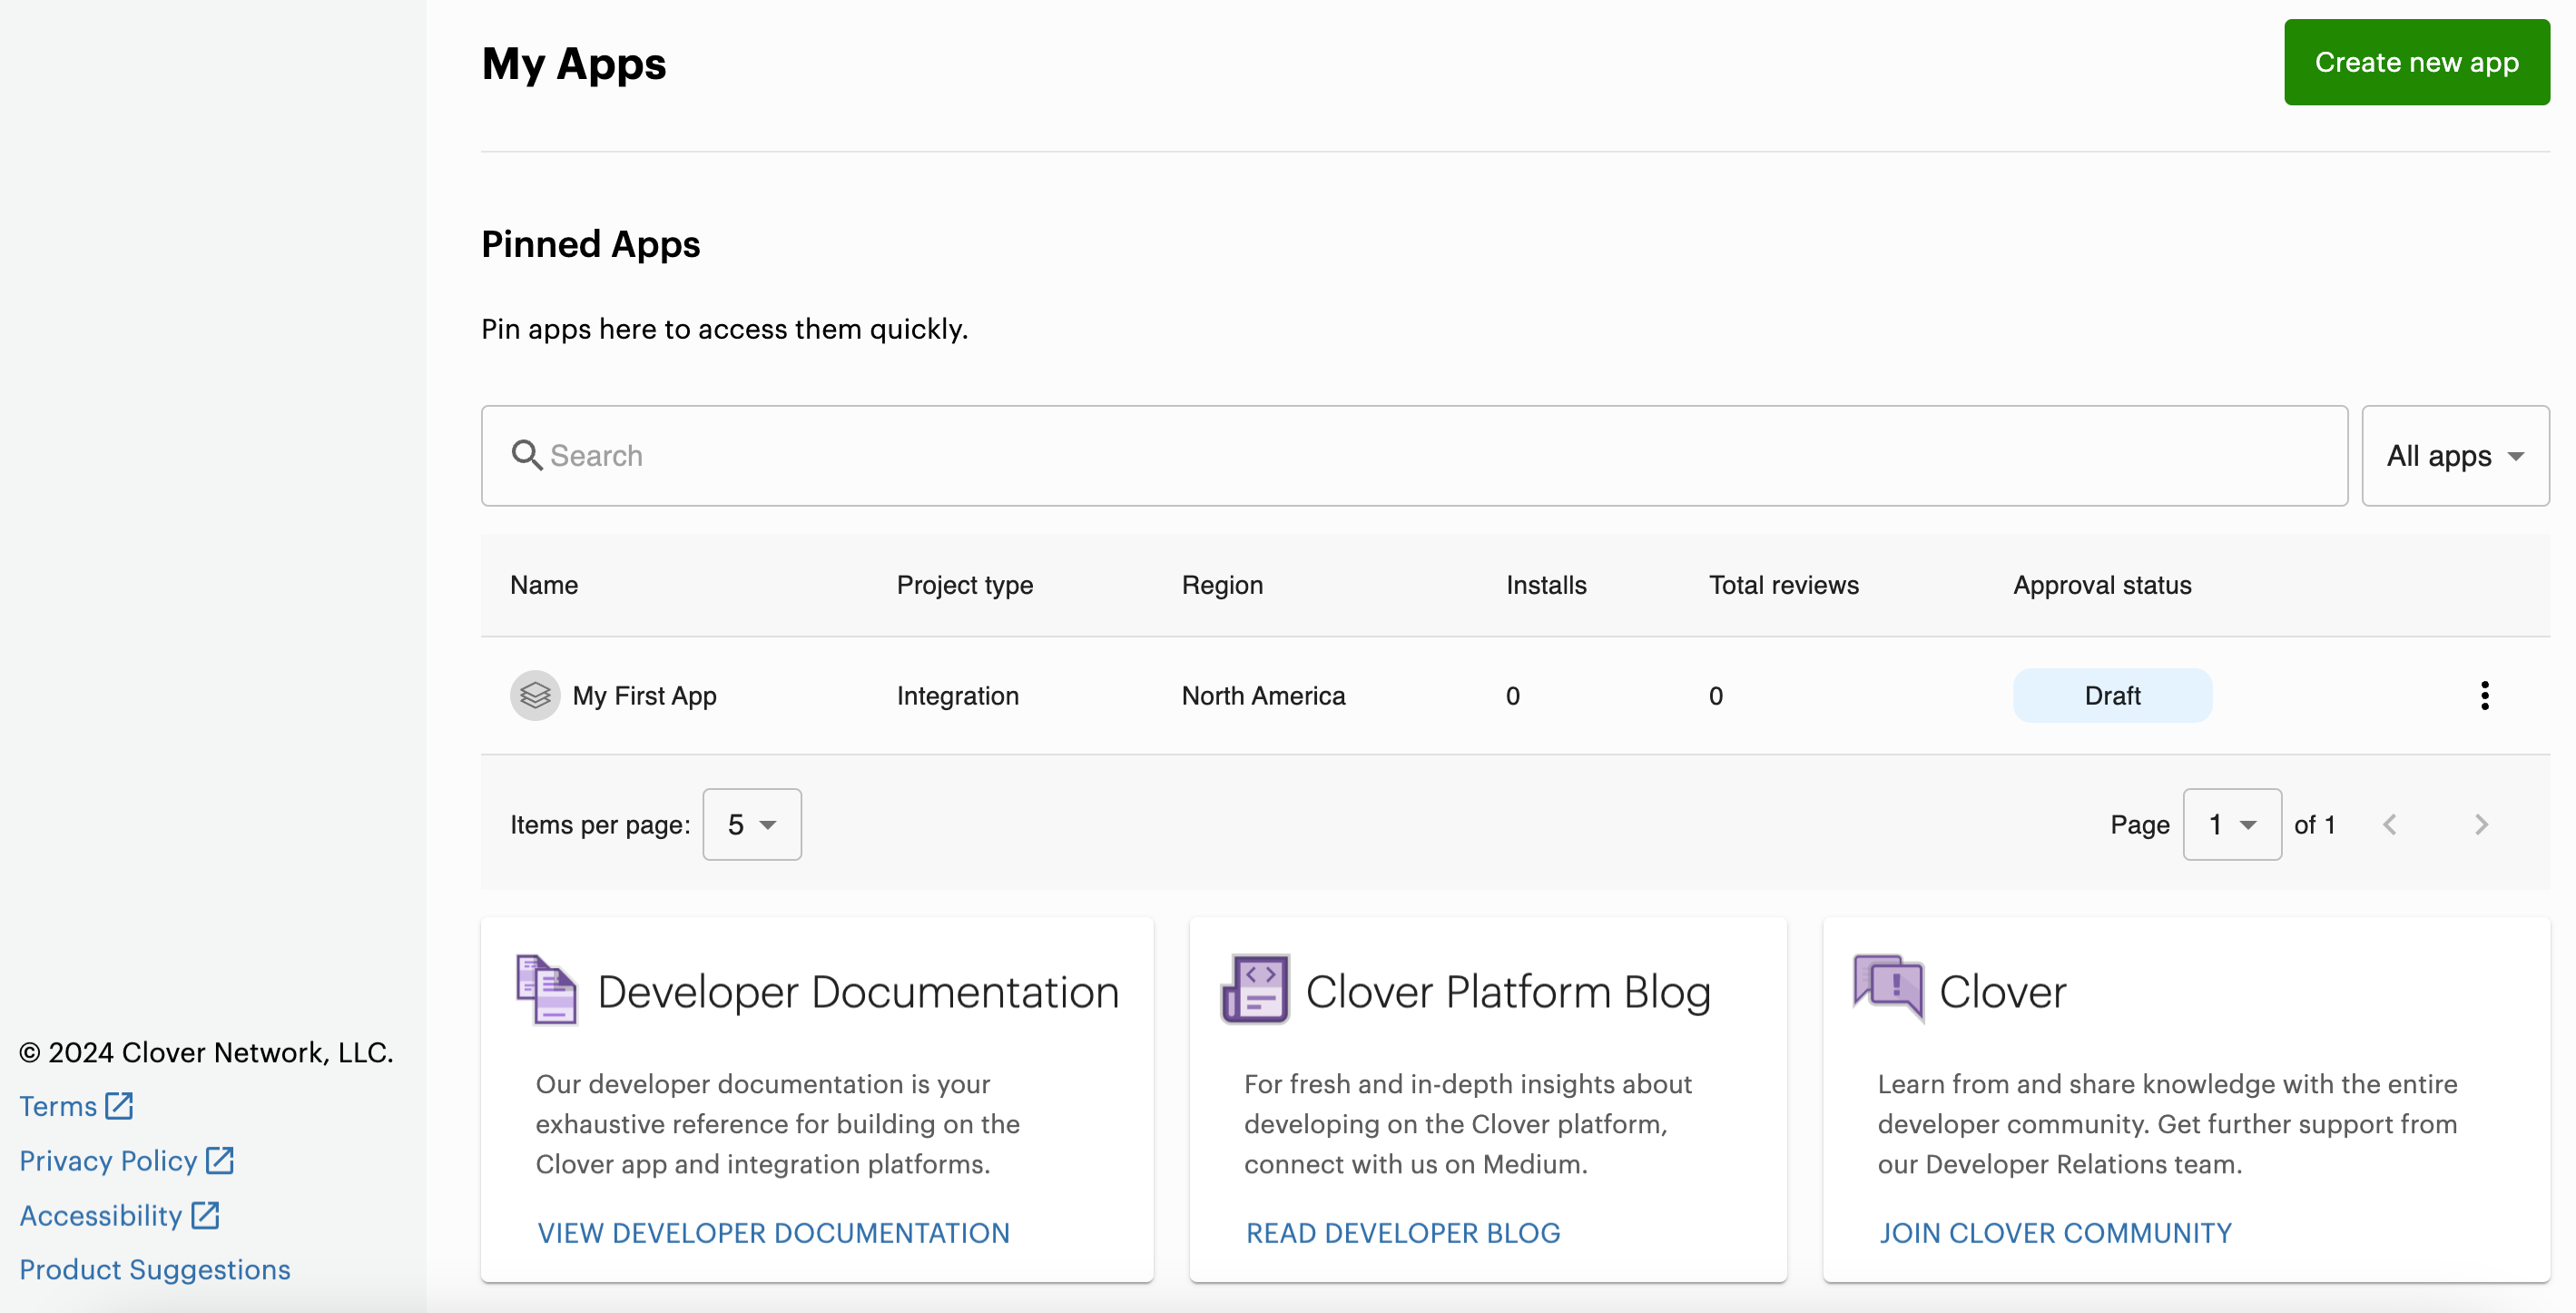
Global Developer Dashboard—Pinned Apps
You can test your app and app integrations using the test merchant accounts.
Updated 4 months ago